Monday, November 2, 2015

A Winter Trifle

I love quick projects.  No project fits the bill better than millinery.  Decorating hats is probably my favorite of short term projects!  I have a particular weakness for the little Bergere hats of the 18th century.  Bergere hats are brimmed hats with an almost flat crown.  Women of all classes wore these little hats as sun hats.  I've made a few of these which were lined with pleated silk and decorated to different degrees from fairly simple to fairly ornate with large feathers.  The one pictured below is probably the most traditional treatment of these little hats:  a simple straw hat base with some ruched ribbon around the crown, a bow and a tie that is tied behind the head.

Some were covered with fabric or lace.

This beautiful example from the Victoria and Albert Museum in London is heavily embroidered on straw.

And this stunning example from the Colonial Williamsburg collection is embroidered silk.

So far, I've only found these hats in straw so I was delighted when browsing Jas. Townsend to find a Bergere hat made out of wool felt.  The wheels in my head started turning to design a winter version of my favorite hat.  I decided that it should have a more tailored feel to it as I don't see wool felt as being something that should have lace and frills.  I also decided that any feathers needed to be removable so that the hat could be worn in inclement weather.  So I gathered my supplies and went to work.

What you see is the hat blank, various sizes of Ostrich feathers, a hat pad made of pheasant feathers, a 10 yard spool of black silk ribbon 1 1/2 inches wide, a marking pencil and my ribbon trim book.

I decided to do a shell ruched ribbon trim around the brim with some sort of cockade or rosette in which to stick the feathers.  The ribbon trim would be like the one I used on my Regency ball gown which is my absolute favorite ribbon trim.

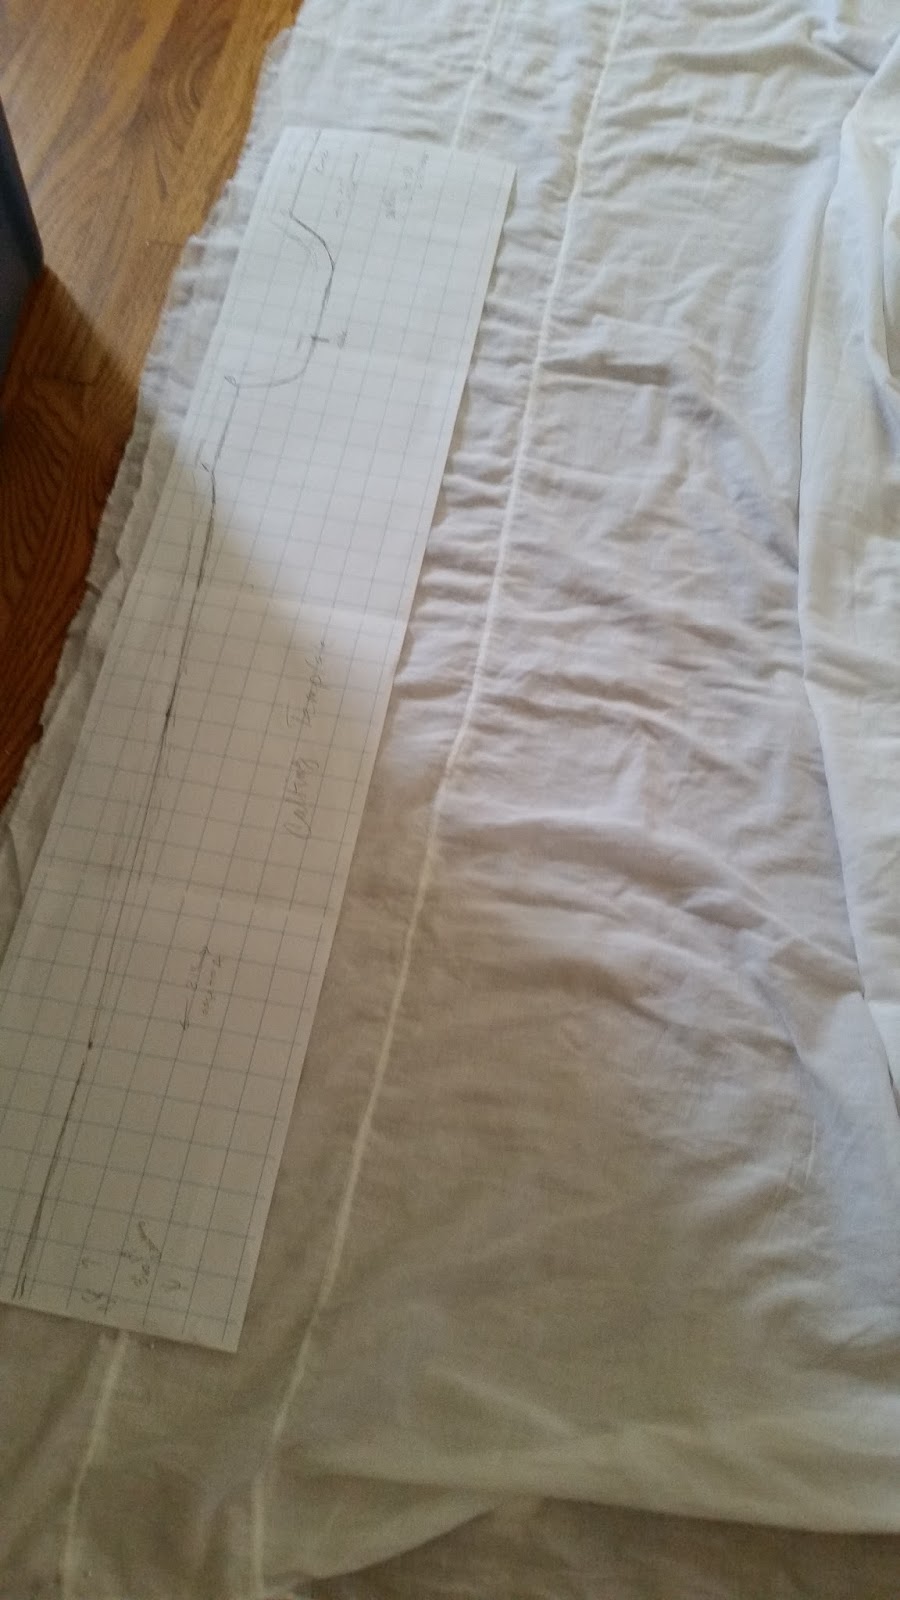
This trim is quite simple to do though it is somewhat labor intensive.  Basically you will be stitching a lot of zig zags.  The directions I've seen say to use ribbon twice the length of the finished trim.  I've found this not to be enough when working with silk ribbon as it is thinner than the synthetics and the gathers draw up tighter.  To know how large to make your zig zags, you will double the width of your ribbon.  My ribbon is 1 1/2 inches wide so I need to make marks 3 inches apart along one edge of my ribbon.  On the opposite edge, I need to find the point midway between the first set of marks and make a second set, also 3 inches apart.  I started the first set of marks about 1 inch from the edge.  I marked a length about twice that of my finished measurement to start, knowing that I would have to add more marks as I went along.

Then you will stitch running stitches from one edge to the other creating the zig zags.  While this can be done by machine, I find it more reliable to do this by hand with a doubled length of silk thread.  There is nothing more frustrating to be pulling up gathers and have them break.

Now the fun begins.  Start pulling up the gathers however tightly you like.  Check to see how this fits on your hat and mark more of the ribbon if more length is needed.

Once your ribbon is gathered, pin it to the hat.  Tack it on firmly using a running stitch along the center gathers.

I decided to make a rosette using the same trim.  I marked a couple of feet of ribbon and drew up the gathers to make a circle.  I stitched the gathers in place in the center.

I wanted to do a center piece and place a backing.  I decided to make a felt backing with a little pocket that I would be able to stick my feathers in.  So I cut a circle the desired size and made a wedge for the pocket.

The wedge was stitched on the circle then the backing was stitched on the rosette.

I wanted a large silk covered button for the center but I couldn't find any button forms large enough.  I found a 2 inch flat button so I cut a circle of silk a little over twice the diameter of the button and I added a little stuffing to give the button a softer look.  I gathered the circle, put the stuffing and button in the middle and stitched it to the center of the rosette.

Then I stitched the rosette on the hat, making sure that the pocket faced toward the back so any feathers would be laying in the right direction.

Voila!  Finito!  This hat will not have ties.  It will be held on with hat pins.  The pocket in the rosette gives me some options.

Here it is with just the pheasant feather pad:

Some added small ostrich feathers:

Some added large ostrich feathers:

And finally with just the large ostrich feathers only:

The feathers seem quite secure when stuck in the little pocket and I like that they can be easily removed for storage as I can keep it all in a fairly flat box!


Saturday, October 17, 2015

Fast forward 100 years . . .

Last you left me, I had written about my 1783 Chemise a la Reine.  My new project skips forward about 100 years.  I was asked to portray Ellen Hardin Walworth at our Maryland State DAR Founders Day Tea.  October 11 marked the 125th anniversary of the founding of the DAR and I was proud to be asked to play Mrs. Walworth who was a fascinating woman.  She lived from 1832 to 1915.  The DAR was founded in 1890.  I had these portraits to get an idea of how Mrs. Walworth might have dressed:

 The top portrait looks to be a natural form gown from about 1878 - 1882.  These gowns were called natural form gowns because they were not worn with bustles.  That period was followed by the bustle period.  The sleeves look to be of that period.  The second portrait looks to be possibly in the 1890's due to the big sleeves.  Really large sleeves were popular during that period.  The big leg of mutton sleeves were typical of that era.  Bustles were not worn during that period either.  I bought patterns from both of these eras and decided ultimately to go with the natural form one.  I greatly dislike those huge sleeves of the 1890s.  I like the shape of the natural form skirts better as well.  They are flat in the front and don't flare much.  There is a lot of fullness in the back.    I settled on Truly Victorian Patterns:  TV125 for the 1879 Petticoat, TV221 for the  1878Tie Back Underskirt, and TV420 for the 1878 Cuirass Bodice with evening options.  Research revealed that older women typically wore darker colors so I found a glorious Sienna silk taffeta at Renaissance fabrics.  It's one of those silks that changes colors in the light as the warp and weft are different colors.


 I made the petticoat first.  It was the most labor intensive of the three pieces.  I did not make the train.  This era is quite a departure from the 18th century and Regency garments I'm used to making.  The skirts of this era have all of their fullness in the back.  The back of the petticoat has an inner and outer back with tiered net ruffles between them--yards and yards and yards of net!  Fortunately I was able to get 10 yards of cotton netting on Ebay for a reasonable price.  The back of the outer back piece has a piece of cotton twill tape sewn on the inside about 8 inches above the ruffles with buttons sewn across.  This is where you would attach the train.  I added an extra ruffle figuring I can put the buttons on the lace trim if I ever want to make a train.

The petticoat closes in the center front with a hook and eye on the waistband.  It is made out of bleached muslin.  I used my ruffler attachment set to a 2:1 ratio to do the tiny pleats on the ruffles. There was just no way I was going to gather that much fabric. I concealed the raw edges of the top of the ruffles with cotton beading lace and blue ribbon.  Once that was completed I could work on fitting the other garments.

The skirt was very straight forward.  Just sew the front to the side fronts then the side backs and a large back piece.  There is an opening left between one side back and the back.  I chose to actually made a placket so my petticoat wouldn't show.  I pleated the back piece to fit the waistband then attached hooks and eyes.  There are ties attached to the inside seams where the side backs join the back.  These are tied pulling the front tighter and making the back fullness protrude more in the back, not allowing it to move around to the sides.


 The instructions for fitting the bodice were quite interesting.  You had to do several different calculations that you don't do with modern patterns.  However, upon making the muslin, it fit perfectly with a few alterations.  I refashioned the neckline so that it was a square in the front but with a high back--unlike the version on the pattern.  I also raised the neckline about 3/4 of an inch and it was still quite low.  I don't have proper Victorian underpinnings and a corset really is necessary to achieve the correct silhouette so I fitted the bodice using my modern waspie corset then I ordered one with a little more coverage and a larger hip spring.  Corsets of that time actually went halfway up the bust but I was able to achieve the right look using the modern corset.  I wore the outfit with American Duchess Tavistock button boots.  They really button with a button hook!

 I remembered that I had that little antique Victorian or Edwardian camisole.  It's a lovely little thing--completely hand made with the tiniest pintucks and feather stitching.  There are patches sewn on where the cami had worn.

The bodice went together without issue.  I did have to use plastic boning which I dislike as I didn't have any sprung steel bones in the correct lengths and time was of the essence.  Typically bodices were underlined (called flatlining) to give them more structure so I did this using unbleached muslin which allowed me to make my dart markings easily. Bodices were typically not lined.  Seams were just finished and typically a waist stay was stitched in.  Edges were faced with self fabric bias strips. Truly Victorian patterns have you make a bagged lining.  Given the ravely nature of the silk taffeta, I decided that I would go ahead and do a bagged lining using lightweight black silk.

I was able to find some nice wide vintage lace on Etsy in a sufficient quantity for this.  I have a huge lace stash but most of it is either narrow or Swiss embroidery, neither of which was the look I wanted.  I just hand whipped the lace in place making little pleats as I went along.

I went ahead and made machine buttonholes but at a later time, I'll go over them by hand.  I had gotten some 1890ish vegetable ivory buttons from someone in the Vintage Fabric Buy and Sell Facebook group which were the perfect shade.

I ended up with almost 4 yards of extra silk taffeta!  The yardage chart didn't list anything wider than 45 inches and my silk was 56 inches wide.  So I purchased an overskirt pattern to make up at a later date.  Ladies could change the look of their outfits by putting different overskirts on!

Our beautiful Maryland State Society DAR Chapter House where our Founders Day Tea was held was the perfect setting for a photo shoot.


Monday, September 21, 2015

Portrait of a Gown . . .


There's just something about the transition from structured Georgian gowns of the 1770's to the free flowing Regency styles of 1790 - 1820 as illustrated in these portraits that I simply love.  This gown is called the Chemise a la Reine--so named because it was a queen who first wore it and turned it into a fashion trend.  The top portrait of Marie Antoinette was done in 1783.  One can find other portraits of society maidens wearing similar dresses and hats throughout the 1780's.

The Chemise a la Reine is typically made of lightweight, almost sheer cotton muslin with a lot of gathers and no boning.  It is worn over several white petticoats as was the custom in the 18th century as it was also typically open in the front.  The gathers were controlled by a large colored sash tied in a large bow in the back.  These gowns could have straight or puffy sleeves.  Puffy sleeves were new on the fashion scene at the time.

All of the portraits I've found of ladies in their chemises, also highlight the newest hairstyle of the time:  the Hedgehog!  Unlike the highly structured big hair with pinned rolls and such, the hedgehog was just a headful of crazy curls, often kinky with some long sausage curls hanging down the back.  No need for pomatum to hold one's hair in place with this style.  It would have been curled using rags which would result in very tight, almost frizzy curls.

The hats were larger too.  The Georgian hats tended to be of the Bergere style with a fairly flat crown and some simple ruched ribbon trim--though feathers were often added.  The hats worn in the portraits above had large crowns, big ribbon trim and large plumes.

One can see how this whole look--  hair, hat, gown-- transitioned into the Regency styles represented in the Jane Austin era.

I decided it was time to reproduce this look.

I settled on the chemise diagram from the Norah Waugh Cut of Women's Clothes book.  It was a one page diagram on 1/8 inch grid graph paper.  The basic shape of the gown is simply a large rectangle of fabric with some shaping at the top, a shaped shoulder strap and a sleeve.  I copied the top part of the gown onto 1 inch gridded paper as well as the sleeve and shoulder piece which I lengthened from the original 7 inches to 10 inches.
This was what I had to work with.  Because it has a lot of drawstrings, fitting wouldn't be much of a problem.  I decided that this would be entirely hand sewn. I used 56 inch wide cotton voile cut about 64 inches long--2 lengths plus a 30 inch wide piece which was in the center back.  These pieces were stitched together in tiny French seams. The front edges were hemmed with a hand rolled hem. I used silk thread for all stitching.
Then I added the waist and bust casing--using 1/4 inch silk ribbon, hand stitched in place.
This was probably the most time consuming part of making this dress.  Once this part was done, I folded the piece in half, laid it out and cut the contour of the top and the hem.
After inserting the 1/8 inch cotton twill tape drawstrings, I pinned the gown on my dress form.  
I used medium weight white linen for the lining of the shoulder straps. The straps in the diagram were only about 7 inches long and I knew that would be way too small so I made them 10 inches long for fitting purposes.  I sewed the lining on first then tried the dress on to see how it fit. 

As I suspected, the straps were too long.  I made a shoulder seam in them, taking them up 1 1/2 inches.  I then cut the outer strap out of voile to the corrected length.  I then stitched a French seam in the sleeves,  hemmed the sleeves then made two eyelets at the cuff and casing line in the center.  I did this so that the ribbon bows would show.  I stitched the silk ribbon in as a casing and I used the same 1/4 inch silk ribbon as drawstrings.  I stitched the sleeve in with seam inside the bottom and on the outside of the sleeve lining.  Then the outer shoulder piece was added and whip stitched to the lining, encasing the sleeve seam.
I decided that I wanted a neck ruffle so I measured each section of the neckline:  front, shoulder strap back.  I doubled each measurement and added them together to make a ruffle with 2 : 1 fullness.  The short ends and one long end were stitched with a tiny 1/16 inch rolled hem.
After the hemming, I made whipped gathers and fit the ruffle to the neckline, whip stitching it in place.  I was quite pleased with the final result.


The final thing to do was to do a hand rolled hem and make another white linen petticoat.
The sash was about 12 feet long and all edges were finished with hand rolled hems.  It was made from silk dupioni.

Step One completed! 

I fashioned a hat out of straw millinery blank.  I stitched teal silk bias around the edge of the brim.  I then cut a circle of the same silk and layered sheer white silk chiffon over it, gathered the edges and covered the crown with it.  A wide bias strip was cut with pinking shears and I fashioned it into a loopy bow, stitching the loops in place.  Two ostrich plumes and a couple of peacock spikes were added and stitched in place.


Step Two completed!

Now the hair!  I had bought a tacky Lioness wig from Whilshire wigs in a color that matched my own hair.
It definitely had that 80's biker chic thing going on!  Fortunately I had the tool of the trade!

I sectioned off the bottom, curled it around a 1 inch dowel and sprayed the curls.  The rest of the wig got teased--a lot!  It took over an hour to do all the teasing.  I had to trim some of the longer teased pieces.  


I ended up with one big hedgehog wig of win!  Love it!  The hat was the perfect proportion for the big hair!

The gown was worn over a Regency shift, fully boned strapless 18th century stays, a small bum roll and 2 white linen petticoats.

I made this ensemble to wear to an 18th century wedding at an 18th century country church--no electricity!  It was a gorgeous day.  Here's the final ensemble: