I was hired to do a demo on the type of sewing that a middlin' sort housewife would do. Of course there are the basic wearables: body linens like shirts and shifts, basic caps, aprons, pockets and handkerchiefs. Baby clothes and diapers seem to be another basic that the average home would need and there would be a lot of mending.
The actual sewing for the home was new research to me. I was familiar with table linens and ticks stuffed with straw. I figured I could make a miniature tick but when I actually started researching bedding and found out there were lots of layers, well, things became a bit more involved.
I decided to do a rope tension doll bed and create all the linens. I have an antique doll bed but it has springs and I really didn't want to alter an antique one to be a rope tension bed. Fortunately, an Ikea doll bed appeared in one of my searches! Apparently this doll bed is sized for American Girl dolls but many people buy it and put a super cushy topper on it for their cats. That made me chuckle as it's totally something I would do if I thought my cat would use it. But I digress . . .
Here's the bed as assembled:
It's pretty basic. There were little strips of wood tacked and glued to the inside of the side rails and the ends. I was able to pop those off with a putty knife and a hammer. I studied images of full sized rope beds and noticed that there were an odd number of holes on the ends and sides for stringing the rope. After playing around with a ruler for a bit, I found a distance for the holes that looked proportional to the big beds. I had purchased rope that was 4mm thick which seemed to be a good size so I figured I'd experiment in scrap wood to see what size drill bit was best.
Once the holes were drilled, I did some light sanding, coated it with a couple of coats of chalk paint, put a light wood stain over the chalk paint to give it an aged effect then gave it a good coat of Butcher Wax.
Here is a reproduction rope bed from a historic site which I used as a model for doing mine.
Next the bed was strung with the rope. I was happy with the final result.
The first layer to be made of linen is the sacking bottom. I've seen a number of different versions of this. It appears to be used in lieu of roping in most of them but I did see one photograph of a sacking bottom strung to the roping to give a smooth surface and to contain and spillage of the mattress stuffing.
From Mount Vernon's Blue Room
Sacking bottom was made of linen canvas with a small whip stitched hem and eyelets. The size was determined by how it would be strung. The proportions of this project are the result of a lot of guesswork.
The mattress was made of linen ticking. Ticking is a heavy, twill woven textile. The construction is much like that of a wallet. The mattress has one center seam on the underside that is flat felled and left open int he middle. The end seams are also flat felled. The opening is hemmed and linen ties re stitched on to keep the opening closed. The dimensions required a bit of guesswork. I had read that full size mattresses were cut and sewn to be about 5 - 6 inches longer and wider than the bed frame to accommodate for the stuffing. I cut this about 4 inches longer to start and ended up shortening it. At this scale, 2 inches wider and longer seemed to be the magic number. Period ticks may have been pieced with butted selvedge seams depending on the size and the width of the fabric.
The mattress was stuffed with straw which gives a firm support for sleeping. Straw was regularly replaced in mattresses and the tie opening facilitates this process.

Next layer is the feather bed. This is the soft, comfortable mattress that you can sink into. I found a number of different ways of making the feather bed. Some were stuffed then stitched closed. Others had tie ends. I cut mine a bit longer since I wasn't sure of the length and I felt that the fold over was helpful in keeping the feathers in. Feathers get everywhere no matter how careful one is! On the left is the mattress cover. Since the feather bed is what was slept on and it couldn't be washed with feathers in it, a cover much like a modern pillowcase was put over it. The cover is made to fit the featherbed and ties closed on the end. Covers were typically white and sometimes checked. In the spirit of "making do," I used a remnant of checked linen that I had. The cover should be a fairly stout linen since it gets laundered. Both were stitched with flat felled seams--one long seam and the end seam --and narrow whip stitched hems.
Featherbed and cover on the bed.
My assistant did some quality control testing on the featherbed while I was stitching the cover.
Next up: Pillow and Bolster.
Pillows were used differently in the 18th century than in the present. Today, we sleep with our head on a pillow. Back then, your head went on a firmly stuffed bolster which was placed right at the headboard. The bolster was the width of the bed. The soft feather pillow(s) was (were) placed on the bolster or slightly in front of it, allowing the sleeper to sink back into the soft pillow but remain at a semi reclined position. Pillows were not as wide as modern day pillows. Their length depended on the size of the bed and whether or not it was a single or double bed. I could not find anything about what the bolster itself was stuffed with--only that it was firm. It could certainly be stuffed firmly with feathers. I chose to use wool roving since I wasn't sure if I had enough feathers to get it good and firm. I cut the bolster on the cross grain in the spirit of making do since I didn't have enough length to cut it the proper measurement. Images show that bolsters can be sewn as a long rectangle or sewn with a round piece on each end making them a perfect cylinder. Either way, when stuffed firmly, the body of the bolster will be cylindrical in shape. One living history friend has an extant bolster made of coarse linen and pieced to form a long rectangle. Her description indicates that she found bits of straw in the corners so we can assume that it was stuffed with straw. Research that I found indicated that the bolster cases studied were flat / rectangular so I went with that design. I do note that cylindrical bolsters are often dressed with fancy cases and seen frequently in house museums. The pillow is made of ticking with flat felled seams and stuffed with feathers.
You can see the bolster and pillow in this period image:
I used a measuring tape to determine what size to cut the sheets. They had to be able to tuck in. I ended up cutting them 22 X 27 inches with one long side on the selvedge. I did 1/4 inch hems, leaving the selvedge edge plain. Here are a few images of 18th century American sheets with laundry marks.
Note the seam in the third picture. Sheets were typically made with two lengths of fabric using a butted selvedge seam in the center. The sides were left with the unhemmed selvedge edge and only the tops and bottoms were hemmed. There were a number of different widths of linen available to create sheets of the necessary size. For a smaller bed, a single 36 inch wide piece could be used as well.
Examples from Colonial Williamsburg
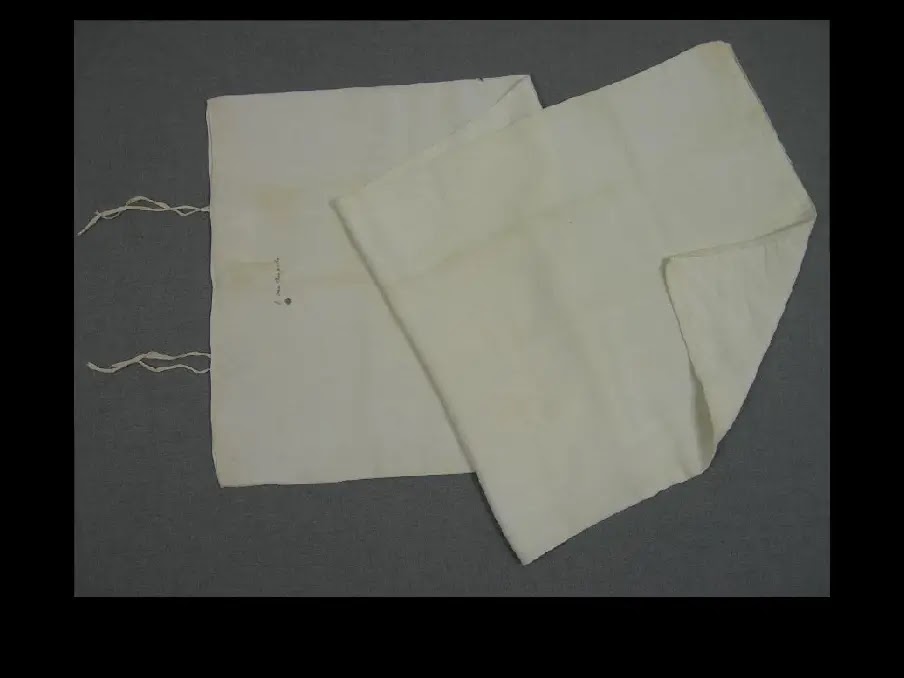
The pillow and bolster cases were done with some guesswork as well. These cases, while looking similar to modern ones, were cut a bit longer and had ties sewn inside to keep the pillow/bolster in place.
This bolster case from the Colonial Williamsburg Foundation, shows the internal ties. The second image shows where they are stitched inside.
This pillowcase from the Colonial Williamsburg Foundations shows that the pillowcase ties were set farther from the edge.
A few words about laundry marks:
Household linens and body linens contained laundry marks which consisted of initials and typically a number. I've noticed that many extant bed linens also have the year on them as well. With bed linens, all the pieces in a set--typically 2 sheets, a bolster case and at least one pillowcase--had the same number. This enabled the bedding set to be kept together when laundering. These marks were typically made with cross stitch. I've seen some in the late 18th century and early 19th century with ink marks. Why did it matter if the sets were kept together? My guess is that since beds were not standardized sizes, the sets were made to fit specific beds. I could certainly be wrong about this but it seems logical to me. How many sets would a typical household need? The partial inventory of William Reynolds of Annapolis gives us a bit of a clue as to why someone would need to mark bedding! Mr. Reynolds was a tavern owner so he would've certainly had more beds than a typical household. There were more listed on a second page. Even a typical family would have several beds so being able to identify the bedding / bed with a number seems very practical to me.
I decided to go ahead and put laundry marks on my bedding. I started with one sheet and managed to get them even smaller for the pillow/bolster cases. I have to admit to getting lazy and not adding one to the bottom sheet. I used one strand of silk sewing thread for the marks. My husband asked why I used number 2 instead of number 1. LOL. My reason is that the charted "1" didn't look a lot like a "1" and I wanted the marks to clearly show a number since that's a talking point. So number 2 it is!
Here is my completed set of bed linens:
Here they are on the bed. First you can see how the bolster/pillow cases tie in place.
Funny how these projects become a bit of an obsession. I was first intending to do mattresses. Then we got into the bolster/pillows and so on. In that spirit, I realize that my little bed requires a proper wool blanket. I will check my stash first for some appropriate wool that will be blanket stitched with wool thread. I'll update this post with photos whenever I complete that.
Final thoughts:
Anyone who knows me knows that this is not the type of sewing I typically do. I love my millinery and fiddly pretty things. Practical sewing requires so much whip stitching and a lot of felled seams, both of which I don't care for. I still found this to be enjoyable for a number of reasons. First of all, I learned a lot. I love how 18th century seamstresses made use of the selvedge edges and used sewing techniques that were very efficient. They really had no choice when you think about it. As long as it took me to make these miniature items, they made full size ones with long seams using stitches far smaller than mine. They accomplished that often with a house full of kids to look after and without the modern conveniences like Ott lights that make these tasks so much easier for the modern sewist. I marvel at that. As a woman, I know that women have always "done what we needed to do" without giving it a second thought and it's clear that our foremothers did so as well.
I also appreciate domestic skills. They were important when I was growing up. I remember being taught how to mend, iron and take care of the household goods. Later we went through a period where domestic skills were not appreciated so much. In many ways I think that was a byproduct of the feminist movement (of which I am a part). As we've made progress, we are starting to demand respect for all of these jobs that were traditionally done by women. As we become aware that a disposable lifestyle has negative impacts on the environment, we are starting to go back to making do and reusing things so people are seeing the value in having such skills.
Finally, I've had people ask why I went to the trouble to do all of this by hand. I could easily show bedding that was whipped up by machine. Part of being an interpreter, is having as much first hand knowledge as possible. I didn't live in the 18th century but I can make an effort to do what they did to help me understand more about their lives. This knowledge is incredibly useful when talking to the public who often ask how long it took them to do certain things. I find connecting to the past that way to be meaningful for me personally.
Anyway--I'm glad I decided to do this and hope to add to my home sewing bag of goodies in the future.