Showing posts with label 1760s. 1770s. Show all posts

Sunday, December 18, 2022

2022 Costuming/Historical Sewing Year in Review

It's that time of year when I take stock of my costuming accomplishments.  I've expanded this post to include other historical sewing since some of it required a boatload of research and took a lot of time.  Note that these projects are all sewn in the period manner.  If the period used machines, then a machine was used.  If hand sewing was the period standard, then the project was sewn by hand in the manner revealed in my research. Many of these items are accessories--some of which are just as labor intensive as full sized garments--particularly those with any embroidery or trim.  

One thing that always amuses me when I make these year in review posts is how different this list often is from the goals list I make at the beginning of the year.  Two of these projects were on my goals list.  At least two of those original goals that weren't completed will go on my goals for 2023 list.  LOL.  Sometimes my research and needs just takes me in a different direction!

This post does not include my modern sewing projects which includes three 1950's style frocks and 3 or 4 other garments.  I've listed these in order of completion and linked them to blog posts/tutorials where they exist.

1.  1921 black worsted tea frock.   This one was a lot more complicated than it appears to be!

      Detailed post with research can be found here. 


2. 1920s black taffeta petticoat.
    
Detailed post and tutorial can be found here.


3 and 4.  1786 Balloon hat and figured wool Italian gown.

               Detailed post and hat tutorial can be found here.


5, 6, and 7.   Three different silk bonnets.

                     Detailed post and tutorial can be found here:


8.  1780 Chintz gown.   Shown here with my friend Esther, who is wearing a gown of the same fabric!

      I'm on the right.  Detailed post can be found here.


9 and 10.  Two new work aprons.  The heavier white apron and the red checked apron are new.  

                 The blue one is included to show the new hand woven tape.  


11.  A new 1760s work gown for Widow Ferguson.   This gown is being worn with the white apron above         as well as a new linen voile handkerchief included with this project.
       Detailed post can be found here.


12.  1810s Regency cap made from a remnant of antique sprigged organdy.


13.  Linen bed gown.  It's hard to believe I haven't had a bed gown all these years.  I completed this one as         part of an 18th century home sewing presentation and found that I rather liked it.


14.  1920s brimmed cloche.  I wasn't sure whether to include this or not.  It was a fair amount of work.  It         was refashioned from a wide brimmed large brimmed thrift store hat that is 100% wool.  I had to         
       completely reblock it numerous times, cut away much of the brim and stiffen it more.  I should trim it 
       but haven't yet decided on what I want.


15.  Common linen mitts.    These were done as a sample for a mitts workshop.


16.  1770s Sheer organdy cap.  Another demo project for a workshop.


17.  1770s shift.  This one was a lot of work but desperately needed.


18.  In progress, fine linen voile Quaker cap.  Hopefully I'll finish it before the end of the year in which csse I will update.


Other history sewing that I don't wear:

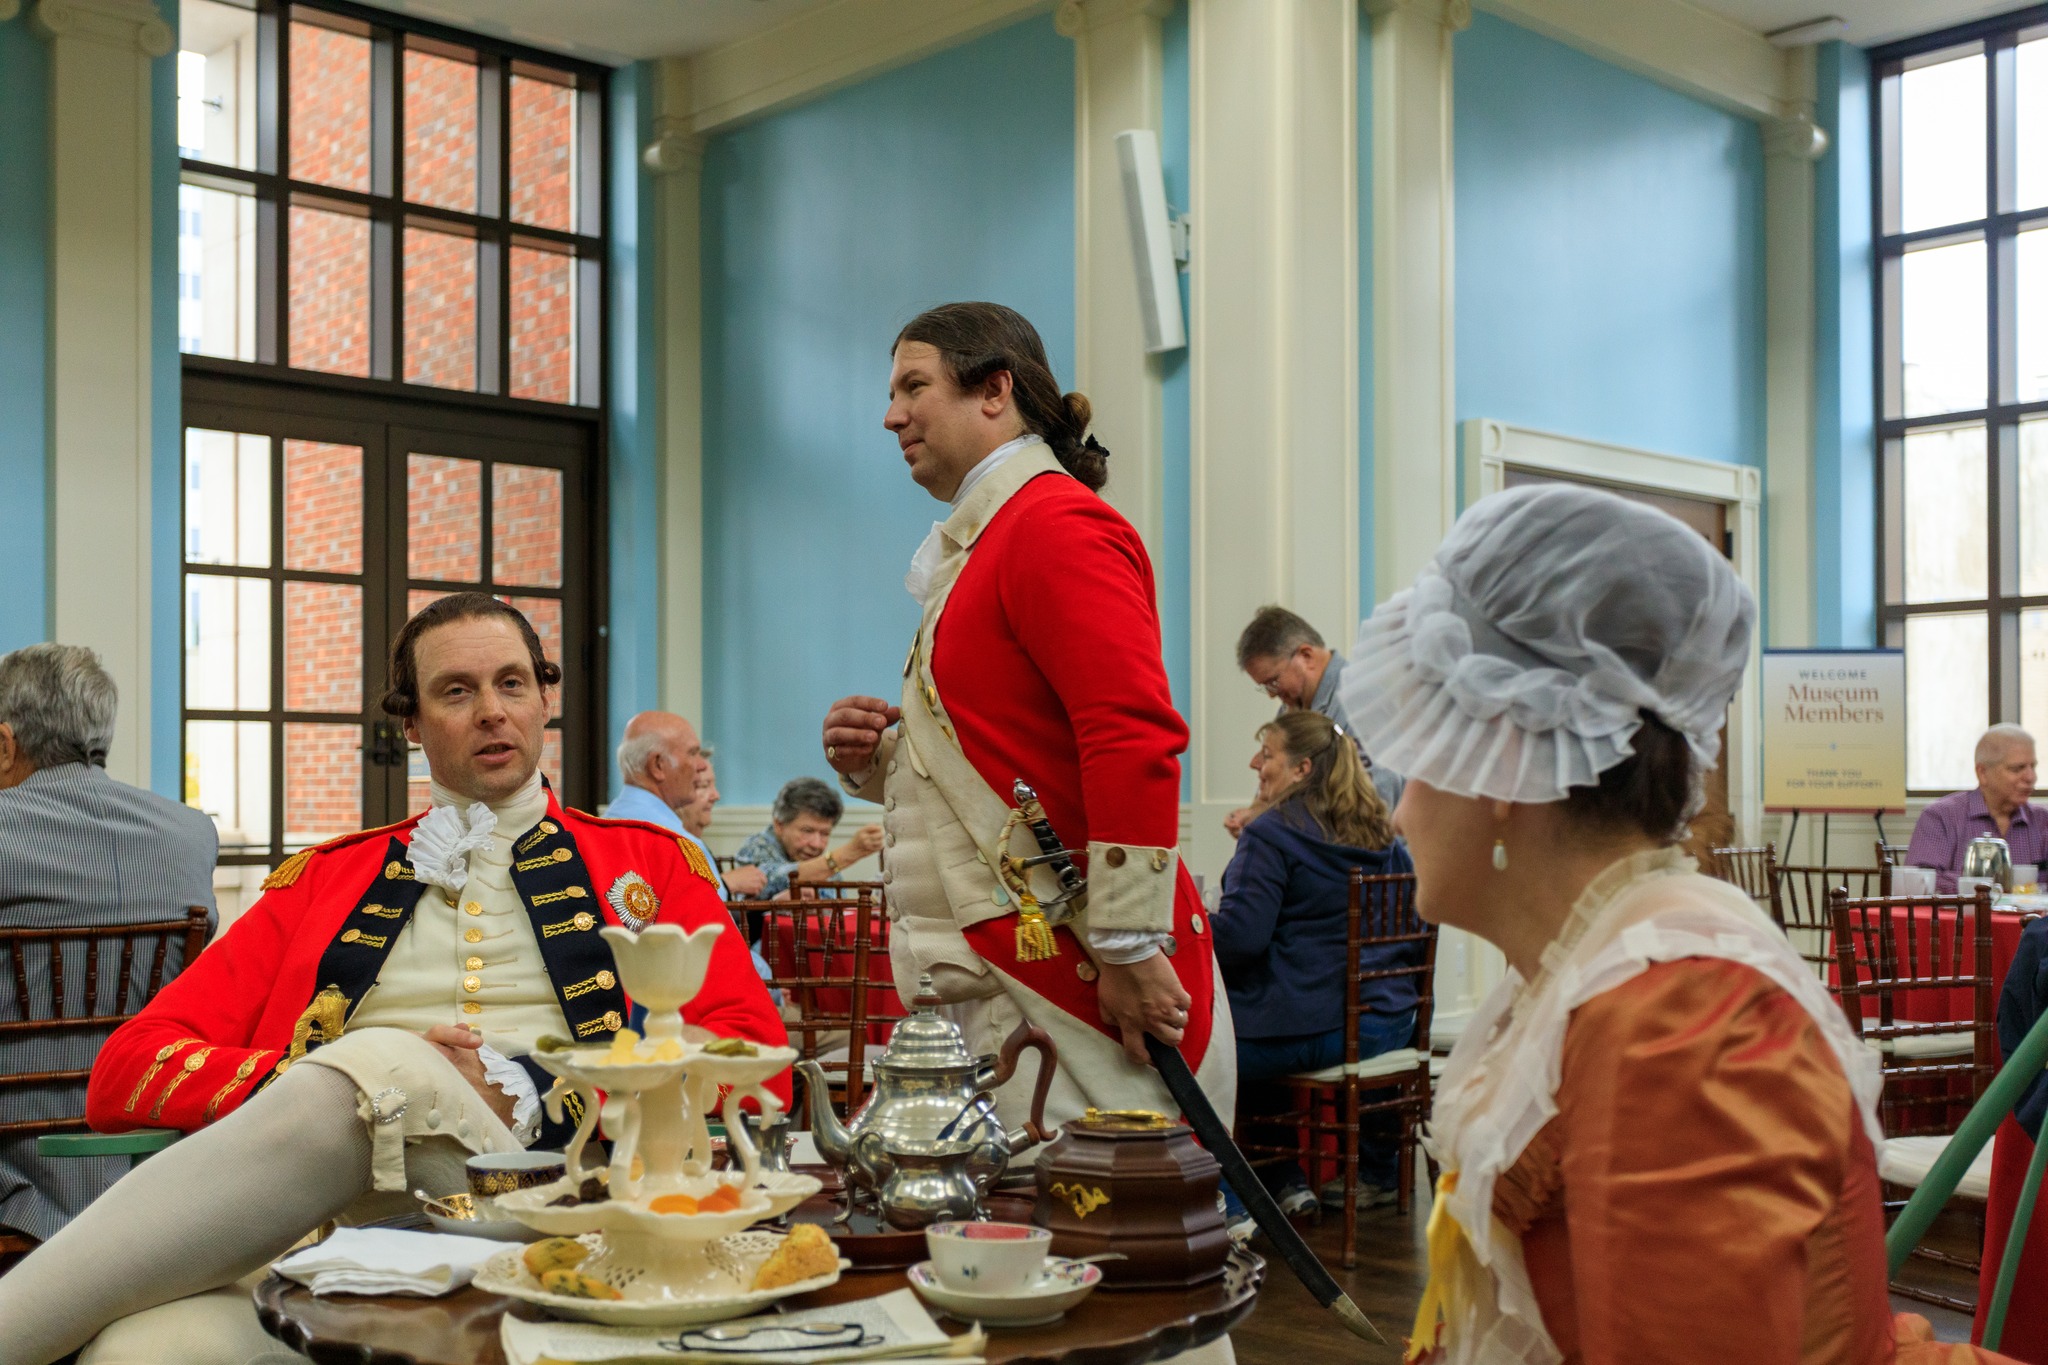
Men's shirt.   This was made for a museum program on Esther deBerdt Reed.  I found myself demonstrating thread button making all day as the kids seemed to enjoy it.


Baby layette from Sharon Burnston's excellent instructions.


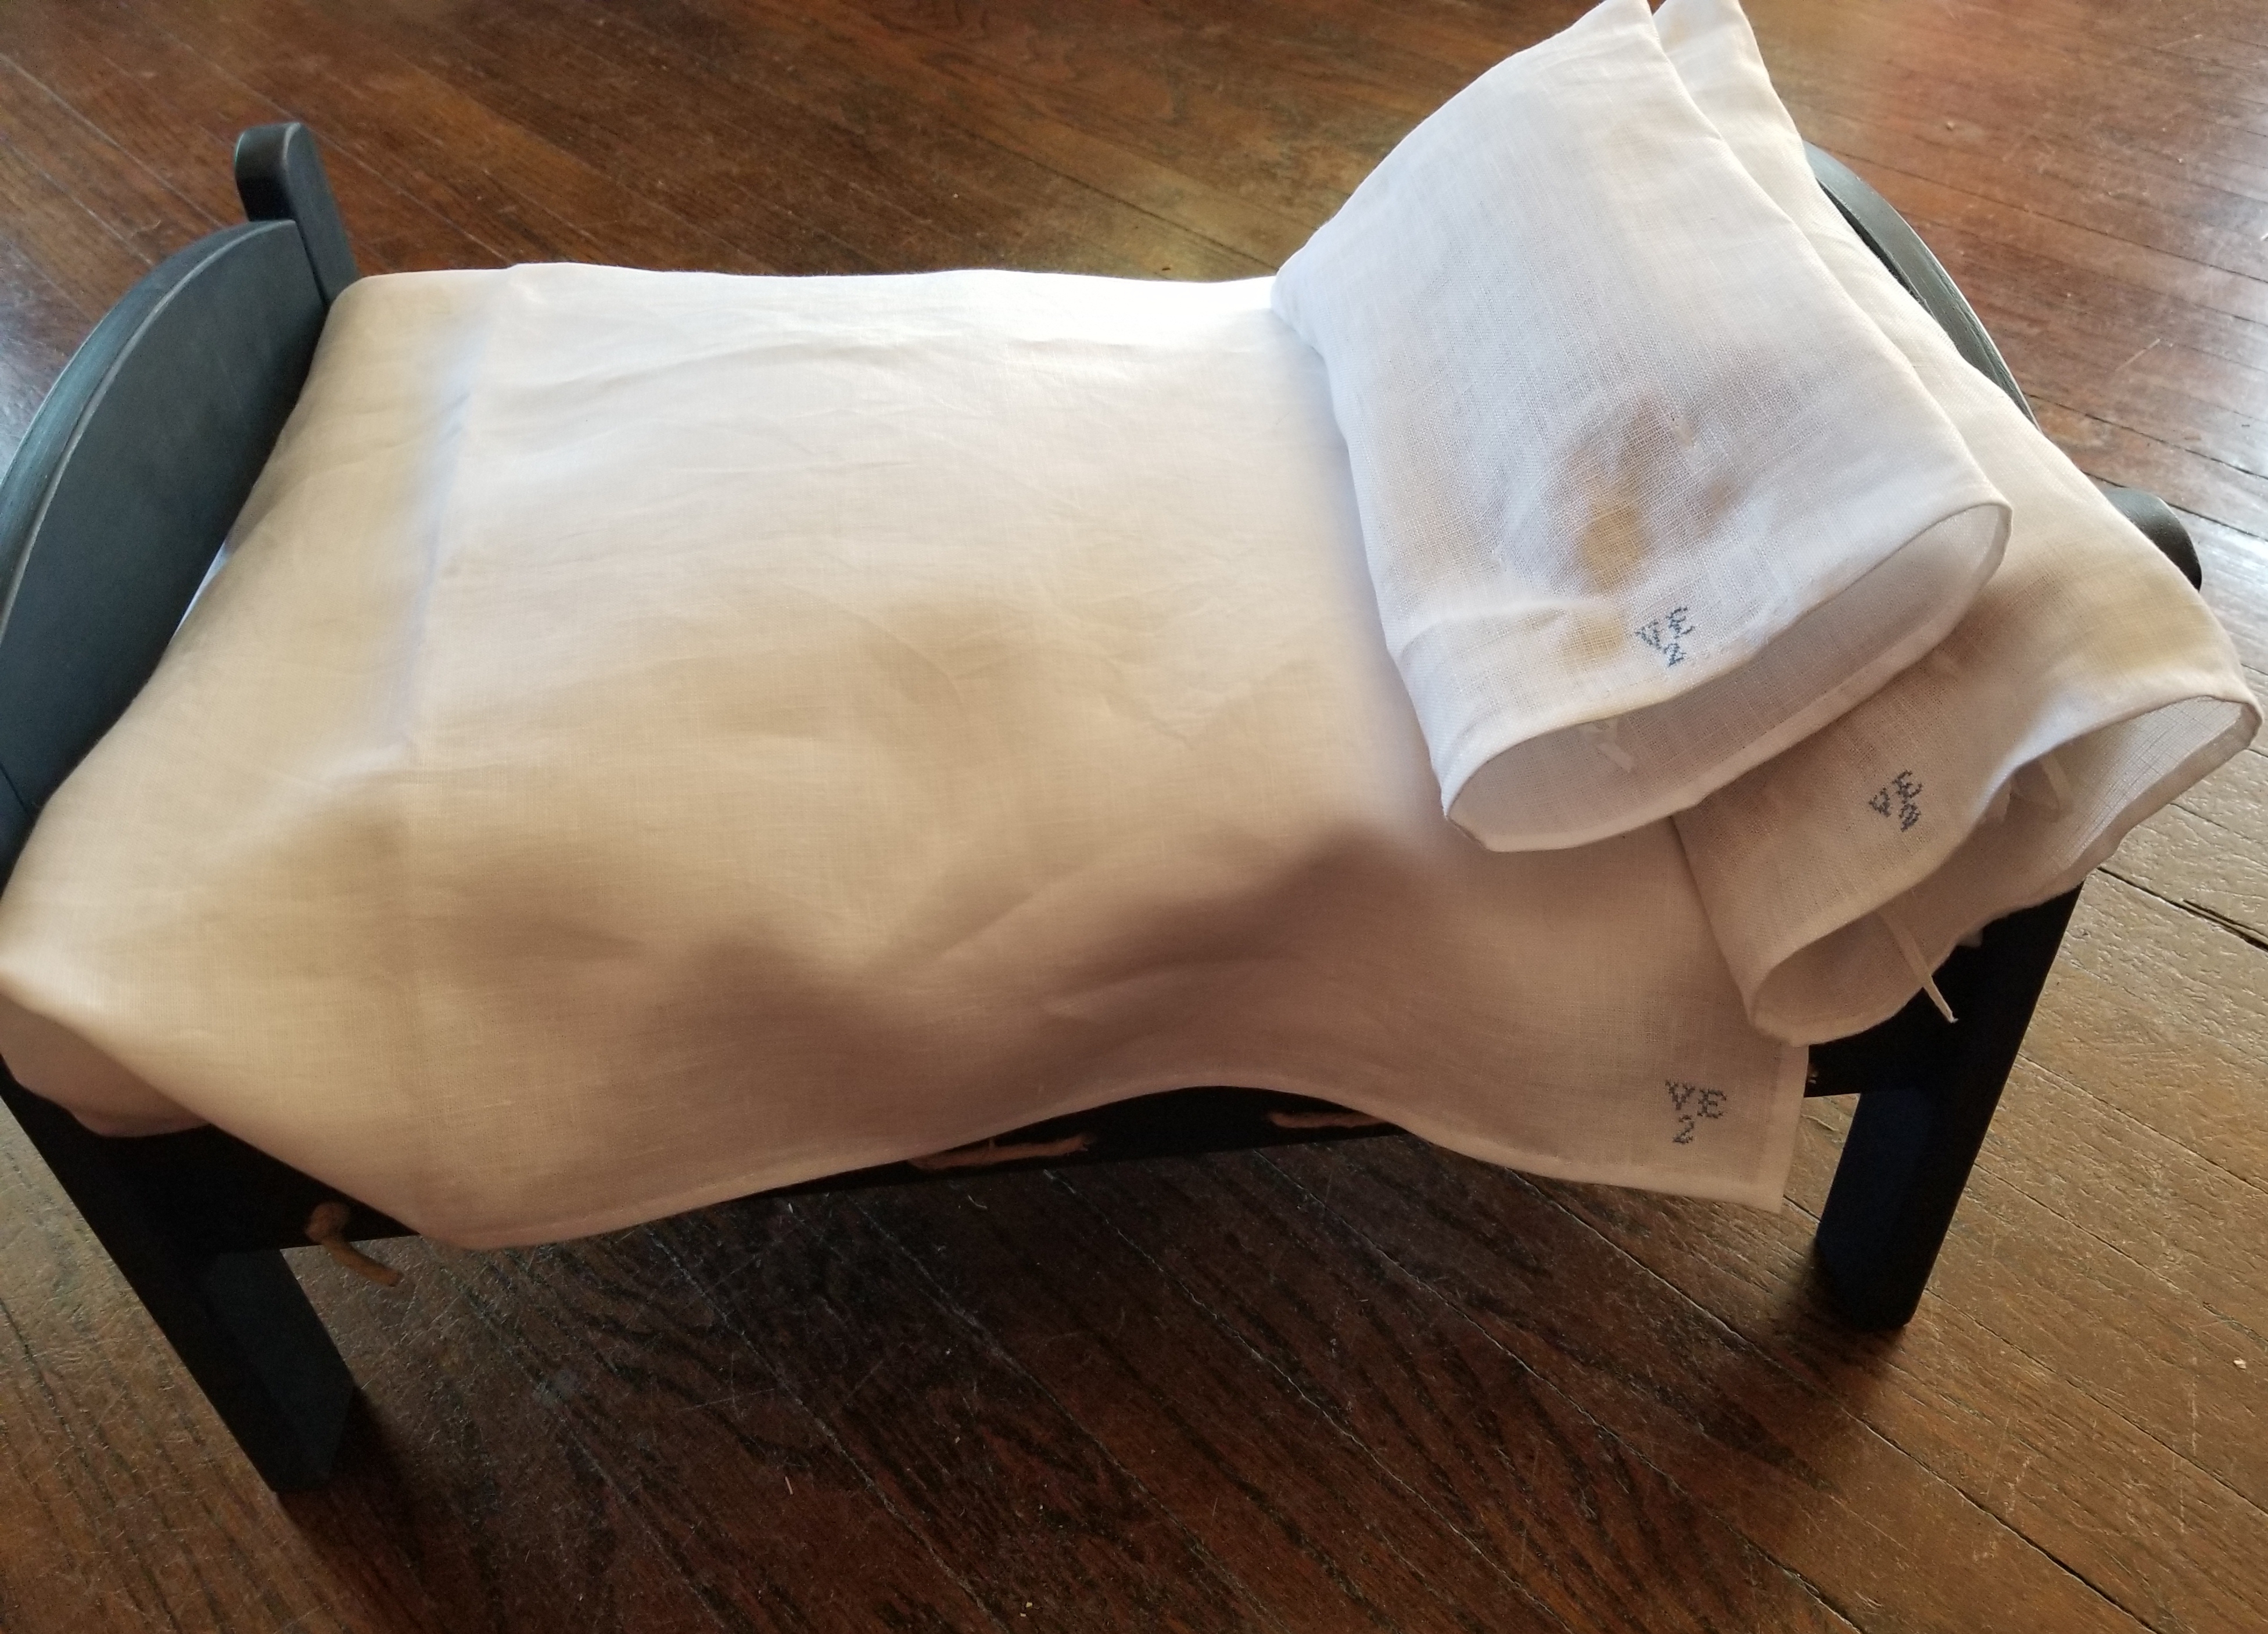
Miniature bedding project:  This was a lengthy project as I had to make the rope bed from an Ikea doll  
bed.  Details and research can be found here.


Rose blanket for the miniature bed:  research and details here.


In progress:  Blue checked men's shirt.  If I finish it, I'll update.

When I start these posts, I always think I didn't accomplish much--until I actually start counting and realize that I was rather productive!  I have a lot planned for 2023 and I suspect that what gets finished will not even be on that list if past years are an indicator. LOL.

Here's to a new year with lots of new sewing adventures!

Friday, July 15, 2022

A Summer Work Gown for Widow Ferguson!

I portray a widow, Elizabeth Ferguson, who assumed her husband's stay making business upon his death in 1770.  She has a nice crossbarred wool gown and a wool sateen mourning gown.  I figured that a July event called for the good widow to have a summer work gown.  The Ferguson's are assumed to be Scots immigrants so I decided on a crossbarred lightweight linen for her gown.  I decided to use the pattern I drafted for a 1760s gown with folded robings.  

I also made a heavy white common apron bound with hand woven tape.  Widow Ferguson is an upper middle class woman with resources so she looks nice but she dresses practically for her job as a stay maker.  

As usual, Luna was anxious to help me:

I added lacing strips to this gown.  I started doing this with silk gowns to cut down on the number of pins I use.  I find that the lacing strips help distribute the stress on the gown.

Here is how they work:

The strips are sewn under the robings.  They go from the waist to just below the top of the stomacher.


Put on the petticoats and your handkerchief if you want it tucked into the front and lace up the gown:


Pin the stomacher to the lacing strips.  I used a single pin at the top of each side.  You do have to size your stomacher to fit in this space.


Pin the robings in place securing the stomacher.  I used 3 pins on each side.


I didn't have time to make the petticoat to go with this gown.  I have a buttery yellow medium weight linen for it.  I hope to make it more of a working length.  I ended up wearing this over a 1760s shift, a linen dimity petticoat with a linen voile handkerchief and white linen work apron.


I really like this gown.  The 1760s styles are comfortable due to the looser sleeves.  Here are some pics of it in action.


It's always nice to have a new common gown!

Thursday, September 10, 2020

Quilted Petticoat pt. 3

Let the stitching begin!  I searched and searched and found a lap quilting hoop that I really liked.  As luck would have it, Luna found it before I could use it.  I like this hoop because it sits flat on my lap and has a sturdy 14 inch hoop attached.  I don't have to fudge with adjusting an angle and it has plenty of room to put one hand underneath.


As I started stitching, I found one challenge--my silk twist quilting thread is either too thick or too twisty to successfully thread my tiny betweens needles that I prefer to sew with.  I even have the John James big eye quilting needles but this thread won't go through the eye. I bent one using a wire needle threader.  I went with a size 10 embroidery needle which was nice and thin but longer than I prefer and that worked fine until I broke both of my wire needle threaders threading that.  I switched to a size 7 embroidery needle which has worked fine.  I'm going to have to experiment with some other brand needles and different threaders.  The longer needles are fine for stitching the figures because I'm not loading the needle with multiple stitches.  So many of the stitches change direction every stitch or two so it's a matter of literally sewing one stitch at a time anyway.

Here you can see the structure of the thread itself.  


As luck would have it--I received some new needles today--size 10 betweens by Bohin--along with 2 new Clover wire threaders.  They work perfectly!  The eye on the Bohin needles is wider than my usual John James so problem solved!

Here are a few pics of what I've done so far:

From the border:


Some of the figures in the squares above the border:


I'm really enjoying stitching these little figures.  I think had I gone with my first design plan--a featured braid for a border and diamonds, I would've gotten incredibly bored.  I'm enjoying the fact that each day brings different designs to stitch.  It was more work to plan and mark but much more enjoyable to stitch!