
Extant Indienne gown ca. 1760. Note that there is no matching stomacher. The robings are folded and look double. Fairly large cuff.

Wool Damask Gown ca. 1760. Same features as above gown. You can see the larger pleats on this gown which is another feature of mid century English gowns. Note the ribbon ties across the center. I don't know if these are original to the gown but I have noticed period images from the 1750s do not have stomachers. They tend to have vertical bands, ties or lacing across the center front to secure a handkerchief in place.

1760s portrait by JS Copley. Note the larger cuff which is typical of an earlier 60s cuff which is more winged. Also 60s sleeves are shorter and wider. You see the shift cuff has a ruffle which is visible in the 50s/60s.

Girl with a tray. 1750. Note the double folded robing, winged cuff and shift sleeve ruffle as well as the ties across the center front. The sleeves on 50s garments are more full than those on 60s garments.

No date but appears to be 50s/60s. Same features as above: double robing, wide shorter sleeve with cuff and shift ruffles.

Girl with a fan ca. 1750. Same features as above. The shorter, fuller sleeve is really quite apparent in this one.

The features I've noted above disappear in the 1770s. The sleeves get slimmer, longer and cuffs disappear. Eventually the stomacher becomes a center front closing bodice.
Another detail worth noting is that the silhouette in the 50s and 60s showed wider hips which were achieved with panniers or hip pads. Those seem to disappear in the 70s for English gowns, being replaced by bum rolls or no padding. In the mid to late 70s we start to see more bum pads.
One detail I should also mention--mid century gowns were longer waisted as were mid century stays. Also--if you study mid century images, you will see that the front opening isn't as wide and typically forms a "V." Often the robings almost come together at the waist. I need to play with my pattern to achieve this silhouette but I will wait until I've made mid century stays.
My research also indicates it was typical for petticoats to match gowns with the exception of quilted petticoats.
One thing to consider if you are using a print --research the date of the original or inspiration textile. You certainly don't want to make a mid century gown out of print that didn't appear until 1780! If your fabric is from Colonial Williamsburg, you can find the original swatch or garment in their emuseum which will give you the dates and use of the original textile. The online vendor doesn't typically give the dates. This will alleviate the possibility of using an inappropriate textile. The print I used for this gown is a replica by Burnley & Trowbridge of a token from the Foundling Museum, dated to 1758. This makes it perfect for a late 50s/60s gown.
If you are a seamstress that uses patterns, you will find that there aren't patterns for mid 18th century English gowns unless you scale up patterns from books. My observation has been that many people simply use the available patterns that are geared for the 1770s. In order to do this, changes should be made to make the gown appropriate for those earlier decades.
As noted in the extants/images above, you will need to shorten the sleeve and make it fuller. I typically use the Larkin & Smith English gown pattern. This post discusses how I changed that to have folded robings.

On this gown I added 1 1/2 inches along the front pattern piece to enable me to make the pleat on the robings to create the double robing appearance.
This print worked well for the en forreau back. I didn't particularly make an effort other than making sure the back fold was centered.

You can see how the robing/bodice piece goes to the back. The robing covered the strap portion of the bodice. I drafted a back facing (which is easy) as the straps don't seem to end up in the same place every time.

I had made a mid century sleeve pattern which was about 1 1/2 inches fuller than my later sleeve and about 2 inches shorter. I also used the same cuff as my brown silk gown. It's larger than my late 60s cuff. I'm still debating as to whether or not the cuff needs to be weighted. Costume in Detail shows a number of cuffs with small self fabric pockets containing lead weights. I have done this in other gowns using a drapery weight. This gown will be worn over a mid century shift which also has a shorter, wider sleeve with a ruffle at the cuff.

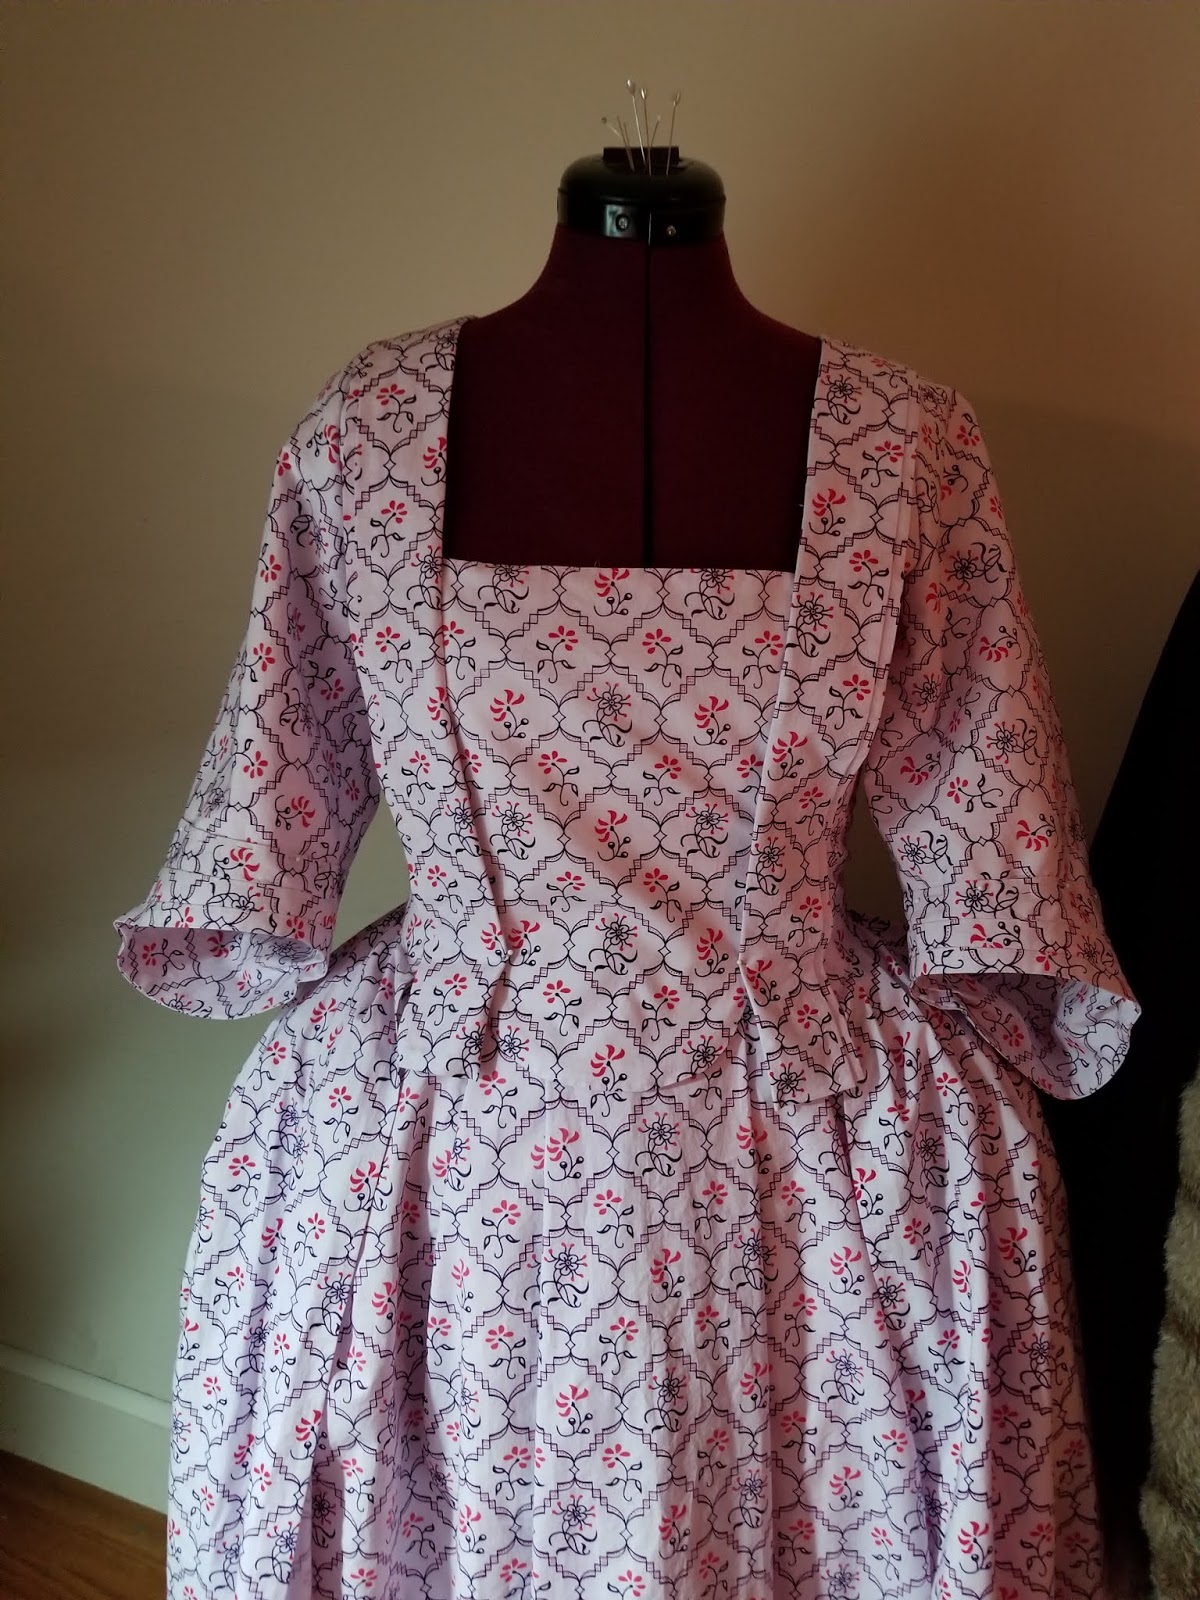
Almost done, pinned together.
This gown was made for an event taking place in 1770 where I was to portray a milliner so I do hope to make another cap. In the meantime, I took a wired cap I made 4 years ago and put new ribbon on it. 1760s featured small hair and small caps. This cap is quite petite. I also made a nice 4 loop bow out of some silk taffeta I have to cover a hat. I'll wear this with tambour work accessories.

I also made a 5 strand pearl choker and a bracelet from 4mm glass pearls.


And here's a pic from the event this gown was created for--worn with a different cap.

Vrinda Creation creates stunning gowns with graceful silhouettes, premium fabrics, and modern detailing, perfect for receptions, parties, and effortlessly elegant evening looks.
ReplyDeleteGreat Creation!
ReplyDelete