I've had a wood doll "kit" that I got from Larkin & Smith about 5 or 6 years ago that I finally decided to make. She's not a "fancy" doll like those shown in my last post but I thought she would make a fun first doll project. In the 18th century, one could buy dolls both dressed and undressed and in various levels of or artistry. Some were clearly not meant to be roughly played with while others were meant for play.

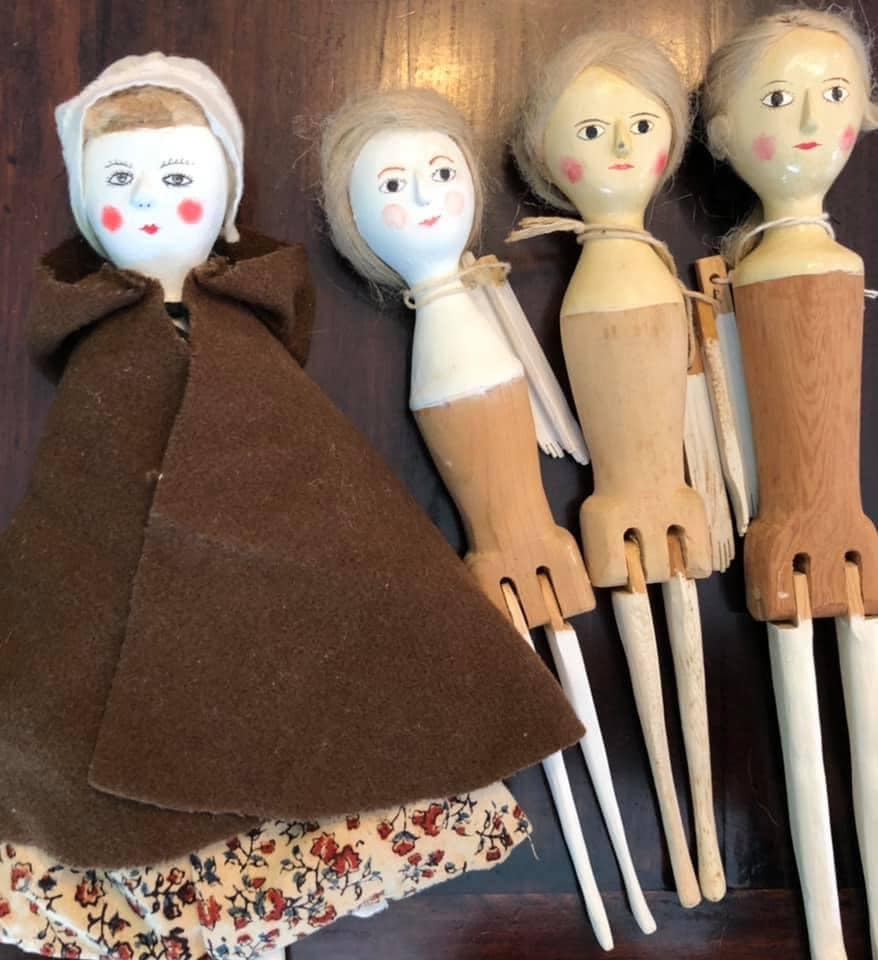
Here's a look at some of the bodies and body parts of 18th century wood dolls.
This one has hinged knees. Many had articulated arms and legs.

This one has leather upper arms which makes the doll easier to dress. Her knees appear to have a small leather strip inside both the upper and lower leg which allows them to bend.

This one has leather upper arms and hinged knees.

Here is a doll diagram for making one's own doll. The arms are hinged and nailed to the body.

Here's my doll kit. Not sure about those arms. I also wasn't thrilled with the face. She needs a chin and ears so I set about using paper clay to add those contours to her face before painting her. Not sure what to do with the arms yet but note that they have holes at the top for attaching.

The kit came with a small piece of almost white wool roving to usee for her hair. I decided to go with some I had on hand that had a bit more color to it. I basicall glued it on in sections to cover the top of her head then made the rolls by wrapping small pieces of roving around a pencil and securing them with white glue. Once dry I glued them to her head.


I painted her similarly to an 18th century doll I found in the V&A. Acrylic paints are very difficult to use for fine line work and the paint looks too heavy to me but it's acceptable. Next time I'll go with oils. I think they will be finer. I made little cardboard washers and nailed the arms to the body. They looked totally wrong. They're way too short and close to the body which will make it difficult to dress her.

Social media to the rescue! I posted a picture of the doll and made a query about the arms. My friend, Jillian, sent me a pic of her dolls from Colonial Williamsburg and explained that the arms are connected to each other with a loop of string. The loop gets wrapped around the dolls neck/upper body and the clothing holds everything in place. That made much more sense so I ended up just doing that.
On to the clothing! I used Sharon Burnston's doll pattern for the shift. Her doll is the same height but the body proportions are a bit different. Not having a name yet, I put random initials for a laundry mark.

I wanted her to have stays since I intended to use her to show the layers that women wore. I wrapped a piece of paper around her body and came up with a suitable shape for a pattern.

The pattern was traced onto some white linen and pinned to the outer linen. I machine stitched the top and bottom lines.

The seams were pinked and the stays were turned right side out.

I backstitched some lines onto the stays. I should've done more but decided to move on. I used heavy linen thread to lace the stays in back.

I decided that she needed some tiny pocket hoops since she would be wearing a sack. I drafted a little pattern and split a cable tie for the hoop.

Here she is with her pocket hoops tied on.

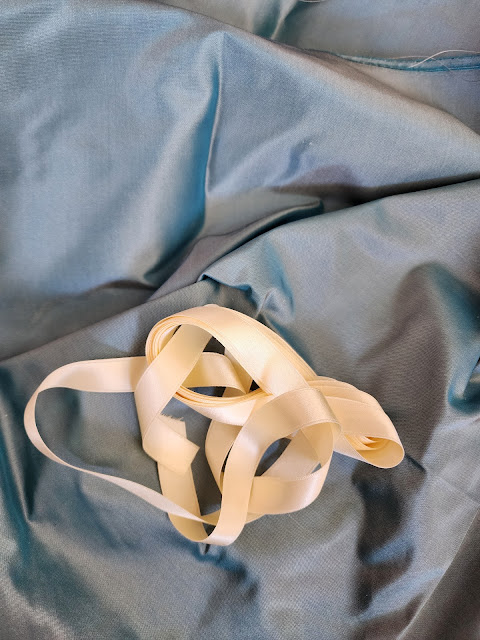
I found a 1 yard piece of a medium blue shot silk which I love. The only silk satin ribbon I had in a
smaller size (3/8") was yellow and I liked the two together so I decided this would be the color scheme
for her outfit.
I also found some tiny vintage French lace in my lace stash to use for her cap, ruffles, and tucker.

I settled on the lace edging and whitened it with Retro Clean.

I love making caps so it was fun to draft a little dormeuse style cap for her.


Using Sharon Burnston's doll bodice pattern, I drafted a sack to fit it. Sharon's pattern is a gown with a full waist seam and no robings. Trim is used in place of the robings. This bodice made a perfect linen lining on which to drape the sack.

Here is the bodice lining with the sack body. Back pleats are done and back section is pinned to the front at the sides.


The sleeves were stitched into the armholes and pinked flounces were added. Pinked trim was added long the front and neck edges and sheer white ruffles edged with lace were stitched inside the sleeves. Her gown is worn the way a full size gown is worn. The stomacher is pinned to the stays and the gown is pinned in place over it. I found tiny sequins pins were perfect for securing her clothing.


This was going to be the end but then I decided to make outer wear. I had Garsault's mantelette diagram on my computer because I had scaled it up to make one for myself. I printed out the original diagram and it turned out to be the perfect size for the doll! I cut two out of yellow silk, pleated them at the neck then stitched them right sides together, turning them right side out. I made a pinked strip to add trim to the mantelette.

Fits perfectly! Now to add the trim!

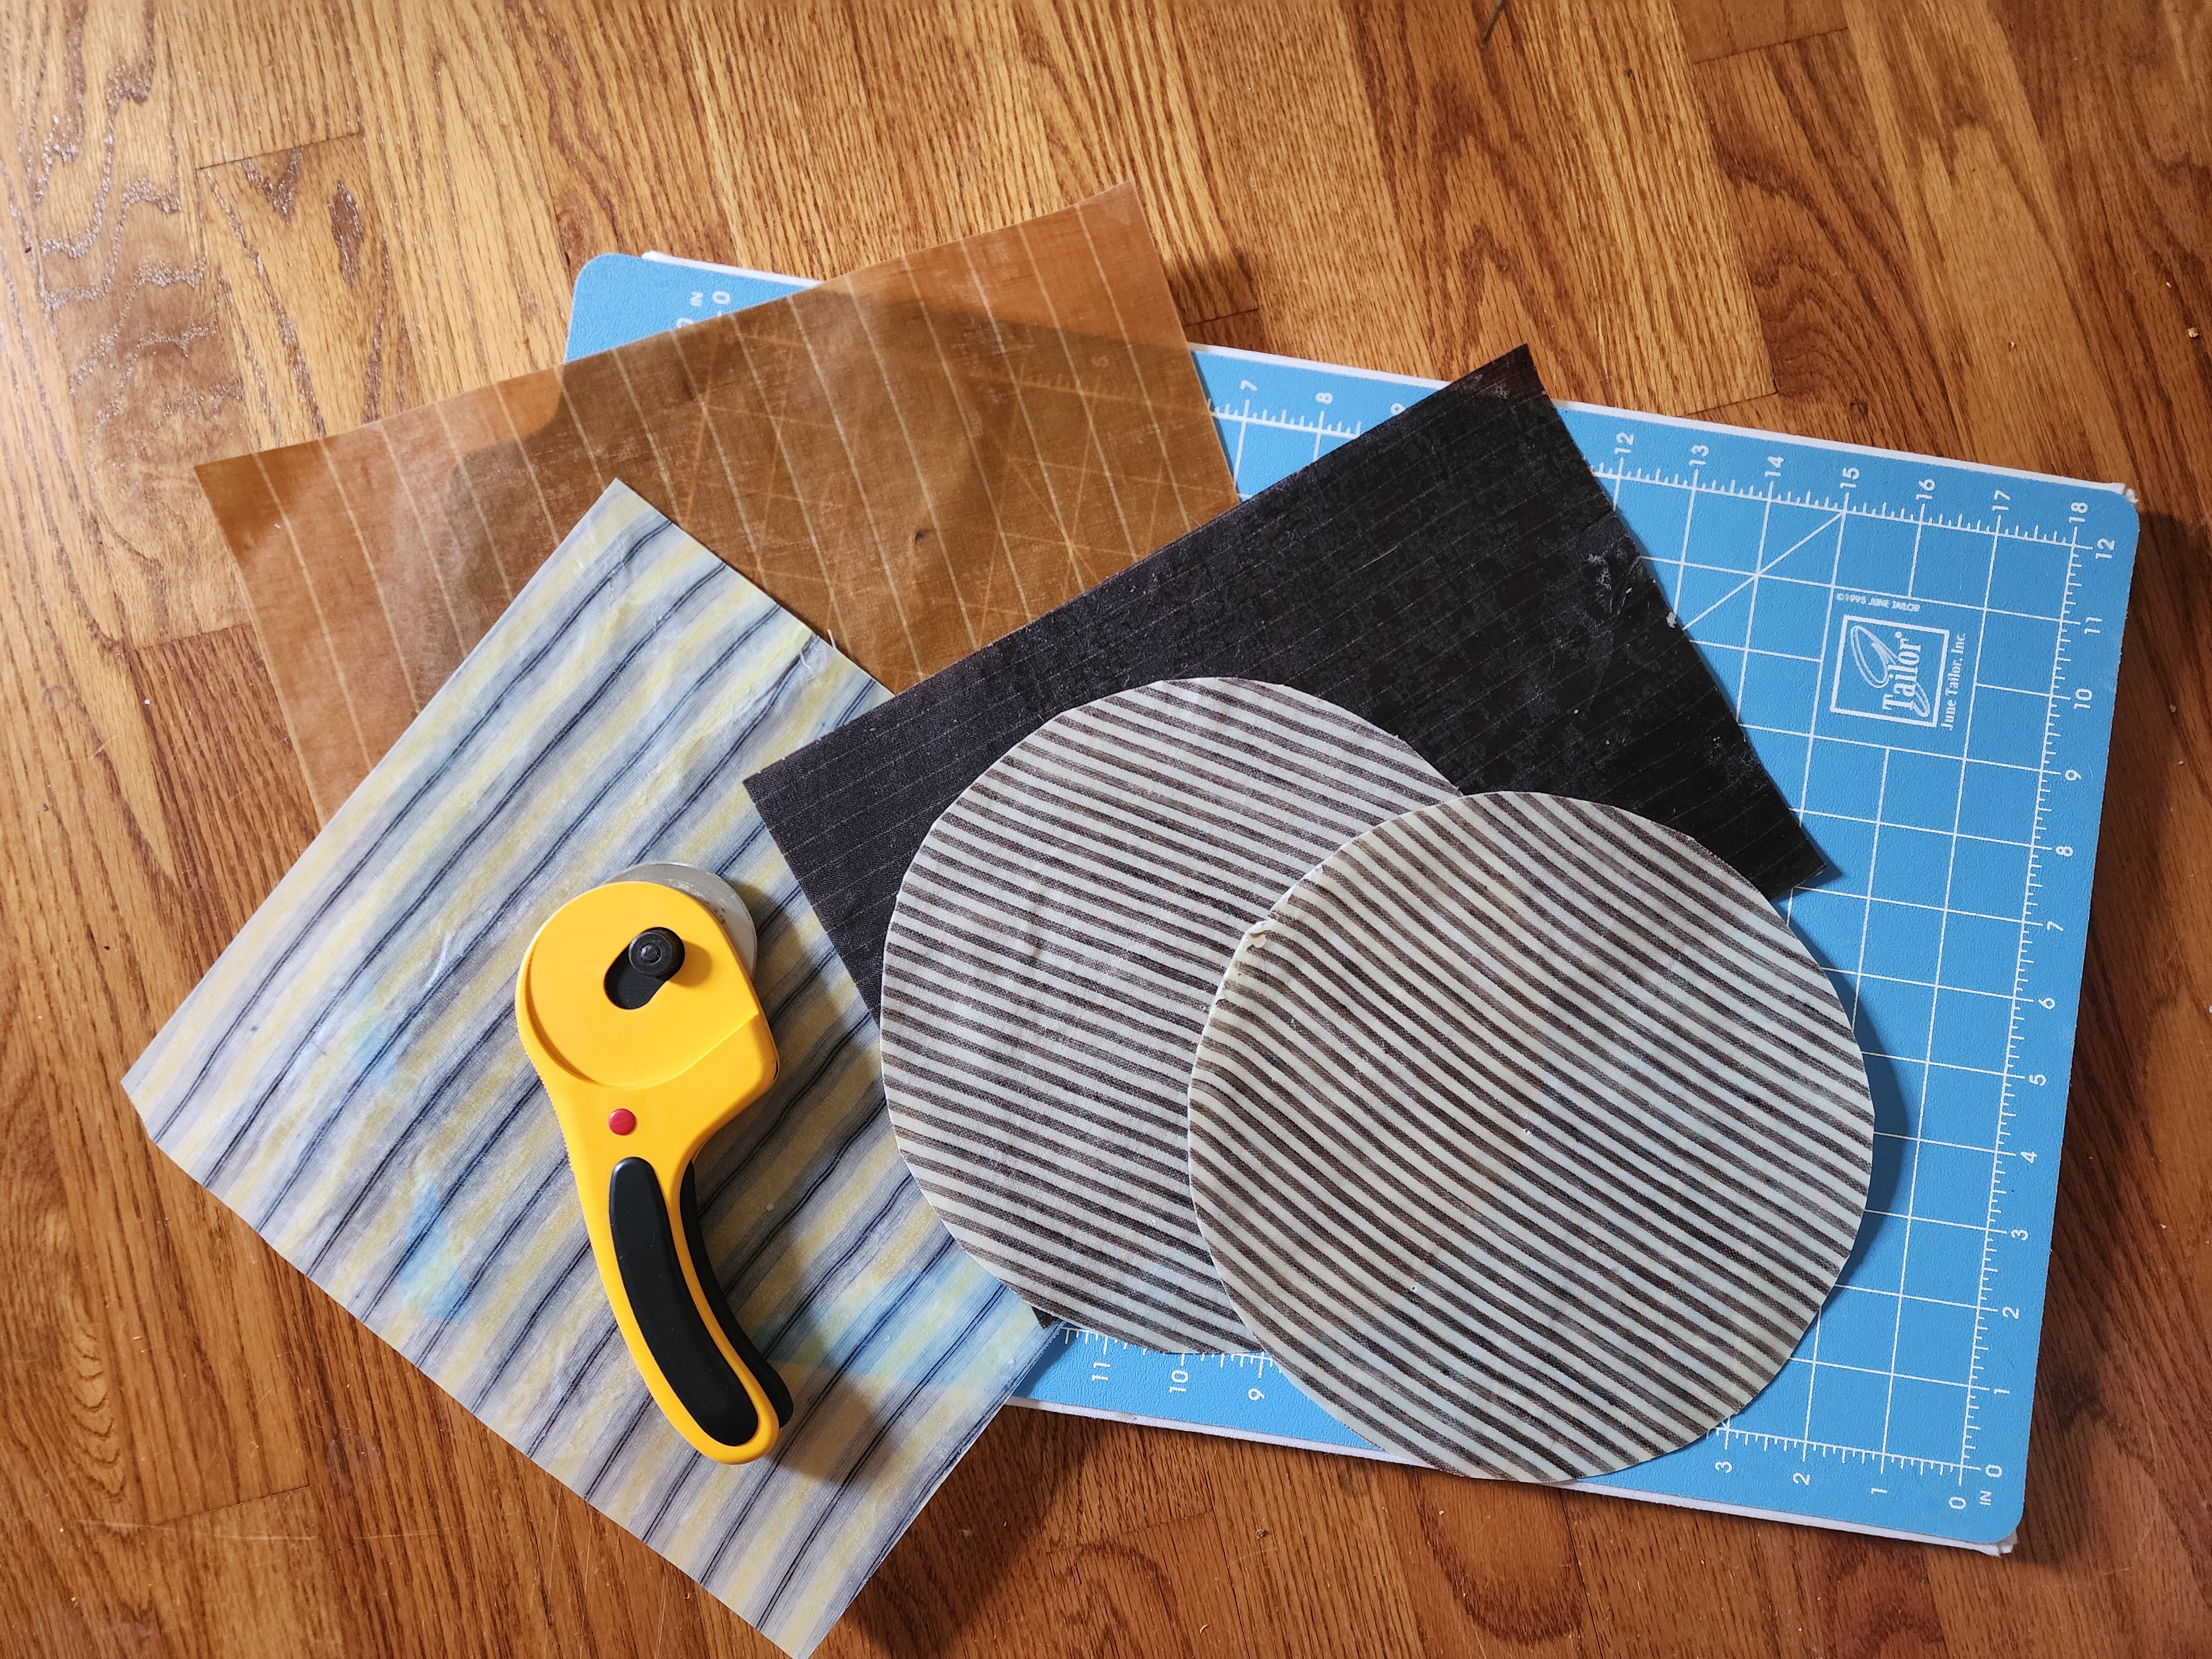
I wanted her to have a decent hat. The straw doll hats that you see in craft stores are quite rough so I decided to make my own. I found some 1/4 inch plaited straw on an Etsy page dealing with miniature trims for dressing dolls. After determining the diameter of her hat, I wet the straw and pinned it to my circle pattern. Jordie seems to think this activity was for his amusement.

This was a fiddly process. I whipped stitched all the little rows of straw together, steamed it with a lot of spray starch, then added trim to the hat.

For her mitts, I used a paper strip to wrap around her arm for the pattern. Using white and yellow silk taffeta, I traced my pattern on the silk, put the two colors together and stitched the top and bottom seams. After turning them right side out, I fitted them on her arm and stitched a seam. I also stitched 3 yellow lines at the points.

Of course she needed jewelry. I had some 2mm glass pearls in my stash which were a perfect size for a necklace. The small watch charm was found on Etsy. I used wire to make a little hook at the end of the chain, which was in my stash.

Here she is in all of her garb!


One last addition to her accessories: a mini pin ball to store her gown pins.


Final thoughts--This was a fun project and a nice diversion. It also kept me from doing other things that probably were more important. LOL. This has become a bit of an obsession as I'm already planning a winter wardrobe for Miss Pennyweather. At some point, I'd like to make a larger, fancier doll but I think I'll have a lot of fun with this one for quite some time! If you are interested in making a doll, the Mill Farm doll pattern by Sharon Burnston has instructions for making a doll and patterns for clothes if you are not comfortable working without patterns.