Sunday, April 14, 2019

1912 Day Gown

My friend Jan and I decided to attend a Titanic themed tea.  Jan is new to costuming and she got really involved in doing a lot of research, making all of the underpinnings as well as adapting a period pattern to match a fashion plate using period construction techniques.  I think hers was the most impressive newbie outfit I've seen due to the time spent in research.   I already had the most important pieces of Edwardian underwear and made the rest of what I needed.   I'd been eyeing this one pattern from the Vintage Pattern Lending Library--1912 Dress with Four Gores, size 36. This is a reprint of an actual period pattern.  These patterns do not have detailed instructions so it takes a while to figure out how to do certain things.

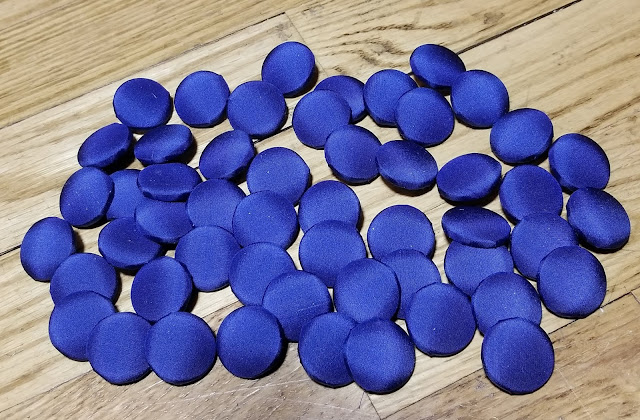
I had purchased 1 yard of pleated Swiss cotton from Farmhouse Fabrics when they had it on special.  It's incredible fabric.  The pleats are woven in which shows at the selvedge.  I planned on using that for the center inset but wasn't sure what to do for the rest of the gown.  The pattern suggested silk, linen or pique.  I originally wanted a yellow pique but just didn't find anything that turned me on.  Then I came across this micro striped pique which I liked.  Even better was the fact that I had 3 yards of royal blue silk taffeta on hand for an 18th century petticoat.  I only need 2 1/4 yards for that so I had enough to use for buttons and millinery trim.  Next I experimented with a couple of sizes of self cover buttons to see what I liked.  I decided on the 7/8 inch and ordered a bag of 100 of them on Amazon. 

I really didn't feel like making a fitting muslin of this gown.  It's a pretty straight forward shape so I flat measured quite thoroughly, adding to the hips (as usual) and adding to the side seam allowances to give me a 1 inch seam allowance for fitting purposes.  The original allowance is 3/8 inch.


My next challenge was to piece the pleated fabric as the lower part of the gown.  I used a narrow zig zag to stitch two pieces together under one of the pleats.


I turned it to the wrong side and trimmed really close to the stitching.

Voila! The pleats completely hide the piecing!

Early 20th century garments are constructed quite differently than the last quarter of the century.  They tend to use hems instead of facings and they have unusual closures.  First I had to hem the side pieces.  In a modern garment, this would've been done with a facing.


Then the inset gets stitched to the left side front on the bodice and also on the skirt.  I laid it out together to play with the button spacing when the pieces were pinned together.

Then the inset was stitched to the bodice on the left side and to the skirt on the left side and halfway up the right side.

I pinned the waist seam and the side seams and tried it on over the underpinnings and was pretty happy with the fit.

Then the fun began.  The pattern instructions said to stitch the shoulder seams and either use functional buttons or hooks and eyes on the right side.  The problem with this is that stitching the shoulder would not leave any way to put the gown on as the neck is very small.  I did some research and found out from an antiques dealer that a lot of garments of this period have asymmetrical closures that open at the shoulder and have hidden snaps as closures.  I had planned on using snap tape as I had found some that used old fashioned stitch on metal snaps.  So I hand machine stitched one side of the tape to the white inset and hand stitched it to the blue fabric overlap.   I put a hook and eye at the waist seam since I thought it would get more stress.


I tried the gown on again and decided that I needed to cut about 5/8 inch off of the neck.

Next I got the rest of the buttons covered--48 in all.

I needed a plain white fabric for the collar and I had several on hand.  The pleated fabric is actually quite sheer and I found that the Swiss batiste I had was the best match.  I measured the new neckline and altered the collar to fit.

Because the batiste is sheer, I trimmed the seam allowance to less than 1/8 inch instead of snipping the curves as I knew it would show through.

The tiny evenly cut seam allowance gave it a nice look on the outside.

There are no neck facings in these garments.  Typically the neck is finished with bias or some kind of binding.  I stitched the collar to the closed side of the gown and around the back stopping at the shoulder on the right side.  Then I bound the collar seam and the loose edge of the collar.  I stitched small snaps on the collar seam allowance and inside the front neck edge.


You can see the loose edges in the front, shoulder and neck.

Last was the belt.  I measured around the high waist seam and cut the belt, made 2 buttonholes and buttoned the belt on the gown.  Finished!


Next came the hat.  I love the big flowered garden hats of this era but this gown is fairly simple, having no lace and being cotton so I decided on a simpler style.  I used the bottom right model as my inspiration.  It has one flower cluster with plumes circling the crown.

I found this one that I liked in my thrift store hat stash.  I removed the ribbon.

Then I cut 2 five inch wide crosswise strips of my silk and machine roll hemmed the edges.  I pleated one onto the hat stitching the ends in place.

Then I used the other one to tie a 4 loop bow.

I stitched the bow to the hat at the left front.

I purchased some velvet hydrangeas and leaves so I bunched 2 of them together, added 2 leaves and stitched them over the center of the bow.  

Then I curled my plumes and stuck them behind the bow.


Accessories:

I bought this cheap Edwardian necklace at an auction.  It seems to be made of some kind of pot metal with glass.  I added an extender chain.  Then I found some glass earrings from Dames a la Mode that were a good match.

Here it is all put together.


Jan, me and our new friend Iris, who sat with us at tea.  We had a lovely day.

 I was pleased with the outcome of this project.  I learned a lot.  I did end up getting another period sewing book, dated 1912.  I'm fascinated with the way garment construction constantly changes and I like to learn the period techniques.  Using a period pattern forces one to learn as the instructions are vague and the pattern is clearly not made to use modern techniques. 

Edwardian Underpinnings: French drawers and Princess Slip

Time to add to my Edwardian underpinnings collection.  I've been needing drawers so that was the next thing on my list.  I decided on the Truly Victorian TV02 Edwardian Underwear pattern with the hope of making drawers and a corset cover.  I like that this pattern has several designs of corset covers including the ruffled one for the pigeon breast look of the early 1900s.  I opted for the plain ruffled drawers at the bottom right.  Instead of making a ruffle, I decided to purchase a swiss embroidery to use as the flounce.


Instead of a corset cover, I decided to make a full length darted princess slip--this one by Past Patterns which is  reprint of a vintage pattern.  It came in a size 36 so it needed very little in the way of alterations other than adding a little to the hips--which is standard for me.  


I bought some plain cotton lawn from my favorite Ebay vendor and wasn't sure what kind of flounce to put on the petticoat as it's difficult to find wide ready made flounces in the width called for,  I ended up getting an 8 inch wide flounce for the petticoat along with some Swiss insertion to make it longer using some of the fabric.  I also ordered some Swiss Broderie Anglaise for the drawers.  Both were listed as being white.  You can see in the photo below that they look very different!  I ended up having to bleach the one on the left to get it to match the fabric


I started with the drawers.  Truly Victorian patterns are pretty straight forward.  They do use modern construction techniques however.  I had seen a pair of Victorian drawers in an antique shop at Savage Mill and inspected them carefully to find they were pretty much made the same way as these.  Basically drawers are two pants legs with no outer leg seam.  They are not stitched together at the crotch seam--rather that area is open and those edges on each leg have a facing that is stitched down.  Then the legs are sewn to a waist band.  The fullness is in the back and the crotch seam is completely open.  Here's the front:

And the back:

You can see the crotch seam with the facing here.

I covered the flounce seam with beading and ribbon.

Next up is the petticoat or slip.  It was a vintage pattern with 3/8 inch seams--also quite straightforward.  I did lengthen the shoulder straps a little and I added French beading and edging to the neck and edging only on the armhole.  Had I known I would use Swiss embroidery on the flounce I would've used Swiss beading but this works well.


I stitched beading to the bottom of the slip body using heirloom sewing techniques

I then constructed the flounce using the wide Swiss edging, a strip of insertion and a strip of fabric.

I gathered the flounce to the beading.

Then I ran ribbon through the beading.  I finished the slip with buttonholes and antique mother of pearl buttons in the back.

So here's the underwear as worn:   First chemise then corset.

Then the drawers go on top.

Then the slip goes on top.


I was pleased with the way both of these pieces turned out.  I think I'd actually like to make another princess slip in silk.  Wearing a cotton slip under a cotton dress poses some challenges in that the dress didn't slide so easily.  It was comfortable though given that it was a worm day.  I recommend both patterns to anyone looking to make these garments.  I also ordered some Swiss batiste to make a drawers/corset cover combination garment with a lot of inset lace. No rush on that one though!

Friday, April 12, 2019

Antique parasol: Cleaning and Restoration

I've had my eye out for an Edwardian parasol for some time now.  I purchased one last year with a tattered silk cover to use for 18th century.  I need to cover that one with silk and adjust the curve of the spines to get the right shape.  I wanted an Edwardian one to use with my Titanic era outfits.  I was pleasantly surprised to find 2 on Ebay a week ago.  Both were close to perfect.  One was either linen or cotton with rows of hem stitching and some Broderie Anglaise. It had a few small holes that looked like they could be patched. The other had a lot of Broderie Anglaise and had no fiber listed.  I assumed it to be cotton or linen. It had no holes but was a bit discolored.  Both had similar burled wood handles and were walking stick type parasols.  I decided to get the latter one.  I was pleasantly surprised when it arrived.  Everything was intact.  


All the tips were on the spine and the little ruched puffs were there on the inside.  You can see the staining that runs the lengths of the folds.

The ruched puff at the tip was quite nice though it was dirty.  Some of the Broderie Anglaise was also stained. 

The little strap that secures it closed was perfect.  There's a little ring that's covered with thread and a mother of pearl button.

I carefully inspected every inch of the parasol.  The cover is linen with a nice sheen on it.  There are no holes from use or from age.  In fact the parasol appears to have not really been used.  Any staining is clearly from storage.  This made my job easy.  Had I seen weakness in the fabric I would need to proceed differently.

I decided to give it a good soak.  I ran tepid water in the bath tub and added several scoops of Clorox 2 all fabric bleach--which is one of my favorite things to use for cotton/linen textiles.  I laid the parasol in the tub as seen below and let it soak for about 30 minutes.  Every 30 minutes I very carefully rotated the parasol in the tub to soak a new section.  It's important to keep in mind that fabric is weakest when it is wet.  Thus when rotating the parasol, I used one hand on the top to support the weight.  If you are worried about the strength of the fabric, it's best to soak in something larger with a sheet, large towel or screen underneath so you can lift the parasol using that for support.  A child's wading pool would be good for this.

After soaking, I decided not to rinse at this time and carefully carried the open parasol to my back deck to dry in the sun.  The sun can be helpful in stain removal.  It was commonly used in conjunction with household materials like lemon juice and salt to remove stains from white textiles in the past.  It was a little awkward carrying an open parasol through doors but it's extremely important not to close the parasol when it is wet.  The fabric can shrink and be strained further upon reopening.

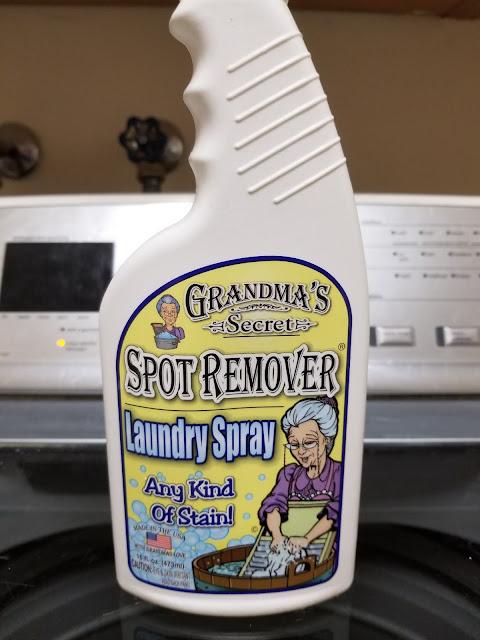
While the staining was lighter, I still wasn't satisfied and resorted to using my favorite stain removal product:

I cannot express how much I love this particular spot remover.  I've used it to get out stains that have been in fabrics for years.  Normally you spray it, work it in and let it sit about 10 minutes prior to laundering. I sprayed the entire cover of the parasol with Grandma's Secret Spot remover and set it outside in the sun for a while.  

After a couple of hours, I brought the parasol in, put some gentle laundry detergent in the tub and got to work.  First I wet the entire top.  Then I carefully supported the fabric underneath with one hand while using a nail brush on top to brush any of the stained areas.  This had to be done with extreme care.

I paid particular attention to the border stitching which was discolored.

I also brushed the trim at the top which was quite grimy and I scrubbed the little button loop strap.

I drained the tub and ran clear water in it twice, swishing the parasol and rotating it to make sure each section was rinsed.  I also used a container to pour water over the very top.  Then she went outside one more time to dry in the sun for a few hours.  Having an umbrella hole in my deck table was really a plus as I didn't have to worry about the wind taking her away!

Once dry, I folded her up and decided to add some wax to the wood.  The top of the parasol had been in water and I made sure that was completely dry.

Voila!  She is good as new!


I was thrilled with the result which was well worth the effort.  I was also fortunate that this parasol was structurally sound and that it was made of linen.  If you find yourself with an antique/vintage parasol that needs some love, it's extremely important to evaluate the condition of the textile before embarking on this type of project.  If you find a silk or wool one, you will need to spot clean it.

There are some good "recipes" for old fashioned cleaning formulas here.  For non washable textiles, you will need to find appropriate spot removal formulas specifically for that fiber.

Saturday, March 23, 2019

A little 1950s diversion

So I bought a cute 50s inspired dress from Modern Mantua Maker which fits perfectly.  I adore the dress however it's sleeveless and my old lady arms need to be covered, unless of course it's hot outside.  I decided a little bolero would probably do the trick.  I took a look at a vintage bolero in my collection  (pictured below) and figured it would be super easy to make.

The bolero has two seams on each side--one running the length of the top of the sleeve and the side/under sleeve seam.  The back is a t-shape with two vertical darts and the fronts are half of that t-shape with a horizontal bust dart on each side. It has a simple stand up neck band.  I decided that I didn't want the neck band and would prefer a v-neck so as not to obscure the boat neck of the dress.  I tucked one side of the bolero under and pinned in place to get the line I wanted.

Also--the bolero was lined but the sleeves were not.  I decided I would simply line the whole thing.

I folded the bolero at the center back and traced around it --both the front and back--drawing lines where the darts are.


I could feel the darts inside the original and was able to measure their depth so I slashed the dart lines and added the darts then redrew some of the lines.


I made a muslin and tried it on.  It was a decent fit but I decided to add a little to the girth of the sleeves since it would be lined.


I got some black pique and polka dotted cotton to make my bolero.  I stitched the outer fabric darts and seams and the lining darts and seams then bagged the lining and hemmed the sleeves.  It took just a few minutes.


And here it is over Modern Mantua Maker's dress:


Mission accomplished!