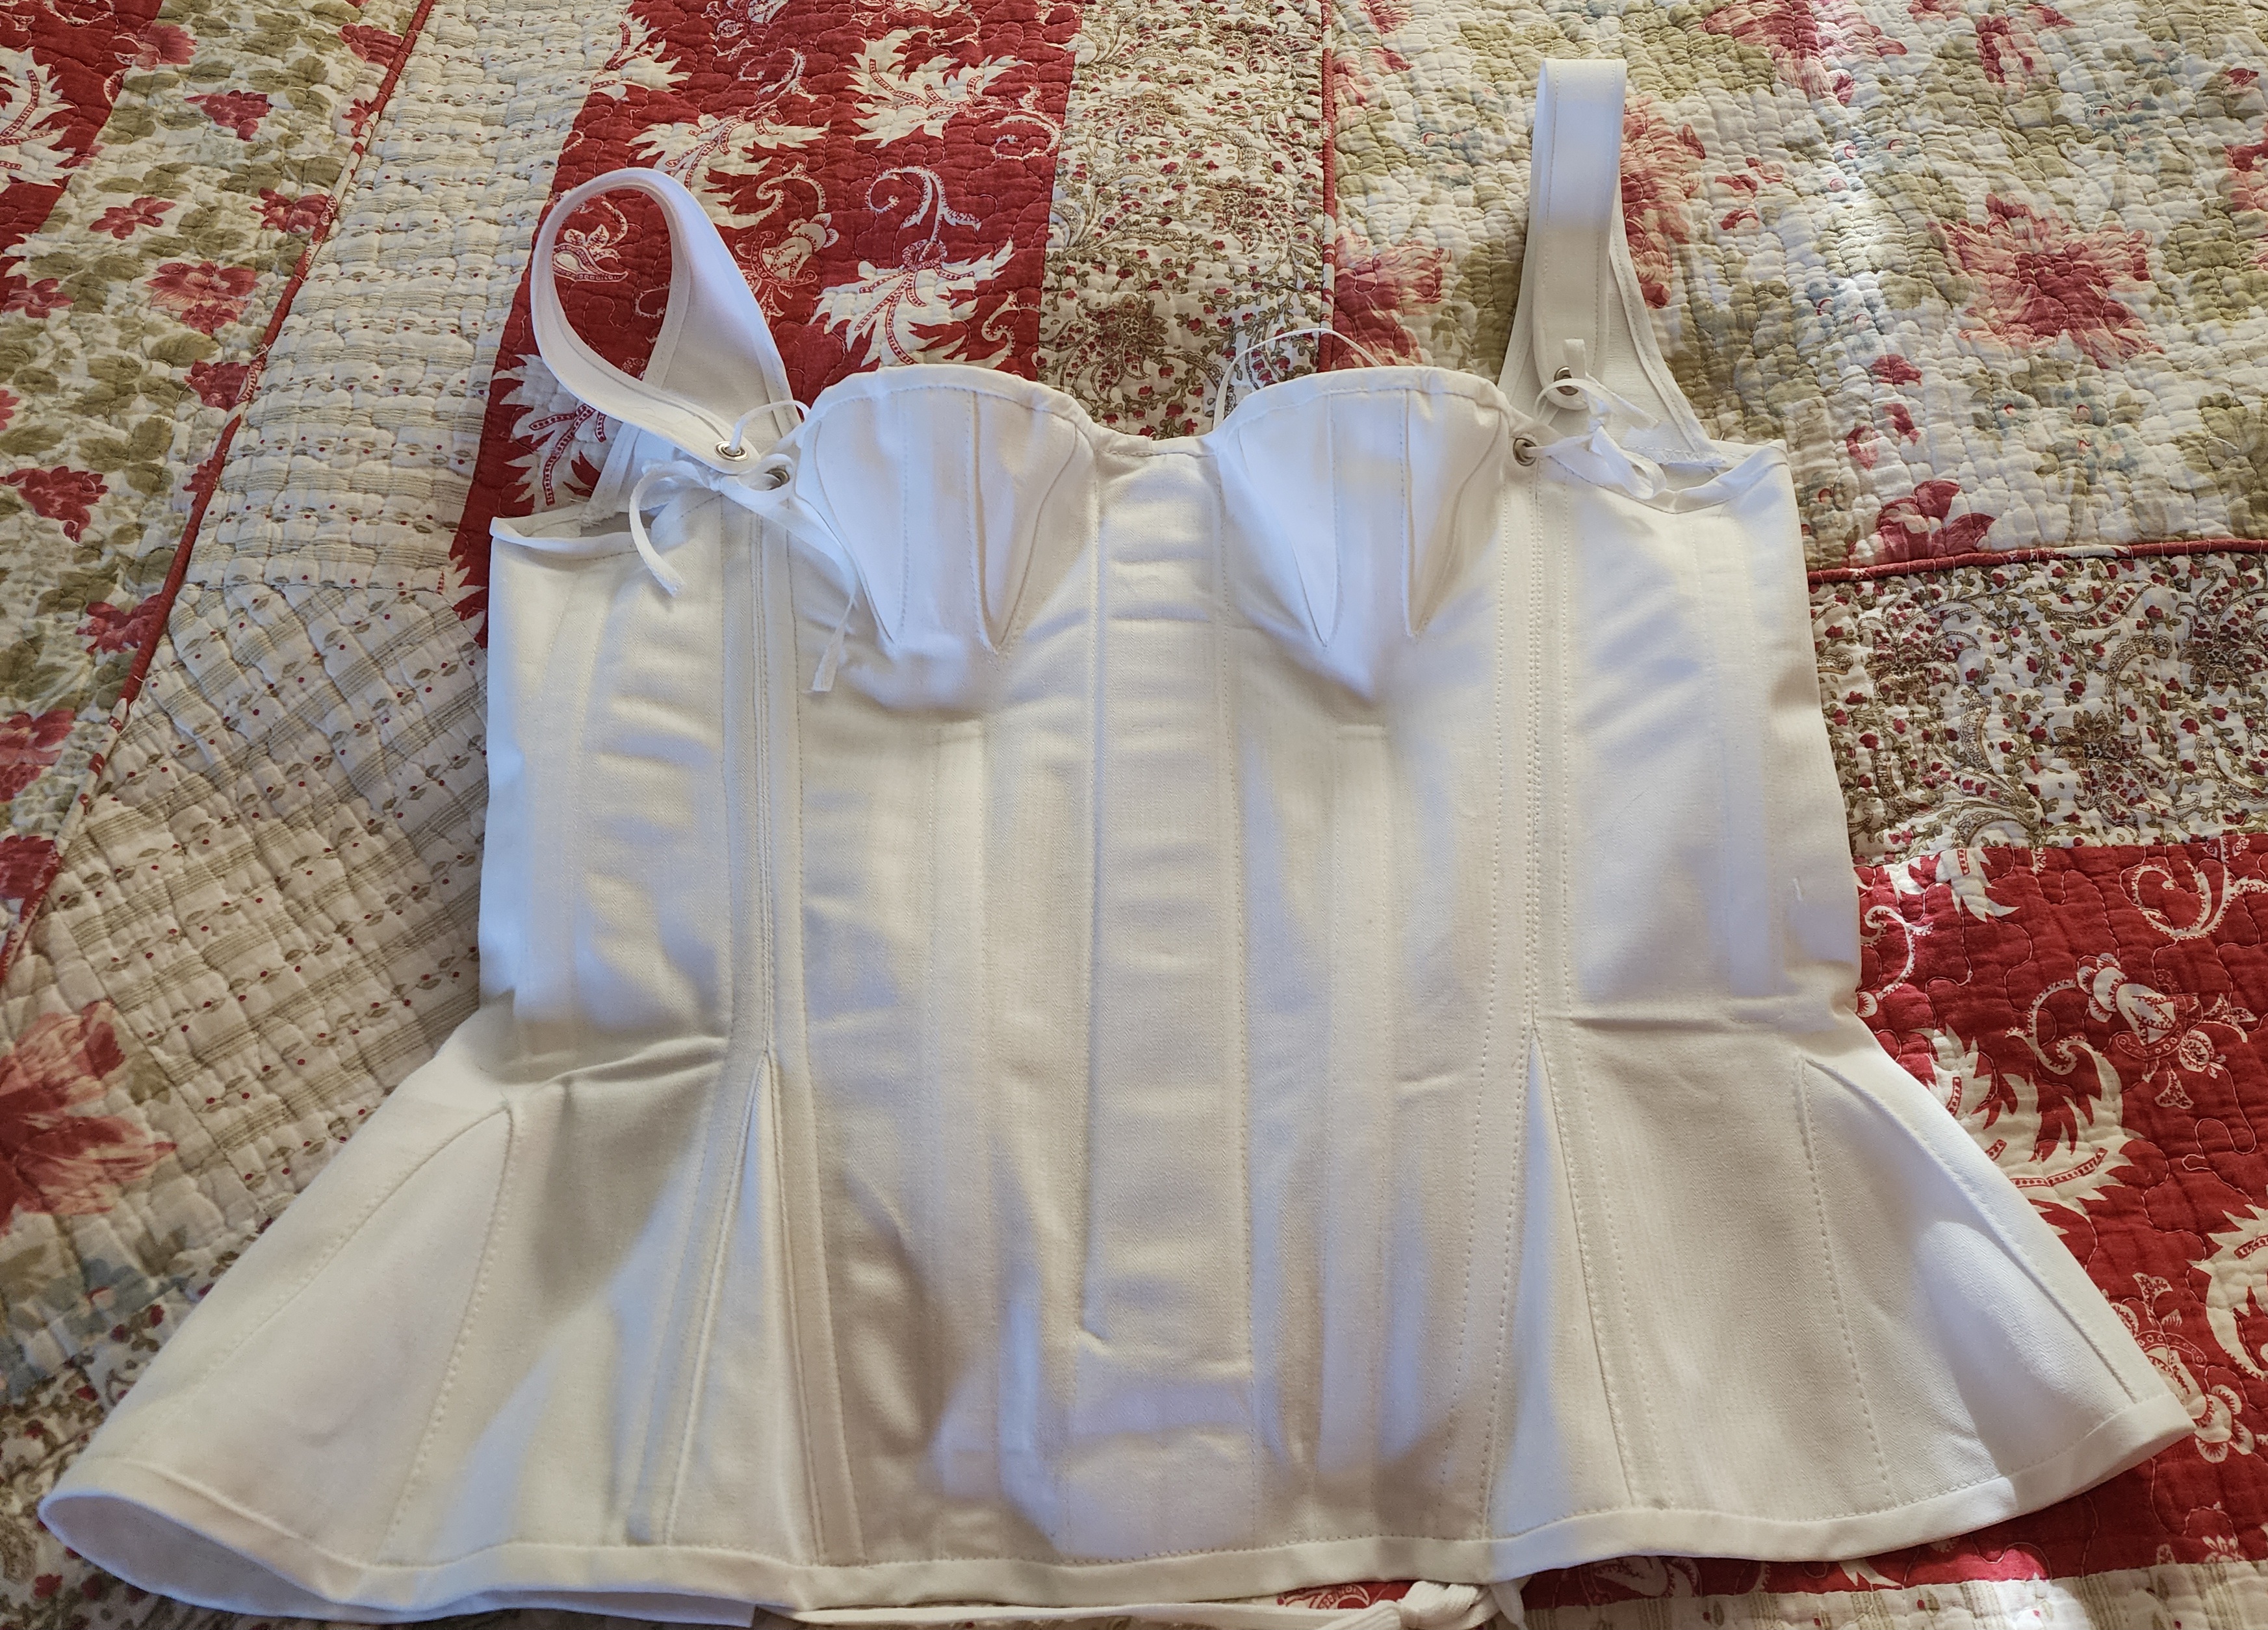
The Bicentennial of LaFayette's Triumphant Tour of 1824-25 is well underway. In order to prepare for the first festivities in Baltimore, I needed to make a day gown, an evening gown and the appropriate accessories. Before I could even start all that, I really needed to make the long Regency stays that I'd been planning for several years. The thing that was holding me up was trying to figure out a way I could dress myself as back lacing stays are problematic. I decided to go with fan lacing and it was life changing! I performed the pattern adjustments on the Red Threaded Regency stays patten and found they fit well.
Doing the fan lacing myself was made so much easier with the help of
this video that explained the entire process.
The next fitting issue involved the busk which wouldn't sit flat against my chest. Further research found that the busks were curved to go over the belly then curved slightly the other way to sit against the chest. I soaked my busk for 24 hours then gently curved it to the contours of my body and it made a huge difference! Now it sits flat on my chest and doesn't compress my stomach. These stays are super comfortable!
I started on my accessories first since I was still working out my gown details. I used this 1820s cap from
the Monmouth Historical Society as my inspiration.

Using this diagram, I drafted a pattern to fit my head. I had to enlarge this one quite a bit.
Materials for the cap: Swiss organdy and Swiss embroidered trim for the ruffles.
I didn't have enough of the trim to add the ruffle at the crown but I'm still happy with how this turned out.
Next up: Corded petticoat. I had to make this at the last minute. I bought 90 inch wide bleached muslin and cut one piece the desired length of the petticoat plus 5 inches. I trimmed the width to 80 inches the folded the bottom up 1/2 inch then 4 inches and pinned that hem in place.
I used this 3/16 inch upholstery cord and stitched 2 rows in at the bottom crease using a zipper foot. It was like stitching piping. I pulled enough out at the seam allowance so as not to catch the cord when sewing the seam. Then I stitched the large hem allowance flat. I stitched a back seam leaving about 5 inches open at the top and made a waist band.
Because 1820s gowns tend to be somewhat flat in front, I decided to pleat the petticoat to the waistband concentrating most of them in the back then I ran wide cotton tape through the waistband to form a tie.
Here are the finished underpinnings. I did end up adding a third row of cord later.
My bonnet is the Sophia Bonnet from
Timely Tresses. I purchased the buckram form and covered it myself.
It took me awhile to figure out how to trim it but I settled on white roses and a back bow. I ended up not adding ties.
I used this gown as my inspiration I love the shape of the gown and the sleeves. It's such a simple design. I planned to trim my skirt differently.
I ended up using the bodice to the Laughing Moon #138 pattern after not having luck with a different one. I like this pattern as it has 3 neckline variations. I drafted the sleeve to match that of my inspiration gown and used the skirt from the new Fig Leaf pattern since I had already cut those pieces out.
This is the Indienne cotton I decided on. I found petite maching blue cotton sateen piping at
Farmhouse Fabrics.
Used a horizontal stripe of the print as the gown hem trim. The trim was piped along both edges.
Piping was also added to the neckline, sleeve seam and the back seams.

The sleeve cuff trim matched the hem with the addition of a 1 inch wide ruffle.
Here's the finished outfit
My accessories for the day.
Here is the whole outfit!
I needed an evening gown 2 days later and had only a couple of days to make it due to some unexpected circumstances. Here are some inspiration gowns.
I had this white cotton in my stash
I made the bodice the same as the other gown with a short puff sleeve. I did add piping to the sleeve band.
I wanted some type of sheer trim but had very little time. I used silk chiffon cut in long 8 inch wide strips and draped them to the lower skirt piece which was then attached to the top piece with piping. I added some drapes to the sleeves then did a pleated piece of the chiffon across the bust before sewing the sleeves on. I didn't get any progress photos of this. The long leather gloves and Lafayette reticule were worn with this gown.
Here is the completed outfit.
With my husband and friends
I was quite happy with all of these projects. I found that I like the 1820s better than earlier regency except for the fact that the gowns all close in the back which prohibits me from dressing myself. Oh well! It's always something! I hope to make a couple more 1820s gowns for December events.
Vive LaFayette!


Wondered what you have been sewing these months! What a lovely collection you made. I find that I like the years 1818-1821, I can still get away with a half-stay and bib-fronts. Anna
ReplyDeleteI've needed new stays for Regency. My short stays were miserably uncomfortable and had no back support so I was glad to finally have reason to finally make these. I've had the materials for several years. The fan lacing is a real game changer. I could put them on, give one tug and tie in front whenever I needed to do a gown fitting! Making 2 more gowns from this era.
DeleteCapital! I'm going to try my hand at the Fig Leaf pattern for the bib-front dress for the autumn. I find I like to sew more during the cooler months, go figure! Looking forward to snapshots of your next couple of dresses! Anna
DeleteI really liked how you used the stripe on the vertical to add interest to the hem on the day dress.
ReplyDeletegood ine
ReplyDelete