I find it interesting to see how the construction of sack back gowns and jackets evolved through the 18th century. In my study of short sacks, I decided to use a different construction technique to explore this further. Let's look at some differences I noted in extant gowns:
Early sacks:
- no waist seam
- true side seam
- stacked inverted pleat at side seam
- integrated shoulder strap with folded robings
- stomacher
Later sacks:
- waist seam in front
- side seam moves to back (like an English gown)
- separate shoulder strap
- no folded robings.
- stomacher, faux stomacher, or center front closing
I would note that the sacks that have stomachers but no robings have trim where the robings would be.
For those who wish to make a sack using a pattern, the JP Ryan pattern is a good example of the early sacks. The example in the American Duchess 18th century dressmaking book is an example of the later variety with a stomacher.
I wish to make another short sack ca. 1780. Here are my inspiration images:
I hope to use this type of trim though it may be simplified.
I cannot see the waist seam on this one but the side pleats suggest that this one is made without a waist seam with the stacked inverted pleats at the side. Note the trim around the pocket slit in the jacket.
No waist seam on this one but it is an updated style with no robings. It appears to not have a waist seam.
Note that this is a center front closing sack trimmed in such a way as to suggest a "faux" stomacher. This gown has a waist seam in the front.
Let's look at this in a little more detail. The waist seam is clearly visible.
The back seam placement is like that of an English gown. The one difference is that the back piece is not cut at the waist.
I decided to make my short sack using this type of construction. Since my dress form isn't perfect, it's difficult to drape to the body so I decided to use my usual method of draping to a fitted lining. I've made many different styles using this method, using the lining from my
favorite gown pattern. Plus I hate enlarging scaled patterns. Why not use one that I know will fit! I'll be able to just use the front bodice and sleeve pattern pieces for the rest of the gown.
The jacket will be made with a center front closure and trimmed to imply a stomacher. I've modified my gown pattern to make center front closing gowns and I will alter the shape at the waist to one that I like for this project.
The first part of this project involves making the back pleats. The back panel, which has a center back seam, needs to be at least wide enough to make all the pleats and extend past the side back bodice seam. I started by making my back lining, then I pleated the back pleats and pinned them to the lining, stitching them down using a spaced back fish. I followed the pleating sequence on the JPR pattern but the one in the American Duchess book or on
this page work just as well.
Here you can see the finished pleats as they are stitched to the lining. I pinned the pleats in place so I could make sure I had all the fullness then I smoothed the excess fabric nice and flat, pinning around the perimeter of the lining.
Inside. The back lining has been basted around the armhole and side edges, stopping about an inch from the bottom. The back lining will be hemmed later.
Lastly, I made a line of spaced back stitches in the back under the pleats to secure the fabric to the lining. I started them about an inch above the the lining edge. This detail is important as it holds the fabric to the body allowing the pleats to billow out in the back.
Next, trim away the excess back fabric. Trim along the side seam stopping twice the seam allowance distance from the bottom of the lining. For me, my seams are 3/8 inch. I'll stop an inch from the bottom for good measure. Make a horizontal cut parallel to the hem. It looks like I'll probably be cutting quite a bit off of the length on this one! Turn under the bottom edge of the back lining (3/8 inch for my piece) and secure with running stitch.
Next step--adding the front bodice pieces.
Press under the seam allowance on the neck edge, waist edge, side seam and center front on both bodice pieces then baste the allowance at the waist edge.
Lay the bodice pieces over the side edges of the back bodice piece (wrong side of front over right side of back. Stitch seam with spaced back stitch from the right side.
Make sure NOT to catch the loose part of the back lining at the bottom.
Attach lining shoulder strap to the back bodice per your usual method. I chose to do this step now so I could pin the jacket on my dress form for the next step.
The next step will require some draping. We will be adding skirt extensions. It appears that most of these garments have fairly deep inverted box pleats at the side to hide the pocket slit. You should have the pocket slit location marked on your bodice piece. You will want the skirt extension seam lined up with this mark. I've chosen to eliminate the pocket slits because I always manage to catch them on doorknobs!
I've torn a piece of my fabric the full width by the length of my skirt extensions.
Pin the front of the lining shoulder strap to the front bodice on both sides and place the jacket on your dress form then play with your fabric extensions. I just needed extensions that were 12 inches in width. I cut 2 and rounded the front edges at the bottom, hemming the front edge. Then I seamed them to the back extensions. I pleated the added extension to complete the double pleats at the side seam and made sure the front edge lines up with the mark I made on the bodice front. I pinned the skirts in place and tried it on the dress form to check placement. When I was satisfied I backstitched the skirts in place. I also rounded the front edge of the lower front "skirt."
The bottom edge was narrowly hemmed and the shoulder straps were also applied. I constructed the same cuffs that I used in the
last project. The trimming will be different however.
Next came the trim. Here are my inspiration pics:
My trim will be sheer. There are many French fashion plates in the 1778 and 1784 editions of the Galleries de Modes that show short sacks, jackets and gowns with sheer white trim. This is one from 1778.
This short sack, also pictured full length above, has a ruched trim that is a narrower width around the neck and down the front which gradually widens to a wider width around the hem.
This sabot sleeve detail is what I'm going for with a sheer trim.
For the trim on the jacket itself, I measured the perimeter of the jacket going around the neck, down the front (not on the edge as this is a center front closing jacket) and around the hem. I computed the trim to have a ratio of 2:1 so the gathers would have enough fullness. I ended up dividing it into sections--going from the waist seam up around the neck and down to the waist seam on the other side--cutting strips to equal twice that measurement and 2.5 inches wide. Then I measured from the waist seam down to the bottom edge, cutting two strips twice that length and graduating from 2.5 inches wide to 4 inches wide. Lastly I measured the bottom hem and cut strips to equal a little over 1.5 times that measurement by 4 inches wide. I made the ruching around the hem less full where the side pleats and watteau pleats were because I thought that twice the fullness would be too bulky for the pleats to be able to lay correctly. Next, I seemed these pieces all together and roll hemmed the long edges. I folded the long edges to the right side 1 half inch to whip gather along the fold. This totaled almost 10 yards of trim.

Next the trim was pinned to the jacket in strategic places and whip gathered in sections, doing both edges of each section and pinning in place. After a large section was gathered to the jacket I went ahead and tacked it in place. The sleeve trim was a bit tricky since the sabot cuff is shaped and doesn't measure the same at the top and bottom. I basically took the pattern piece and cut and spread it, adding about an inch at the top and bottom then whip gathered both edges.
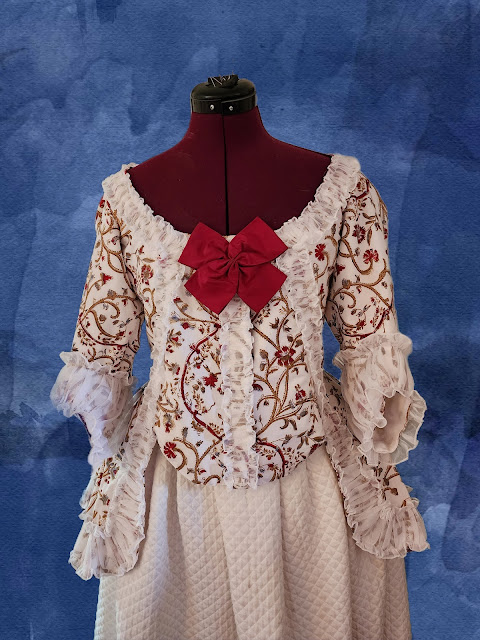
I ended up adding a narrow trim strip down the center front as an after thought. I think it completes the look. Here's the finished jacket on my dress form which doesn't fill it out:
Now for the petticoat. I made a standard petticoat to fit over my late 1770s bum pad. This is a shorter petticoat as the fashion dictates for the year 1780 which is when this will be worn.
I decided that a sheer ruffle 8.5 inches wide would be the right proportion. Since my petticoat is made of 3 widths of 42 inch fabric, I cut 5 strips of 45 inch organdy 9 inches wide for the ruffle and started hemming each long edge. I find it easier to hem each piece separately, starting and stopping a few inches from the edge. Once they were all hemmed, I seamed them together with tiny felled seams and finished hemming in the seam area. This made the project more portable since I don't have yards and yards of trim puddling on the floor.
The ruffle was whip gathered to the petticoat.
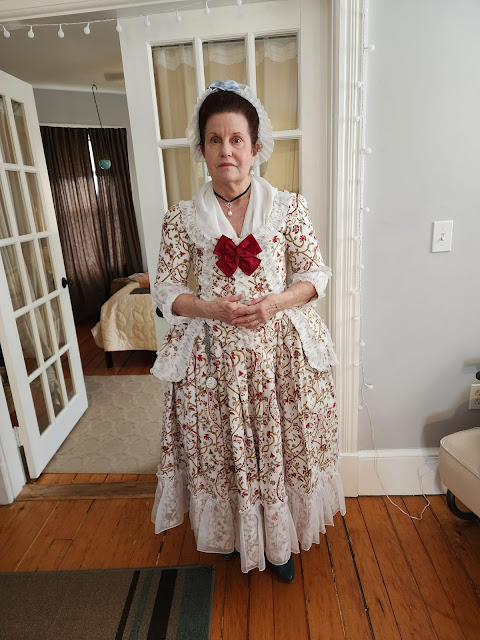
Here is the finished jacket and petticoat. The first picture shows the hat that will be worn with this outfit.
It needs a good steaming then it will be ready to wear!
Final thoughts: I'm very happy with this outfit. It's very comfortable and I love the style. It's certainly not as practical as most of the historic garments I make due to being a very iconic French fashion from 1778. I'm sure I will get enough use out of it however. It was interesting to figure out the construction and study the evolution of short sacks in general.


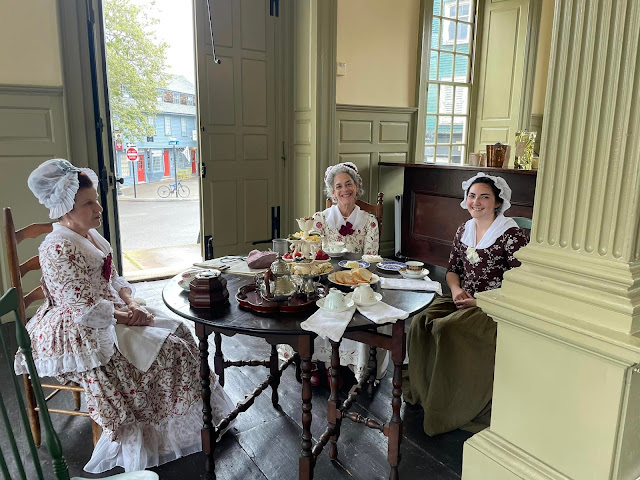
Very frothy! I like the cotton print with the vines and pops of blossoms. Makes for a nice late summer ensemble.
ReplyDeleteI took your photo minutes before with Sandy I'm @HarperSeams on Instagram!
ReplyDeleteI find it fascinating how construction techniques evolved over time.
ReplyDelete