
The first piece of my Edwardian underpinnings is complete. After doing the necessary research, I settled on the Truly Victorian TVE13 corset which is dated to 1913. Past patterns has this same corset as a pattern but I really like the stitching and fitting instructions in Truly Victorian patterns. I also purchased all of my materials from corsetmaking.com which included coutil, binding, boning tape, boning, grommets and busk. It's important to measure your busk length by sitting down with a stiff ruler and seeing how long the busk can be without impeding your ability to sit comfortably. I believe mine was 11 inches.
The nice thing about corsets of this era (as opposed to 18th century/Regency) is that there are a lot of vertical seams which makes fitting to the idiosyncrasies of one's body easier. I also like that they are multi sized so you can trace the lines that fit your body. I often wear 2 sizes bigger in the hips!
After measuring my body and flat measuring all of the pieces, I added to some pieces to accommodate my hips and waist, cut out the pattern and stitched it together. I settled on cheap, heavy weight off white denim from Joann's for my fitting shell. Because this corset calls for a busk, I just pinned the busk into place between the corset and front facing.


For the back lacing, I just took eyelet tape and machine basted it in place. I figured I can rip it out and use it for fitting other corsets.

Finally, to save time, I just taped the boning in place. I purchase my spiral steel boning in 10 yard rolls as I use it in modern evening wear. I'm able to cut it with bolt cutters and I can apply the metal tips with 2 pairs of pliers. I also find it helpful because I often have to alter the waist length of garments which results in my needed a different length of boning than what is called for in the pattern.

The first fitting was pretty close. There is some pulling across the thighs--a common issue for me.

The fit is pretty good above the waist.
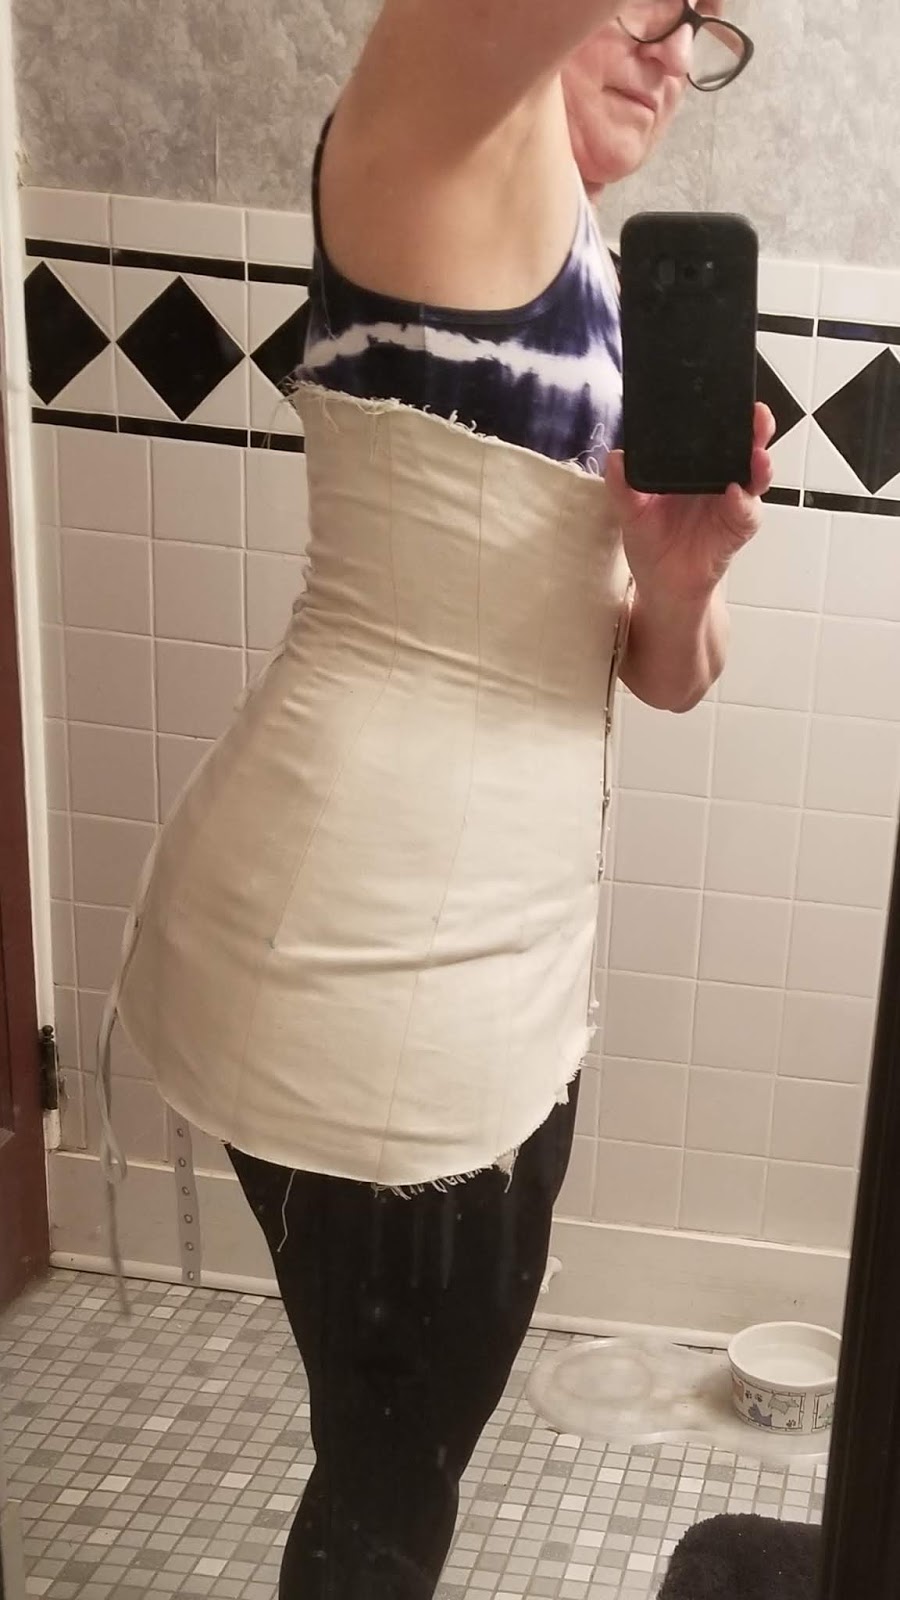
The waist is pulling in the back but it is smooth in the front. This tells me that the side and side back seams need a little added to them.

The additions to the side/side back seam pattern pieces were made and the corset was cut out of white twill coutil. After inserting the busk, I used boning channel tape in double width, stitched it down the center to make two channels then stitched it to the wrong sides of the seams as indicated in the pattern. I used the satin seam binding on the bottom edge, inserted the boning, then bound the top as well.
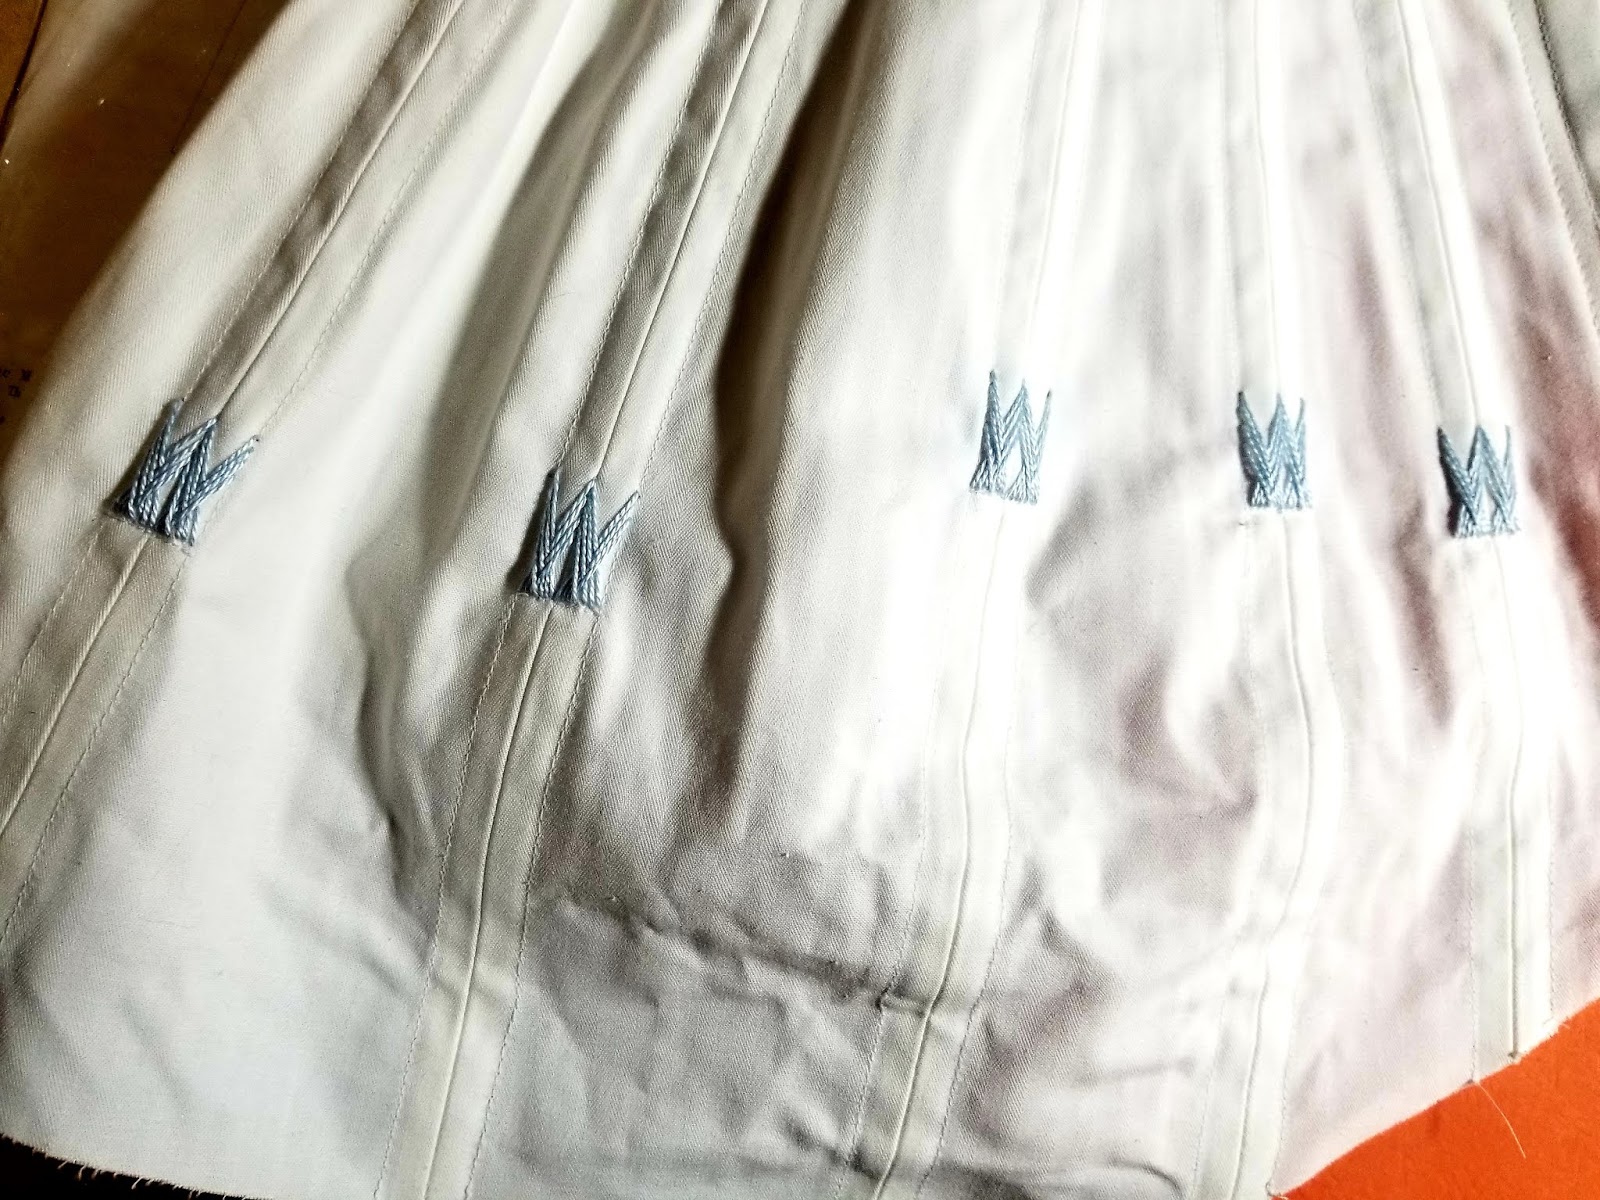
I decided to do a basic flossing design at the bottom of the boning channels using the diagram shown below.

I used pearl cotton from Joann's to do the flossing. It's fairly thick and hard to pull through the fabric so needle nose pliers came in real handy for pulling the needle!

You can see how the boning channels are different lengths.
I also added garters that I got at Manhattan Wardrobe Supply. If you've not seen this website, I highly recommend checking it out. There are all kinds of helpful items there.
Here's the finished corset:


Overall, I was pleased with this project. I was leery of making a more "modern" type corset--having only made 18th century and Regency stays. I really enjoyed this project and hope to complete an early Edwardian and natural form era corsets in the future.
It turned out really nice ! Great job !
ReplyDelete