
My first task was to study some pics of extants.


You'll notice that they are all similar in style. The top picture is of a center front closing gown with robings which give it the appearance of having a stomacher. There were a number with long sleeves. Basically, they look like any English gown with a closed front skirt. I decided on a style representative of 1780 - 1781.
The J.P. Ryan pattern English gown pattern does have instructions for adding what they refer to as an apron front to make a round gown. I didn't care for those instructions. I also studied the scale pattern in Fitting and Proper. Unlike the JPR pattern in which the skirt is attached just as an English gown with an added drop front apron, The F&P gown seems to have the skirt attached to the back of the bodice to the pocket slits with the rest of it being constructed as a half petticoat. I figured this would be easy to do using my favorite gown pattern and can really be done with any English gown pattern. Studying the F&P scale pattern, I determined that the entire fullness of the skirt was about 135 inches.
The pattern I used has about 120 inches in fullness for the open robe. My petticoats typically have 120 - 130 inches of fullness. Since I plan on wearing a bum pad, I wanted to make the skirt a little fuller. I cut the back panel a couple of inches wider than indicated in the pattern and decided that I would add a 30 inch front panel to make the closed front.
I cut the gown out, using the bodice pattern I had outlined in this post as I wanted this gown to be a center front closing gown.
My fabric choice posed a few issues due to the prominent wide spaced stripes. I had to take that into consideration when cutting out. Stripes needed to match as closely as possible on the sleeves and they needed to be symmetrical in the en forreau pleats. The stripes also were distracting when appearing on the smaller pieces --shoulder straps and back facing--so I made sure to cut those pieces in a way that the stripes won't detract from the finished appearance.
I began constructing the gown following the regular English gown constructions in my pattern.
The first change in procedure came when attaching the skirt panels to the bodice.
Typically, you mark the bodice where the pocket slits match and where the skirt front edge goes, pleat the entire skirt and line the marks on the bodice up with those on the skirt. For this gown, the pocket slit mark is the only one needed.
The skirt panels are pleated to the pocket slit, pinned to the bodice then stitched on with a back stitch. The rest of of the skirt will be dealt with later and will just hang free at for now. At this point, I have not added the front panel just to cut down on all the fabric that gets in the way.


Once the back of the skirt is sewn on, finish the bodice and add the sleeves according to the directions in the pattern you are using. The front panel will be added at the end.
When your bodice is finished, sew the front panel to each of the side panels. You now have what resembles half a petticoat hanging free.


Use whatever method you normally use to pleat your petticoats and pleat this part of the skirt as if it is the front of a regular petticoat. Be sure to first measure the width of the back of the bodice at the waist. You will want that to overlap the front skirt by a little. Baste the pleats in place as you will want to try the gown on and check for fit.

Put the gown on a dress form or try it on and someone assist you. You will want to have the gown over any clothing you intend to wear with it. I put my gown on my dress form over my shift, stays, bum pad and under petticoat. You need to pin the front petticoat to your stays and pin the front bodice closed. The object is to see that the pocket slits line up smoothly and that the back overlaps the front evenly.


Once you are satisfied with the way the skirt lays, mark the waist line on the front of the petticoat. You will place your waistband on that line. You can use whichever method of applying a waistband that you like. I just whip stitched half inch linen tape to the front of the petticoat and folded down the excess pleated material. The tape is long enough to wrap around the back and back to the front.

Check your hem to make sure it is even. Due to the size of my bum pad, my gown had to be almost 3 inches longer in the back.


One thing that threw me was all the fabric in the gown as it isn't open and has extra fabric in the skirt. The gown was worn over a lightweight linen under petticoat, bumpad, shift and stays. To wear it, I had to first put on the gown bodice. You can see how the skirt just hangs!
Next I took the front ties, wrapped them around the back and back to the front where they were tied then tucked into the skirt.

Then the gown was pinned closed like a typical English gown.

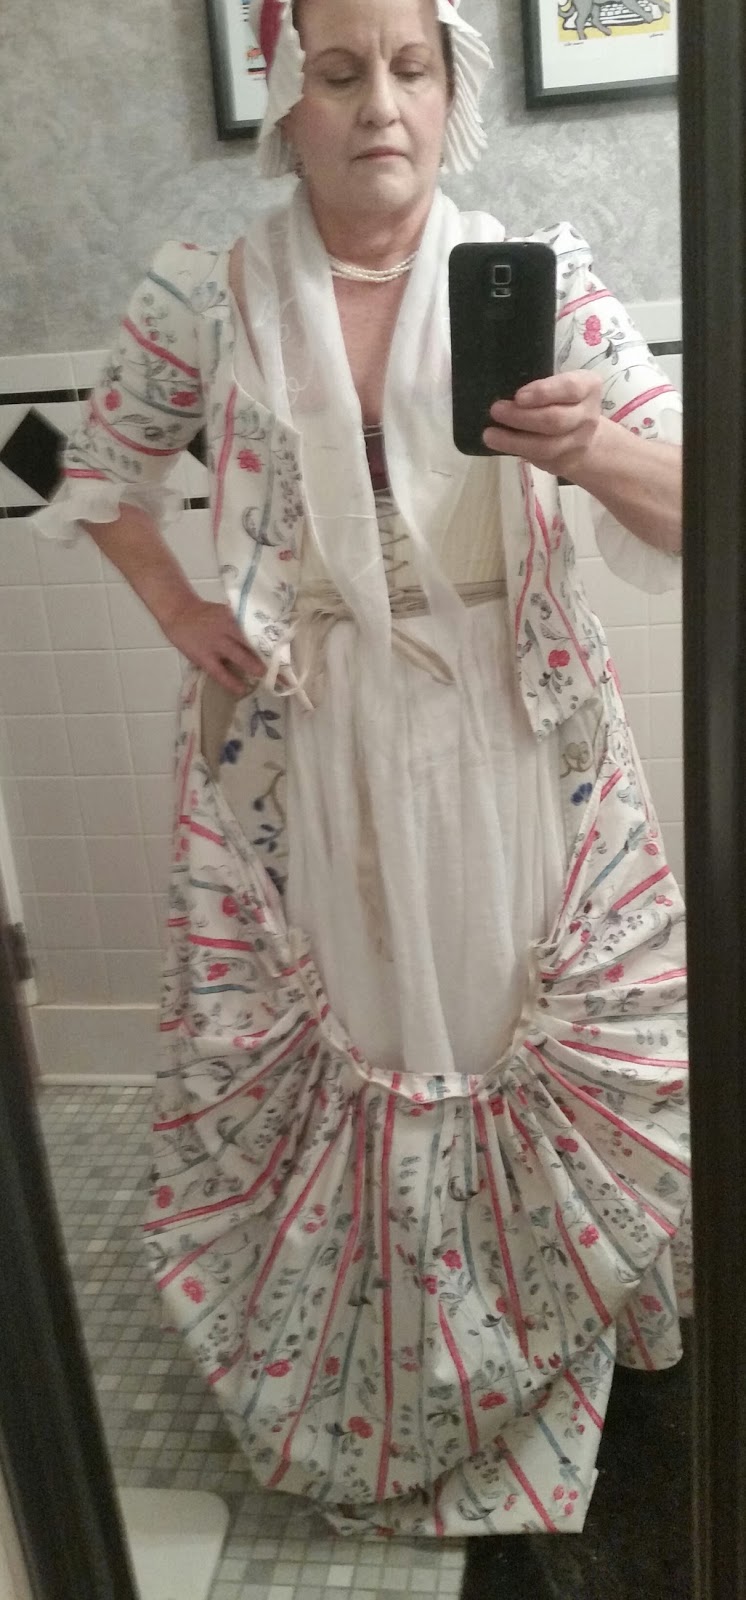
I was very pleased with the way this gown turned out. It eliminates one layer of skirt which makes it nice for summer. I wore this gown to celebrate Independence Day at Mount Vernon. Here it is all finished:


Thank you for sharing your gown!
ReplyDelete