Saturday, November 14, 2020

Renovating Gloria's Home: Housing a Special Needs Bird

If you're a regular reader here, you are probably aware of Gloria, my 34 year old Blue Front Amazon Parrot.  We adopted her in Jan. 2016 at the age of 30. The last couple of months have been trying for her.  On August 18, I took her to her regular avian vet for her annual physical which was pretty uneventful.  After the doctor examined her, she was taken into another room by 2 vet techs for a blood draw and a nail trim--both of which can be unpleasant for her.  Normally the doctor does these things but the last time we were there a tech did it in my presence. 
 
Due to covid, I couldn't be in the room with 2 techs.  When I got Gloria home, I put her in her cage only to watch her fall off her perch and struggle to navigate her cage.  Something was clearly wrong.  Her right leg looked like it was at an odd angle or was twisted and she fell off her perch so I called the vet and took her right back.   She had a standing xray which showed arthritis and she was given pain killers.  Over the next month, with exams by another vet and an xray under anesthesia, we learned that she suffered from a hip dislocation and surgery was probably too risky.  Plus there was significant scar tissue due to the time lapse since the injury.

I was nervous about putting her in her cage until this problem cleared up so I pulled out her travel cage and put it on top of her cage.  She basically roosted like a chicken and got to work chewing the perch in her travel cage.   She ended up destroying 3 perches and spent most of the time on the floor of the cage.

Occasionally, I would find her sitting on the perch, albeit she would roost.


After a while she started climbing around the cage and she chose to climb on top where she spent much of the day.

I still didn't feel she was ready for the big cage.  She struggled to climb but over a few weeks she has gotten quite adept at it.


You can see the angle of the injured leg here.  Normally she will sit on the edge of the dish with both feet

As she's gotten more confident, it became time to start planning a transition back to her big cage.  


Here is the old set up for her cage.  This cage has a removable play top where she has always spent much of her day.  I leave the nesting door open so she can go in an out.  The big door stays closed because we have cats.  In looking at her current set up, I see a couple of problems right off the bat--there are gaps between the perches and many of the perches are too narrow for her.  I also worry that the rope perches won't feel secure enough to her.

As I planned the remodel for her cage I decided to begin the transition by giving her time on her cage top.  I was surprised to see her spending time on the wooden perch.  She had chewed away both ends of this perch and always preferred to sit on the metal support.  She also likes to sit on the rail around the cage.  Her preference has always been thin metal perches.  I think this may be due to the fact that the cage she came with had 2 skinny brass perches.  I suspect that she had that cage for the 30 years prior to living with us.

 So making a plan to renovate her cage for a special needs bird involves the following considerations:

  • The bird's physical abilities and nature of the injury/disability
  • The bird's daily routine 
  • How the bird uses the items in the cage
  • Safety
Gloria struggles to perch.  She roosts on her perch when she's on it.   I don't think she feels secure enough to sleep on her perch as I fine her roosting on the floor in her travel cage--often in a nest of shredded paper towels

Gloria isn't an overly active bird and never has been.  She hangs out on her cage top and chews some favorite toys.  When I go into the kitchen, she flies to a rolling perch so I can take her in there with me. She's a pretty chill bird who just wants to hang out with her people.

Gloria spends a lot of time sitting on the edge of her dishes and always eats in that position.  Her preferred perches are the straight wood perch on the left and the skinny rope perch on the right.  She never goes to the bottom of the cage.  If she's at the bottom, it's because she's fallen, which before her injury was rare.

My biggest worry now is that she will fall when navigating from perch to perch or while sleeping.

So my plan was to get some thicker wood perches and some shelves to go under the perches.  I noticed that someone had soft covers for the shelves that slip on and off for washing and make the surface soft on the feet so if she prefers to sleep on the shelves, I'll make covers.

As I waited for the items I ordered to arrive, I put Gloria on her play top to get her used to her old routine.  She even got adventurous and took to flight a couple of times.  The first time, she flew around the corner, apparently wanting to land on the kitchen window ledge over the sink but she ended up grabbing the valance with her beak--waiting for me to rush over with a stick to rescue her.  The next time she flew to the floor which is her usual flight path.  I let her wander around for a while, monitoring Luna (cat) closely to see how she managed to walk.  It was definitely more labor intensive.  Gloria has never chosen to fly much.  I think her wings may have been clipped in her first home where she lived most of her life.  At our house she typically flies to her big rolling perch, which she hasn't done yet.  

Over the 2 1/2 months she's been in the travel cage, she has started sitting on the wood perch more which is a positive sign though she moves to the floor during the night as that's where she is when I wake her up in the morning.

So here is the final layout for her renovated cage.  I kept it as similar as the old layout and used most of the same things.  The main task was to have shelves under the areas where she hangs out and sleeps and to make any gaps between the perches smaller and easier for her to navigate.


The right side of the cage below:  I switched out her java wood perch for one that was in her old cage as the shape was flatter on top and allowed me to rest the shelves on it.  I installed the straight bottlebrush perch which has some littls branches on the end.  Those seem to help her when navigating from the rope perch as she can grab them with her beak to pull herself over.  I eliminated the small rope perch in front of the food dish but may end up putting that back as the dish sits higher above the shelf and it's harder for her to pull herself up on.

On the left side of the cage, I used the same perches--the straight one and the small java wood perch and managed to put shelves under them.  The straight perch is often where she would sleep so I wanted to definitely keep that in the same location.  I slightly repositioned the rope perch to get rid of the slack as I felt she needed to have more secure footing.


I finished her cage yesterday afternoon and she explored a bit, had a snack, then climbed out the nesting box door to her favorite napping spot.

She did climb in and out several times.  I noticed at bed time, she did not go into the cage.  Before her injury, she'd always climb in around 9 pm or so, have a snack then ring her bell to be covered.  My thinking was that she was afraid to sleep in the "new" cage--especially feeling a bit vulnerable due to her physical condition.  I brought the travel cage over and she went right in so I think I'll phase her into sleeping in the big cage.  This morning when I got her up, I put all of her food in the big cage and she went right in so she'll spend the day going in and out.  I suspect she'll sleep in the travel cage for a few more days.

Here she is enjoying her nutriberries.


While I know she'll never be back to "normal," I hope she will enjoy more of her old activities.  She did spend time shredding one of her favorite toys both in the travel cage and on the play top. She's also started wanting her baths.  I'll know she's more herself when she gets back to shredding egg cartons which are her favorite "toy."

I hope this post will be of help to anyone who finds themselves in the position of suddenly dealing with a special needs bird.

Friday, September 18, 2020

Quilted Petticoat, pt. 4

More quilting:


Some border pics:


I've also stitched a variety of flowers which I didn't photograph.  I'm about 40% done with the figures/border.


I'm afraid to stop and work on something else as I'm the queen of unfinished projects and I have too much time invested in this one already.  I'm just going to keep on chugging along!

Thursday, September 10, 2020

Quilted Petticoat pt. 3

Let the stitching begin!  I searched and searched and found a lap quilting hoop that I really liked.  As luck would have it, Luna found it before I could use it.  I like this hoop because it sits flat on my lap and has a sturdy 14 inch hoop attached.  I don't have to fudge with adjusting an angle and it has plenty of room to put one hand underneath.


As I started stitching, I found one challenge--my silk twist quilting thread is either too thick or too twisty to successfully thread my tiny betweens needles that I prefer to sew with.  I even have the John James big eye quilting needles but this thread won't go through the eye. I bent one using a wire needle threader.  I went with a size 10 embroidery needle which was nice and thin but longer than I prefer and that worked fine until I broke both of my wire needle threaders threading that.  I switched to a size 7 embroidery needle which has worked fine.  I'm going to have to experiment with some other brand needles and different threaders.  The longer needles are fine for stitching the figures because I'm not loading the needle with multiple stitches.  So many of the stitches change direction every stitch or two so it's a matter of literally sewing one stitch at a time anyway.

Here you can see the structure of the thread itself.  


As luck would have it--I received some new needles today--size 10 betweens by Bohin--along with 2 new Clover wire threaders.  They work perfectly!  The eye on the Bohin needles is wider than my usual John James so problem solved!

Here are a few pics of what I've done so far:

From the border:


Some of the figures in the squares above the border:


I'm really enjoying stitching these little figures.  I think had I gone with my first design plan--a featured braid for a border and diamonds, I would've gotten incredibly bored.  I'm enjoying the fact that each day brings different designs to stitch.  It was more work to plan and mark but much more enjoyable to stitch!

Sunday, August 30, 2020

Quilted Petticoat, pt. 2

Part 2:  Marking the design on silk

One of the most daunting tasks of of this project is that of marking the quilting design on the silk.  My original plan was to use a stencil and a product called Quilt Pounce, which is a white chalk like powder that goes into a pad.  The pad is rubbed on the stencil and the white powder then shows up on the fabric.  It looks like white chalk but the best thing about it is that it is heat removable.  I had tried it on black silk and on a lighter silk and it seemed to work.  The other thing that appealed to me about this product is that because it looked like chalk, I could work on this project at events.

Since choosing to go with a different design, I have 2 options:  trace the design with some sort of removable marking pen/pencil or cut stencils and use the Quilt Pounce.  If I were stitching a repeating design, I'd use a stencil.  However since that's not the case, I have to trace it using a removable marker of some kind.  I have a number markers that I use in general sewing that are typically cold water soluble.  I've used them on silk but the marks were always inside the garment and not visible for that reason.  I've never had any qualms about removing the marks with water and I've always had good luck with simply dampening a wash cloth and dabbing the marks with cold water.

This project has other concerns:
  • The project will be subject to a significant amount of handling and the marks need to be able to withstand that handling without rubbing off
  • In the event that the marks cannot be completely removed, they need to be obscured by the stitching
  • The marks should look like something that could have been used in the 18th century if I wish to work on this project at events.
Given that we're in the middle of a pandemic and we aren't having events, the last concern is not relevant for this project.   I set out to do some testing of various products on my silk.

Here is my chosen selection of markers to test:  water soluble graphite pencils, heat erasable pens (these got particularly high reviews), a water soluble chalk type mechanical pencil, fine point blue water soluble marking pens.


Let's look at how the marks look.

The water soluble graphite pencil was easy to see and seemed to withstand rubbing the fabric.  My one concern about this product is that these are traditional pencils that have to be repeatedly sharpened thus not having a consistently fine point.  The thickness of the line will be harder to conceal with stitching.  I do like this product though.

The heat erase pen was eliminated at this point.  The lines are not even and would not work well for tracing detail.  I can see how this would be a nice product to use for marking things like darts or pleats inside a garment but I was disappointed in this product overall.

The water soluble chalk pencil made a nice thin line that was readily visible.  It did rub off a little but not completely with handling.  I like this product.

The fine point blue markers made the line that was easiest to see.  These have always been my marker of choice for general sewing.  These marks do not rub off with handling.


So with one eliminated, let's see how the remaining 3 look with stitching.  I used my silk quilting thread to see if the stitching would obscure the marks should the marks not be able to be removed.

First the graphite.  I stitched over a solid wavy line.  The color of the graphite blends well with this particular shade of blue and I found that it wasn't particularly noticeable.   I'm still concerned with the thickness of the line though and I don't like the idea of having to constantly sharpen a pencil to get a fine line.

The water soluble chalk pencil marks are well obscured by the stitching,  This fabric isn't dark enough for this to be too noticeable.

The blue water soluble marker is also pretty well obscured though a little visible.

The last test was that of removing the marks.  For kicks, I did test the heat removable pen and it failed.  It left a fair amount of residue.  I do suspect this wouldn't show if it were quilted but I really don't want to have to iron a quilted petticoat.

The graphite pencil marks came out after dabbing with a damp washcloth.  You can see where I also removed some of the lettering.

The water soluble chalk pencil marks were less visible after dabbing them but they did not completely remove.  They are still not visible with the stitching.

As expected, the blue soluble marker lines came completely off.

At this point, I was thinking that I'd use the blue markers until I received some Bohin brand water soluble chalk pencils in the mail the next day.  Here are the sample marks. They are more intense and crisp than the Dritz chalk pencil.  I rubbed them with different textiles and my hands to check their durability and the marks stayed on so I'm going to go with them to mark the quilting design.


I used the blue markers to mark a dotted line 10 inches above the bottom raw edge of my petticoat to use as a guideline.

Next I tried out the light tablet to see if the design showed through the silk:

I couldn't believe how clear the images were!  I pinned the paper pattern behind the fabric and worked on sections of the border.  This was pretty time consuming--I spent about 3 hours getting the whole border traced.  You can see how clear the marks are:


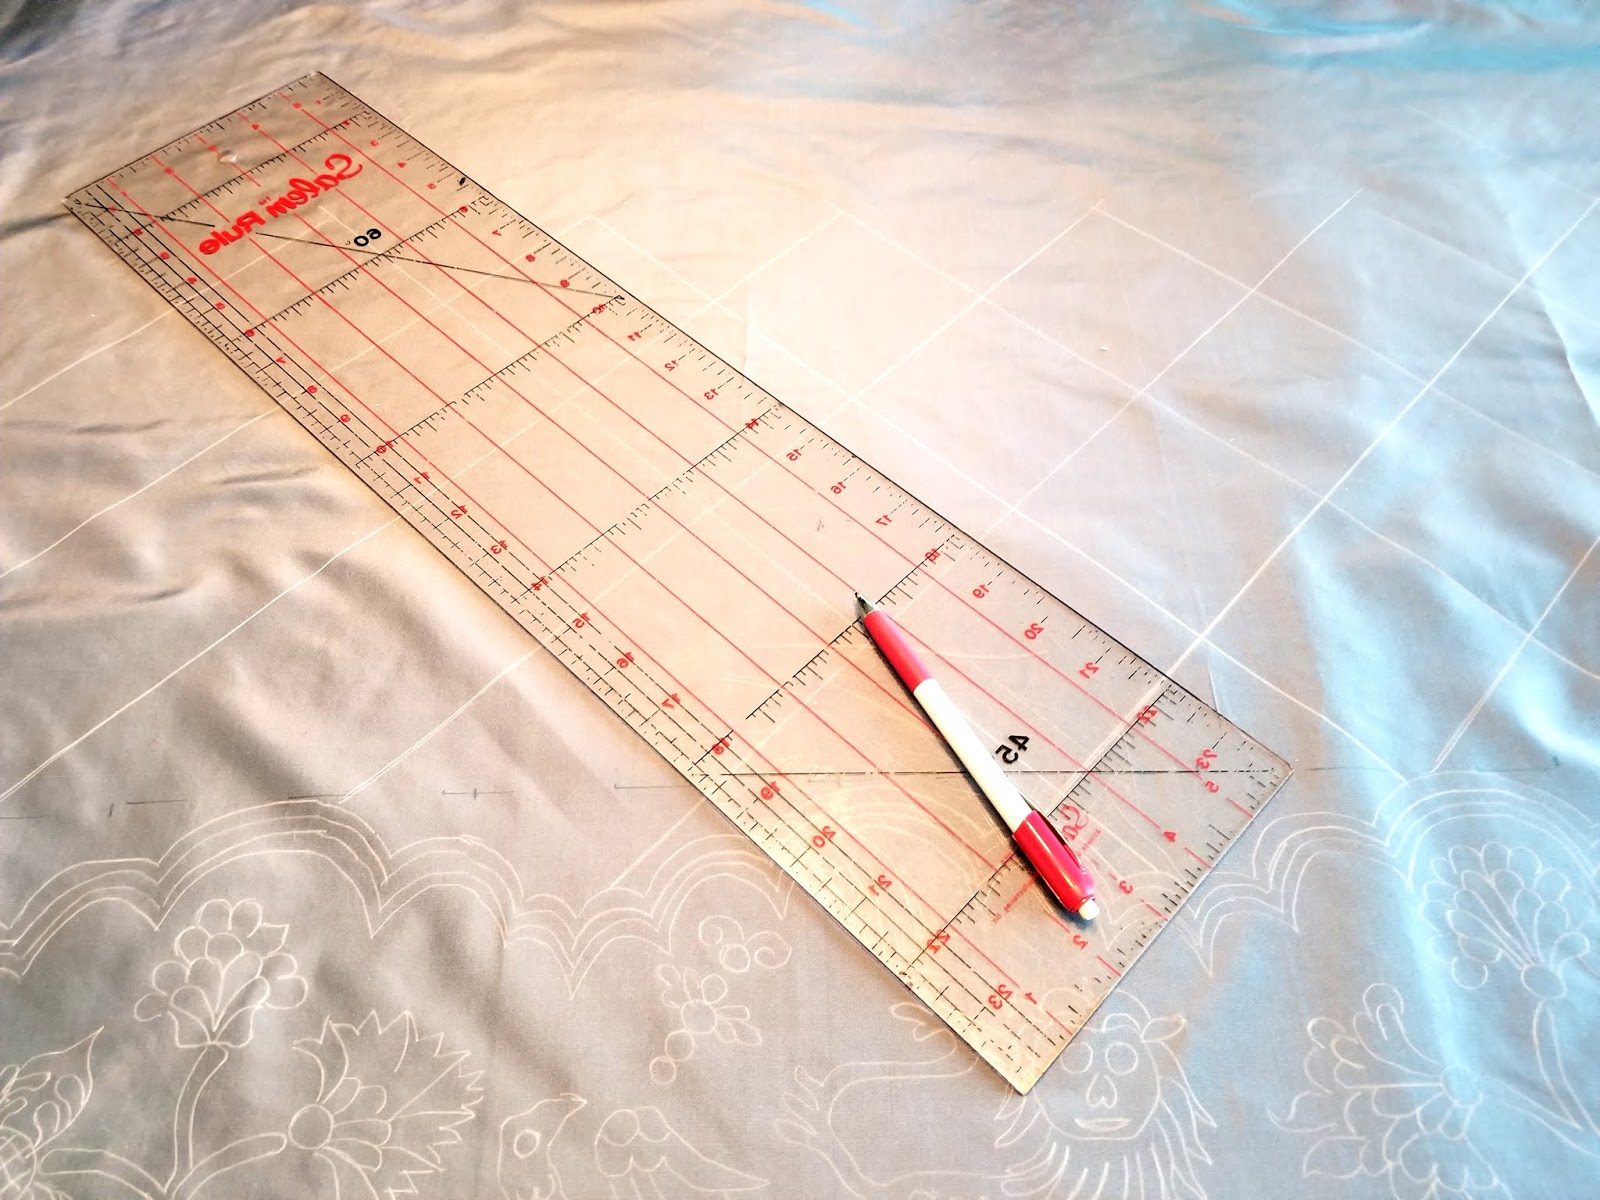
After the border was marked, I used a quilting ruler to draw diagonal lines.  The quilting ruler has a 45 degree guideline which helped me line the ruler up with the guideline I had drawn for the border.  The resulting squares were 3 1/2 inches wide.   

Starting with the row of diamonds adjacent to the border, I divided each diamond into quarters.  I did this every other row.  In the "blank" diamonds, I used the light tablet to trace a variety of figures taken from extant quilted petticoats:  the first row has flowers, the second row has animals the the third row has birds.

These images were taken from small sketches of the full extant petticoat designs.  I used photoshop to isolate each one and resize it to fit the 3 1/2 inch diagonal squares.  This was fairly time consuming.


It's hard to see how the design layout looks, but here's what I have:


I made sure to put my favorites in the front!  Note the hippogryph! Nothing like an 18th century no to Harry Potter! LOL


Next up:  basting the layers together, which I believe will take at least a whole day.  Since I'm using the dining room table, I have to work on it and get it done so it doesn't become a cat bed.