Monday, October 30, 2023

Mid-late 1770s Silk Sack


I've been looking at a lot of sack back garments.  After making two short sacks with different constructions, I thought I would do the same with gowns.  Since I often portray members of the upper class, I thought I would focus on day gowns rather than elaborate ball gowns.  You find a number of sack back gowns in portraits of women of all ages.  

Several years ago, I made a chintz sack using the JP Ryan pattern.  It was a typical earlier sack style with a compere front stomacher.  This style has no waist seam which is typical of earlier sacks.  I've noted a lot of extant sacks that are made more like English gowns with pleated skirts on the front bodice.  They seem to be a bit later--late 60s and 70s.  I've always loved the Copley portrait below of Ralph and Alice Izard from South Carolina which is from 1776 when they were in Europe.  It's difficult to see many of the details of this gown.  The sleeves are mid to late 70s styled with sabot cuffs.  There is pinked scalloped trim on the robings and above the sleeve cuff.   The trim looks pleated in some areas and gathered in others.  There is a gathered "cover" on the cuff and narrow elbow ruffles at the sleeve opening.  The stomacher cannot be seen but I have to assume that with trim on other parts of the gown, the stomacher would have similar pinked scalloped trim as well.  The gown skirts look plain and the petticoat cannot be seen.

Mrs. Izard's accessories include a very well-known fancy dormeuse style cap,  a sheer half handkerchief with narrow stripes and a sheer apron.  The apron fascinates me because I cannot see how it is being worn.  It's not tied over any part of the gown from what I can see.  Was she wearing it under her gown or was she just holding it in her lap to protect her gown?  I love that she is wearing a simple black ribbon on her neck.


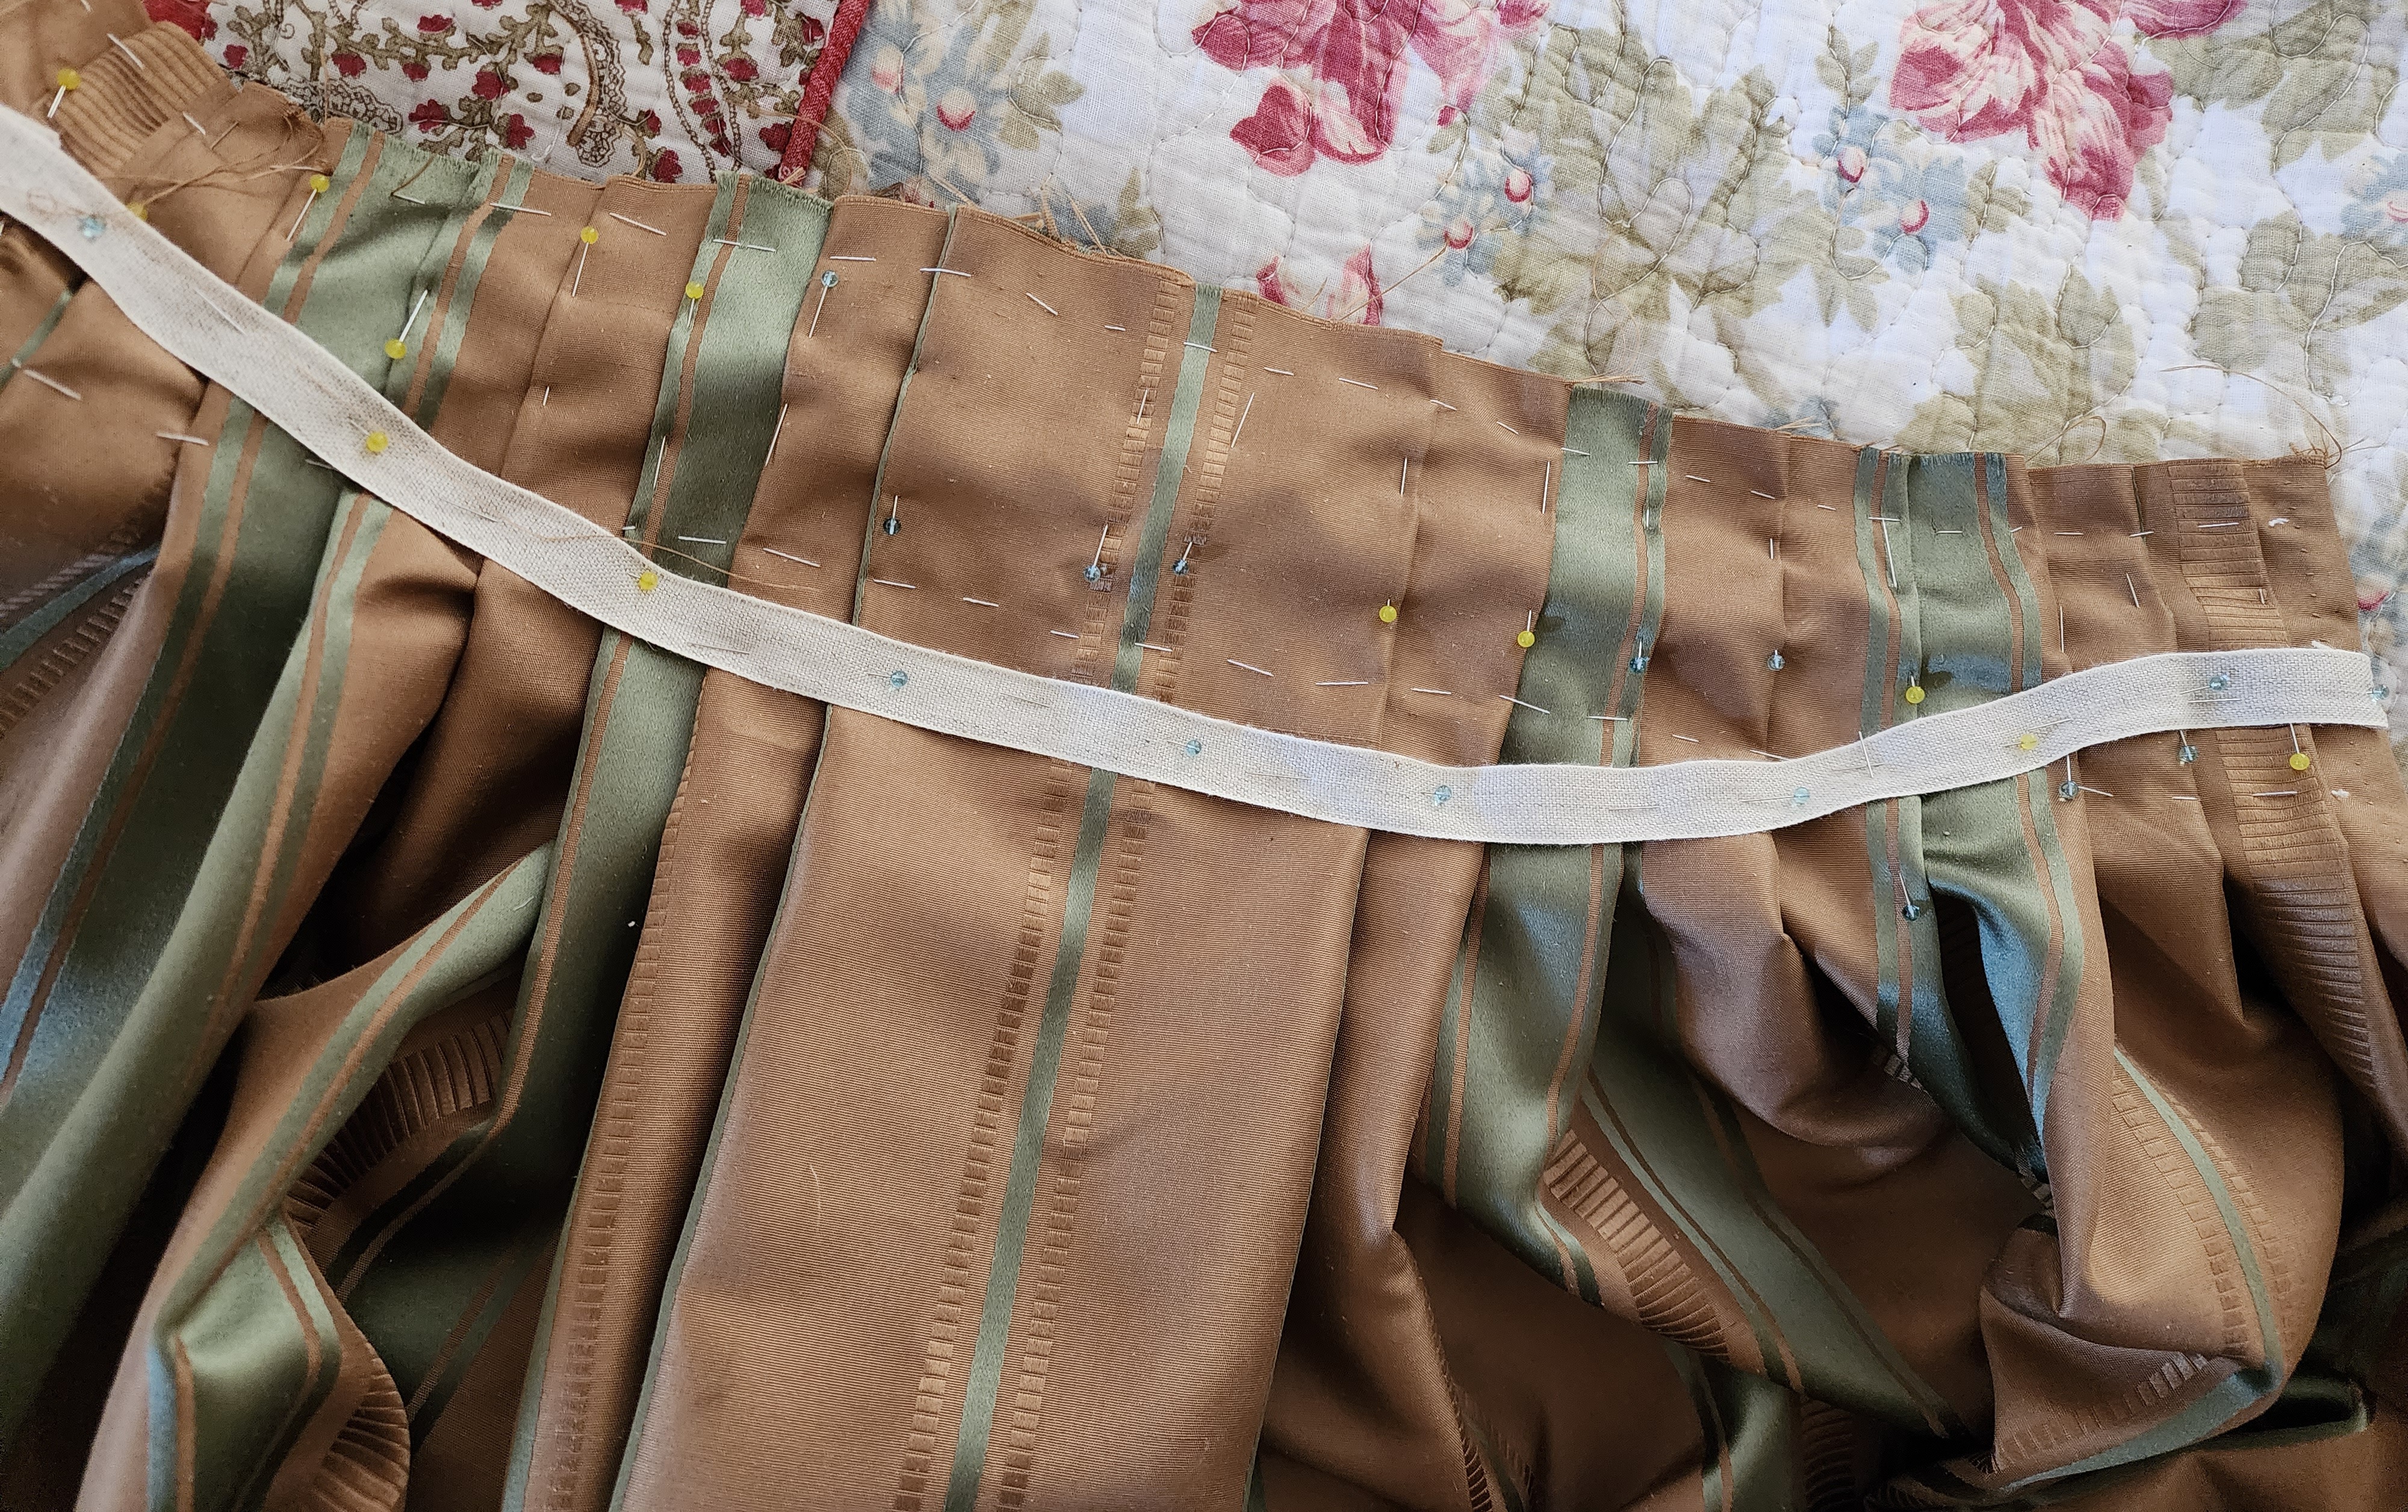
I decided to construct this gown in a similar manner to the Indienne Short Sack I made this summer.  I used my English gown back lining and draped my watteau pleats to it, cut away the excess fabric at the side back bodice edge, then added my bodice fronts which in this case were traditional folded robing styled fronts.  Unlike the short sack, I added skirt extensions to each side of the back skirt.  The extensions were 30 inches wide.  My back piece was two two lengths of 56 inch wide silk that were seamed together in  the center back.    I basically pleated the skirts much like I would pleat and English gown with a few changes due to the large amount of fabric.  I stacked a couple pleats under the back pleats then made knife pleats toward the pocket slits.  I stacked two deep pleats at the pocket slit area (basically) forming stacked inverted box pleats.

Here you can see the stacked pleats which concentrate fullness where I wanted it:

Note that I did not make pocket slits.  I have such a tendency to catch them on things.

The gown sleeves were made very much like those in the linked short sack only with an added trim strip.

I added the same ruched trim to the robings then added it to the stomacher. 


I pretty much finished the gown before trying it on with stays.  Here's the first fitting.  This was to determine the length of the gown skirts.  I had already finished the petticoat which I'm considering adding a ruffle to later.

I hemmed this gown to have no train since it was to be worn as daywear.  I made a new sheer silk half handkerchief with some fabulous organza from my stash:

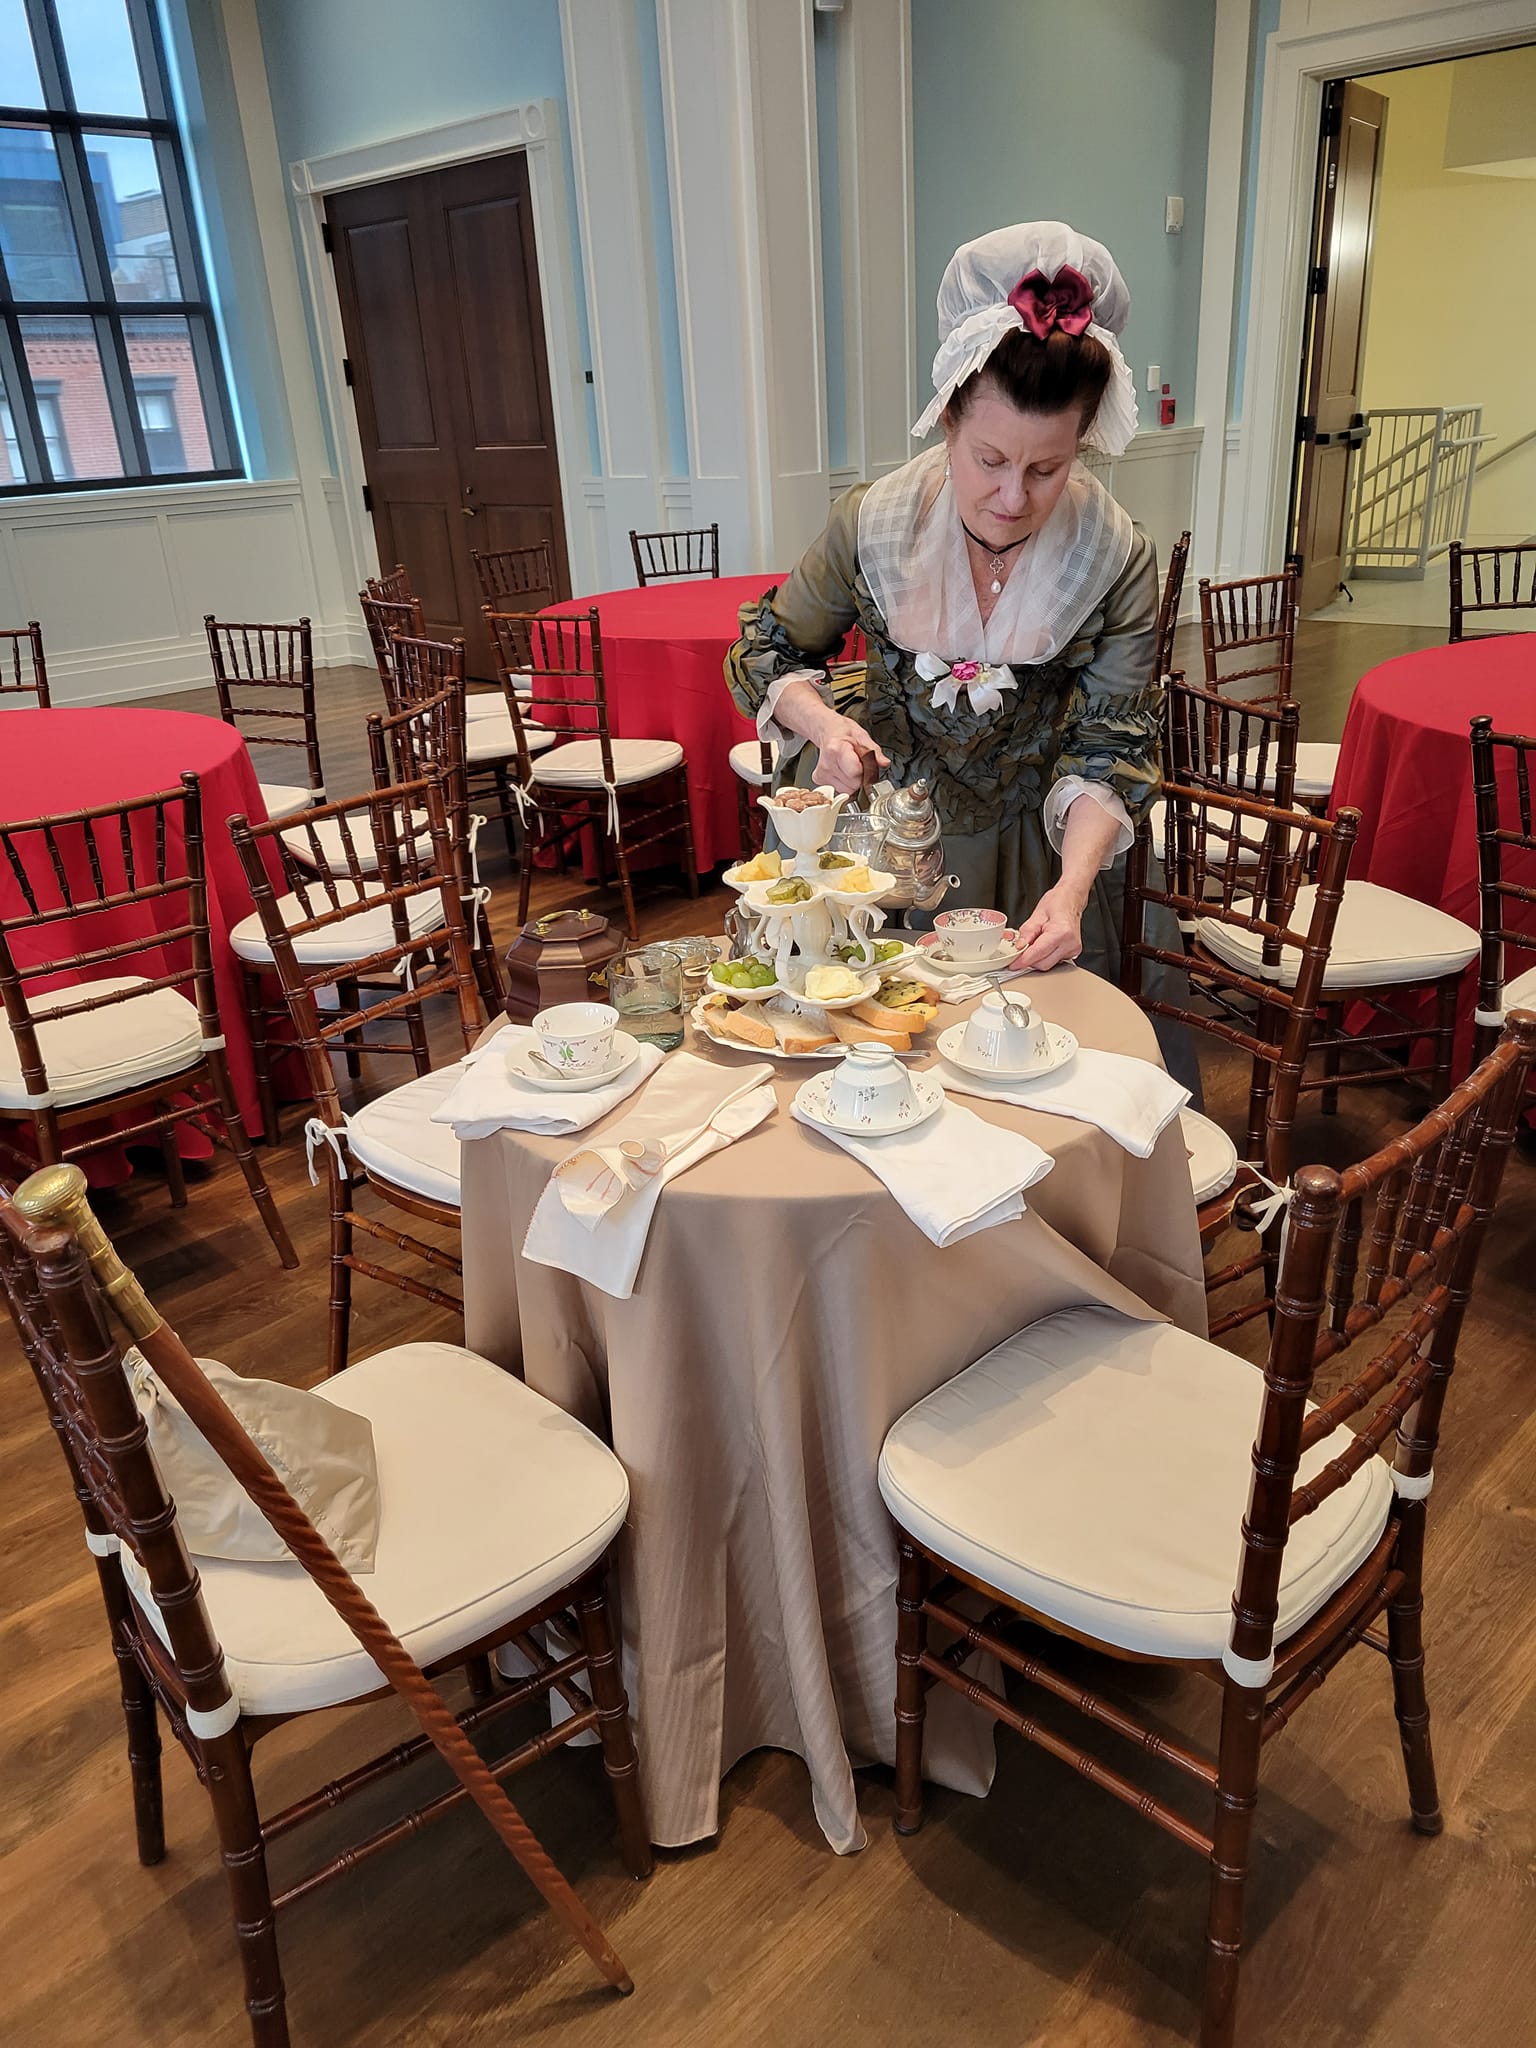
The gown was worn with a late 70s bum pad, sheer half handkerchief, flower breast knot and a sheer cap.


This changeable silk is incredibly difficult to photograph due to the colors.  I'm very happy with this gown and see myself wearing it a lot.  I had started making a black silk sack side by side with it but set that one aside to finish this one for my deadline.  Now I need to go back and finish the black gown which will have some different features.  Silk sacks are glorious to wear.  Why save them for formal occasions? If you do choose to make one as a day gown, remember to study plenty of period images to see how they were worn!


Friday, July 7, 2023

Late 1770s Short Sack Version 2

 I find it interesting to see how the construction of sack back gowns and jackets evolved through the 18th century.  In my study of short sacks, I decided to use a different construction technique to explore this further.  Let's look at some differences I noted in extant gowns:

Early sacks:

  • no waist seam
  • true side seam
  • stacked inverted pleat at side seam
  • integrated shoulder strap with folded robings
  • stomacher

Later sacks:

  • waist seam in front
  • side seam moves to back (like an English gown)
  • separate shoulder strap
  • no folded robings.
  • stomacher, faux stomacher, or center front closing
I would note that the sacks that have stomachers but no robings have trim where the robings would be.

For those who wish to make a sack using a pattern, the JP Ryan pattern is a good example of the early sacks.  The example in the American Duchess 18th century dressmaking book is an example of the later variety with a stomacher.  

I wish to make another short sack ca. 1780.  Here are my inspiration images:

I hope to use this type of trim though it may be simplified.

I cannot see the waist seam on this one but the side pleats suggest that this one is made without a waist  seam with the stacked inverted pleats at the side. Note the trim around the pocket slit in the jacket.

No waist seam on this one but it is an updated style with no robings.  It appears to not have a waist seam.


Note that this is a center front closing sack trimmed in such a way as to suggest a "faux" stomacher.  This gown has a waist seam in the front.


Let's look at this in a little more detail.  The waist seam is clearly visible.

The back seam placement is like that of an English gown.  The one difference is that the back piece is not cut at the waist.  


I decided to make my short sack using this type of construction.  Since my dress form isn't perfect, it's difficult to drape to the body so I decided to use my usual method of draping to a fitted lining.  I've made many different styles using this method, using the lining from my favorite gown pattern.  Plus I hate enlarging scaled patterns.  Why not use one that I know will fit!  I'll be able to just use the front bodice and sleeve pattern pieces for the rest of the gown.

The jacket will be made with a center front closure and trimmed to imply a stomacher.  I've modified my gown pattern to make center front closing gowns and I will alter the shape at the waist to one that I like for this project.

The first part of this project involves making the back pleats.  The back panel, which has a center back seam, needs to be at least wide enough to make all the pleats and extend past the side back bodice seam.   I started by making my back lining, then I pleated the back pleats and pinned them to the lining, stitching them down using a spaced back fish.   I followed the pleating sequence on the JPR pattern but the one in the American Duchess book or on this page work just as well.

Here you can see the finished pleats as they are stitched to the lining.  I pinned the pleats in place so I could make sure I had all the fullness then I smoothed the excess fabric nice and flat, pinning around the perimeter of the lining.

Inside.  The back lining has been basted around the armhole and side edges, stopping about an inch from the bottom.  The back lining will be hemmed later.


Lastly, I made a line of spaced back stitches in the back under the pleats to secure the fabric to the lining.  I started them about an inch above the the lining edge.  This detail is important as it holds the fabric to the body allowing the pleats to billow out in the back.  

Next, trim away the excess back fabric.  Trim along the side seam stopping twice the seam allowance distance from the bottom of the lining.  For me, my seams are 3/8 inch.   I'll stop an inch from the bottom for good measure.  Make a horizontal cut parallel to the hem.  It looks like I'll probably be cutting quite a bit off of the length on this one!  Turn under the bottom edge of the back lining (3/8 inch for my piece) and secure with  running stitch.


 Next step--adding the front bodice pieces.

Press under the seam allowance on the neck edge, waist edge, side seam and center front on both bodice pieces then baste the allowance at the waist edge.

Lay the bodice pieces over the side edges of the back bodice piece (wrong side of front over right side of back.  Stitch seam with spaced back stitch from the right side.  


Make sure NOT to catch the loose part of the back lining at the bottom.


Attach lining shoulder strap to the back bodice per your usual method.  I chose to do this step now so I could pin the jacket on my dress form for the next step.

The next step will require some draping.  We will be adding skirt extensions.  It appears that most of these garments have fairly deep inverted box pleats at the side to hide the pocket slit.  You should have the pocket slit location marked on your bodice piece.  You will want the skirt extension seam lined up with this mark.  I've chosen to eliminate the pocket slits because I always manage to catch them on doorknobs!

I've torn a piece of my fabric the full width by the length of my skirt extensions.

Pin the front of the lining shoulder strap to the front bodice on both sides and place the jacket on your dress form then play with your fabric extensions.  I just needed extensions that were 12 inches in width.  I cut 2 and rounded the front edges at the bottom, hemming the front edge.  Then I seamed them to the back extensions.  I pleated the added extension to complete the double pleats at the side seam and made sure the front edge lines up with the mark I made on the bodice front.  I pinned the skirts in place and tried it on the dress form to check placement.  When I was satisfied I backstitched the skirts in place.  I also rounded the front edge of the lower front "skirt."


The bottom edge was narrowly hemmed and the shoulder straps were also applied.  I constructed the same cuffs that I used in the last project.  The trimming will be different however.

Next came the trim.  Here are my inspiration pics:

My trim will be sheer.  There are many French fashion plates in the 1778 and 1784 editions of the Galleries de Modes that show short sacks, jackets and gowns with sheer white trim.  This is one from 1778.

This short sack, also pictured full length above, has a ruched trim that is a narrower width around the neck and down the front which gradually widens to a wider width around the hem.

This sabot sleeve detail is what I'm going for with a sheer trim.

For the trim on the jacket itself, I measured the perimeter of the jacket going around the neck, down the front (not on the edge as this is a center front closing jacket) and around the hem.  I computed the trim to have a ratio of 2:1 so the gathers would have enough fullness.  I ended up dividing it into sections--going from the waist seam up around the neck and down to the waist seam on the other side--cutting strips to equal twice that measurement and 2.5 inches wide.  Then I measured from the waist seam down to the bottom edge, cutting two strips twice that length and graduating from 2.5 inches wide to 4 inches wide.  Lastly I measured the bottom hem and cut strips to equal a little over 1.5 times that measurement by 4 inches wide.  I made the ruching around the hem less full where the side pleats and watteau pleats were because I thought that twice the fullness would be too bulky for the pleats to be able to lay correctly.  Next,   I seemed these pieces all together and roll hemmed the long edges.  I folded the long edges to the right side 1 half inch to whip gather along the fold.  This totaled almost 10 yards of trim.


Next the trim was pinned to the jacket in strategic places and whip gathered in sections, doing both edges of each section and pinning in place.  After a large section was gathered to the jacket I went ahead and tacked it in place.  The sleeve trim was a bit tricky since the sabot cuff is shaped and doesn't measure the same at the top and bottom.  I basically took the pattern piece and cut and spread it, adding about an inch at the top and bottom then whip gathered both edges.


I ended up adding a narrow trim strip down the center front as an after thought.  I think it completes the look.  Here's the finished jacket on my dress form which doesn't fill it out:


Now for the petticoat.  I made a standard petticoat to fit over my late 1770s bum pad.  This is a shorter petticoat as the fashion dictates for the year 1780 which is when this will be worn.

I decided that a sheer ruffle 8.5 inches wide would be the right proportion.  Since my petticoat is made of 3 widths of 42 inch fabric, I cut 5 strips of 45 inch organdy 9 inches wide for the ruffle and started hemming each long edge.  I find it easier to hem each piece separately, starting and stopping a few inches from the edge.  Once they were all hemmed, I seamed them together with tiny felled seams and finished hemming in the seam area.  This made the project more portable since I don't have yards and yards of trim puddling on the floor.

The ruffle was whip gathered to the petticoat.  

Here is the finished jacket and petticoat.  The first picture shows the hat that will be worn with this outfit.


It needs a good steaming then it will be ready to wear!  


Final thoughts:  I'm very happy with this outfit.  It's very comfortable and I love the style.  It's certainly not as practical as most of the historic garments I make due to being a very iconic French fashion from 1778.  I'm sure I will get enough use out of it however.  It was interesting to figure out the construction and study the evolution of short sacks in general.


Sunday, March 19, 2023

Mid-late 1770s short sack and petticoat

 I've always loved short sacks, aka French jackets.  I find garments with watteau pleats to be a joy to wear.  There's just something about the "flying back" (a quote from the mid 18th century), particularly in silk, to be a sensory delight.   I'm particularly fond of the later short sacks from the mid 1770s and later.  They are shorter and don't have sleeve ruffles, often opting for sabot cuffs or rows of ruched trim.  Here are a couple of extant examples of this style, both from that period:


1778 French fashion plate

You can find more of my research on short sacks here.

The short sacks seem to follow the same construction as the earlier sack back gowns--no waist seam with stacked inverted box pleats at the side.  You can see this in the second photo above.  This is the same construction as the JP Ryan pattern which I used for this gown.  JPR patterns do not use period construction as they are entirely machine sewn.  They also don't follow an 18th century construction sequence.  I attempted to make that gown using 18th century hand sewing techniques.  The one thing that was a pain to me was the construction of the lining with that pattern.  There is an adjustable back with ties in the lining which seems totally unnecessary to me.  I've seen some extants that have a similar lining, some other that have lining that laces in the back to make it adjustable and some with just a plain lining with a plain back,   It seems to me that pregnancy would be the main reason to want to let the lining out to increase the fit.  I measured the width of my lining in my gown with the ties adjusted to fit and just cut a solid back.  I also eliminated the front under stomacher structure which I also didn't care for, choosing to line the bodice as I would an English gown.  I also cut the jacket 4 inches shorter than the pattern.

I had 7.5 yards of a striped taffeta from the $7 yard silk bin at G-Street.  It's rare to find any taffeta in that bin--usually it's full of China silk, georgette, or dupioni.  It just screamed to be made into some type of sack back garment.

I tried to be very conservative with cutting.  The stripes are very symmetrical and it was easy enough to cut the fronts and sleeves to match.  The back required a little more planning in order to get the wide stripe to land in the middle of the top pleat.

Once the back pleats were pinned, I basted them in place to make sure they didn't migrate when stitching.

The next part of the plan was choosing how to deal with the sleeves.  I wanted a sabot sleeve--which has a shaped cuff that goes over the elbow with ruching or pleated trim.  The L&S Fashionable Gown pattern has these sleeves so I used the cuff pattern and adjusted it a bit to fit my sleeve.  I cut the trim a bit wider--about 2 inches finished after pinking with scalloping shears.  I also made sure to apply fray block on the wrong side of all my trim for this project.  I wasn't sure if pleated trim would work with the stripes but I chose to use it anyway.  I like the way the cuffs turned out.

I pinned the cuffs on to make sure they were positioned in the right place as they had to fit correctly over the elbow.  Then they were stitched in place.


Next up:  Trim.  I cut more crosswise strips for trim, cutting them wider than the cuff trim.  Finished width is about 2.5 inches.  I pleated two at the same time so they would be symmetrical and match--one for each side of the front.  The pleats were just pinned in place. I needed to cut a tiny strip to fill in a gap in the back of the neck.    I made the stomacher and cut more trim the same width as the jacket trim.  All  the trim was pinned on the jacket and the stomacher.

The trim was stitched in place, stitching only to the folded robing on the jacket front.  Once the trim was on, I tried the jacket on to check the placement for the lacing strips which I constructed like those in this post.    Once the lacing strips were in, I made a 4-loop breast knot out of some coordinating green silk taffeta.   The jacket is now complete!


Next up--petticoat!  This outfit is being worn over a late 1770s bum pad which also has some side padding instead of pocket hoops which are more commonly worn with ball gowns or earlier sacks.

I cut the petticoat panels--2 panels the full width of the 56 inch wide fabric.  I wish the wide green stripe (the one on the back pleats of the jacket was centered, but it wasn't and the fabric isn't wide enough to try to center it for this project.  Some creative seaming might have done the trick for a petticoat to be worn under a gown but not for a jacket.  I stitched the side seams and pinned then basted the pleats.  Here is the petticoat with the jacket.  It still needs to be leveled at this point and is just pinned at the sides.


Once the petticoat is leveled and hemmed, I will cut wide trim strips, pink them and fray check them.

I leveled the petticoat to be worn over a late 70s/ early 80s bum pad.

For the petticoat trim, I cut 4 crosswise strips of matching fabric 8.5 inches wide, pinked/scalloped the edges and used a tiny artist brush to coat fray block on the wrong sides of the scallops.

There's no way to really pleat this fabric with even pleats to show off the stripes.  I basically pleated it similarly to the narrow trim on the jacket.  My original plan was to tack the pleats about an inch from the top and an inch from the bottom (they extend past the petticoat hem about an inch).  I would have to press the pleats flat to do that which I didn't want to do.  I thought I might just tack them at the top for a ruffle but decided to go with my original plan, also tacking them in the center as well.  I like the added texture of letting the pleats poof out.  I ended up using 3.5 of my trim strips.

Here's the finished outfit.  It still needs to be steamed and it needs some under petticoats.  


I've very happy with the way this turned out.  I did make a floofy bonnet to wear with it:

I may make some light sage green mitts using the embroidery pattern from the 1772 Ladys Magazine.  

I'm pleased with the way this turned out and I need to get a proper photoshoot.  I'll edit to add those photos.  It's just been too cold lately.

I hope to make a summer short sack based on the French fashion plate above using a documented print with sheer trim to wear in July.  

Here are some pics from Montpelier Mansion in Laurel, MD.