Showing posts with label cooking. Show all posts

Thursday, April 2, 2020

Life During a Pandemic, part 7: When the going gets tough, the tough get cooking!

 What do you do when you can't go anywhere?  You cook.  It's not that I need to bake, I'm home most of the time anyway but in times of crisis, the feeling of needing to bake just kicks in.
I had made a sourdough starter last week using these instructions.  It was alive and well so I took out one cup to make sourdough pretzels and put the rest in the fridge.


One thing about working with sourdough that I'm not used to is that it makes a soft dough that doesn't rise quickly.  It has to ferment for hours, typically being made one day, left to ferment with folding and flipping it every hour for several hours before going in the fridge overnight.  My typical yeast doughs rise rather quickly.  My pizza dough easily doubles in an hour or two.  I wasn't sure if the pretzels were going to come out right.  The dough in the bowl seemed sticky after the 5 hours so I left it out for 2 more hours with more folding.  It started to feel more "lively," pulling away from the sides of the bowl, so I figured it was ready for the fridge  When I took it out in the morning to shape the pretzels with the cold dough, I knew it was right because there were air bubbles in the pretzel ropes!

After shaping the pretzels and leaving them to come to room temperature for an hour, they got placed in a boiling water/soda bath for 10 seconds on each side, brushed with egg white and sprinkled with Trader Joe's Everything But the Bagel topping which is good stuff!

This recipe is a winner!  I wrapped 6 of them and froze them.  We each had one yesterday then I put the others in the fridge.  I quick warm up in the oven on a cookie sheet makes them taste fresh baked.
I think the next sourdough experiment will be cinnamon rolls.

The next cooking task:  freezing celery.  This sounds weird I know but I always find soup recipes that call for celery and I don't keep it on hand.  I had bought a bag with 2 celery bunches at Trader Joe's last time I went (11 days ago) as I needed some for soup.  I didn't want to throw the rest out.  I did some research and found that you can blanch it and freeze it for freezing for soup.  It can't be eaten fresh this way.  Apparently it keeps longer in the freezer and retains more flavor when blanched.  I diced the celery, put it in boiling water for 3 minutes then plunged it in ice water until the water was cool. I let it drain on a paper towel.

I packed it in portion control bags--enough for 3 batches of soup!

Next up--making tortilla bowls for taco salad.  I have a little chili left over but not enough for two full servings so I thought I'd make taco salad.  Normally when I make a batch of 18 tortillas, I use 3 cups of masa and 2 cups of water for tortillas weighing about 1.4 oz. each.  So I figured I'd try 1 cup masa and 2/3 cup water.  Each dough ball was 3.8 oz plus a .2 oz one for Gloria.  I pressed the dough balls in the tortilla press and had to further roll them out as the press is a little small.

The get "cooked" on the griddle for about a minute on each side before going in a tea towel to steam.  This makes them more pliable.

Next I had to figure out how to shape them.  First I draped them over upside down pyrex bowls but that didn't work because they don't flop enough.  I ended up lining the bowls with oiled foil and just sticking them in the bowls.  Then they got baked until they were crisp.  They took longer to bake than I expected.  When they started getting crisp, I lifted the foil from the bowls and they finished cooking much more quickly.  I flipped them over for a minute or two as well.

Here they are waiting to be filled. I'll have to find a better shaped bowl for the next time.  

And here they are filled with baby lettuce, topped with leftover chili, sweet baby red pepper slices, cherry tomatoes, olives, jalepeños, cheese and sour cream.  Gloria's has oil free refried beans, spinach and sweet red peppers.  These were fun.  They would probably be crisper if they were fried but I think the bottom just gets leathery from the moisture of the ingredients in the bowl.  The sides were still crispy.

Food prep always brings about calm and a sense of purpose.  I mean everyone has to eat!  I suppose this is why you can't find a bag of flour anywhere around here.  Tomorrow, food prep will be easy--tomato soup in the Instant pot and grilled cheese.  So looking forward to that!

Today's numbers have hit a milestone.

Over 1 million infected.  They are predicting at least 2 weeks before we hit the apex here.  If you're thinking of going out in the public--don't!


Sunday, January 1, 2017

We interrupt our sewing to bring you . . .Sweet Potato Chips!

Being the mother of a Blue Front Amazon parrot who is 30 years old can be quite an awesome responsibility.  Most people don't have pets with lifespans that equal or exceed their own.  As such, I'm always looking for nutritious snacks that Gloria will enjoy.  Since parrots in captivity often need additional vitamin A, sweet potatoes are a frequent choice.  Gloria is also fond of crunchy things so sweet potato chips seemed like a logical choice.  Commercial ones don't fit the bill as parrots should not have most oils or salt so it makes sense to make them myself.  I was amazed at how easy it is!

You will need:
sweet potatoes
coconut oil
seasoning

I like to use garnet sweet potatoes that are fairly straight.  Peel the sweet potato and cut the ends off. I like to slice the sweet potato perpendicular which makes smaller chips.  They do shrink too.  If you are making them for humans, you may wish to slice them diagonally to have larger chips.

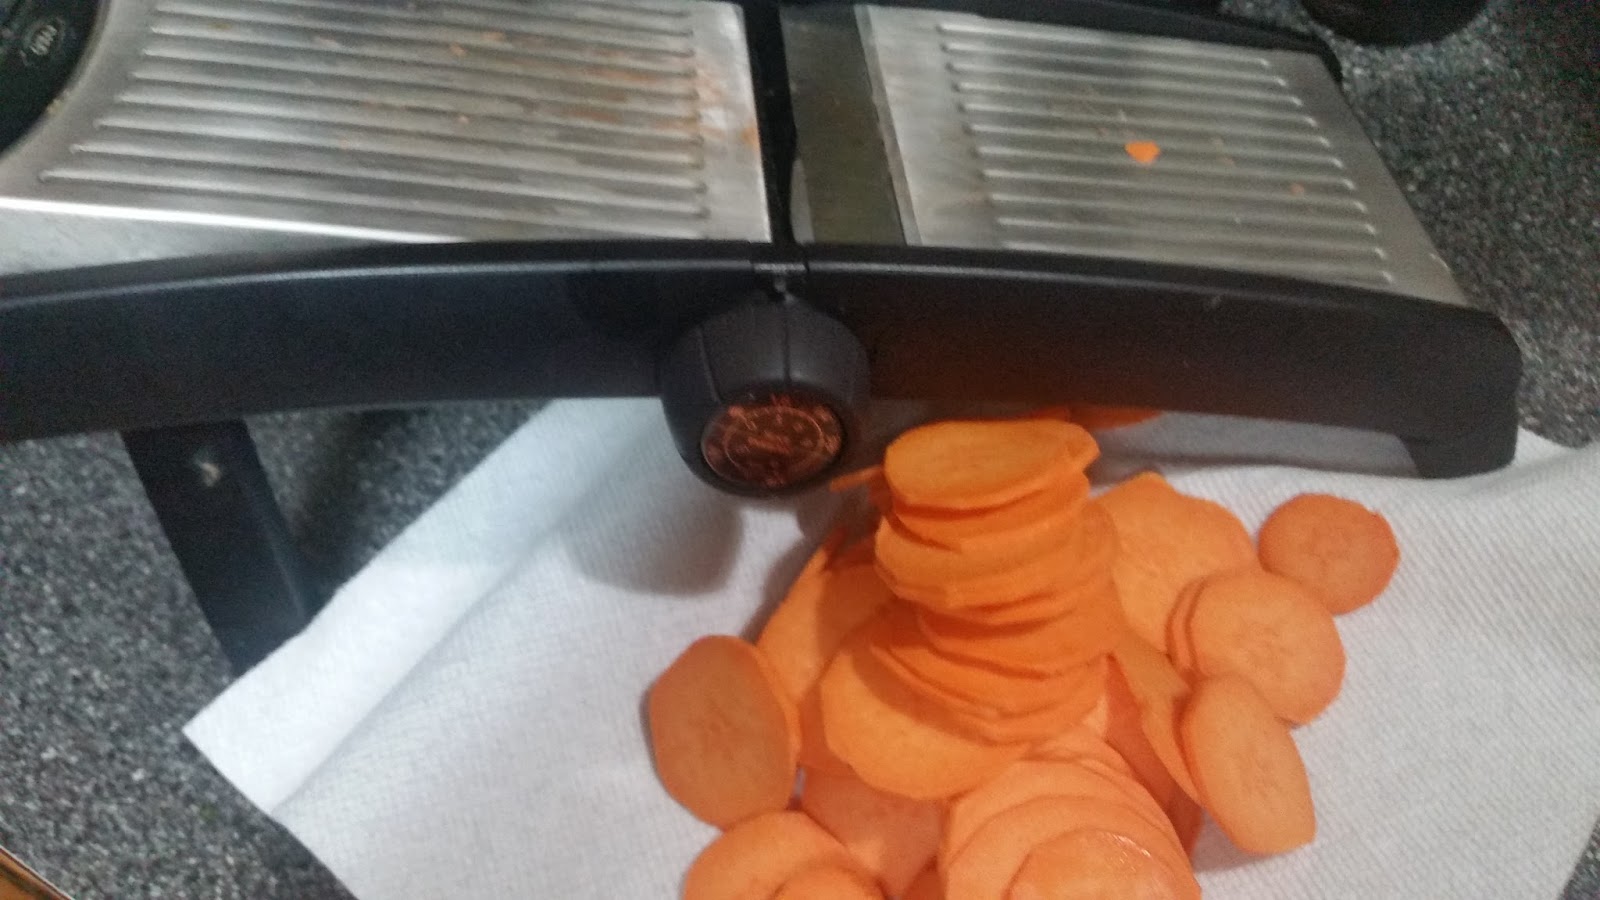
Thinly slice the potato using your method of choice.  I like using a mandoline as it allows me more control--though my Cuisinart would certainly do the job.  I set my mandoline for 1/8 inch slices.


Melt a small amount of coconut oil in the microwave.  I used about a teaspoon.  I could probably use less.  Another option, if you really want to avoid oil, is to skip this step and lightly spray the chips with a coconut oil spray.  Add the sweet potatoes, oil and any seasonings to a plastic bag and shake so all the slices are covered.  Parrots love hot peppers so I use crushed red pepper on our chips.


Lay the chips out in a single layer on baking sheets and sprinkle with additional seasoning if desired.


Bake for 40 minutes in a 200 degree oven.  After 40 minutes, turn the chips over and return to the oven for another 40 minutes.  


Watch the chips.  They will curl a bit as they shrink.  You may need to bake them longer or they may be done a little early.  They need to be hard.  Mine were clearly not done after the second 40 minutes. Bake until they are leathery, then take them out.   They will get hard and crisp if they are done.  If they aren't crisp, put them back in the oven for 10 minute increments.  I ended up baking these an additional 30 minutes. You can probably reduce the baking time by increasing the temperature.


I think I find these to be as tasty as Gloria does because every time I give her one, I eat two!


Monday, September 5, 2016

Chili Relleños! It's what's for dinner!

I love Southwest food.  If I had to pick any culture of food that I could eat every day, that would be it. One of our favorite dishes is Chili Relleños.  I have a recipe that I got in an old out of print book about 30 years ago that I've tweaked over the years.  Since I was making it tonight, I thought I'd write it up to share.  I love the combination of the somewhat spicy Poblano peppers, the soft melted cheese and the airy omelet like coating.  It's a mix of textures and tastes that is most appealing to me.

Chili Relleños

Ingredients:
  • Poblano peppers--one for each relleño.  I always get the biggest ones I can find
  • Monterey Jack or Pepper Jack cheese.  Plain is more traditional but I like the extra kick from the pepper Jack.
  • Eggs--one for each pepper plus one extra.  Since I make 4 at a time, I used 5 eggs.
  • Flour
  • Water
  • Cooking oil
You will need to peel the peppers.  Place them on a cooking sheet under the broiler until they are blistered.  Turn over, making sure they are blistered all over.  You will need to watch them but figure about 5 minutes or so on each side.


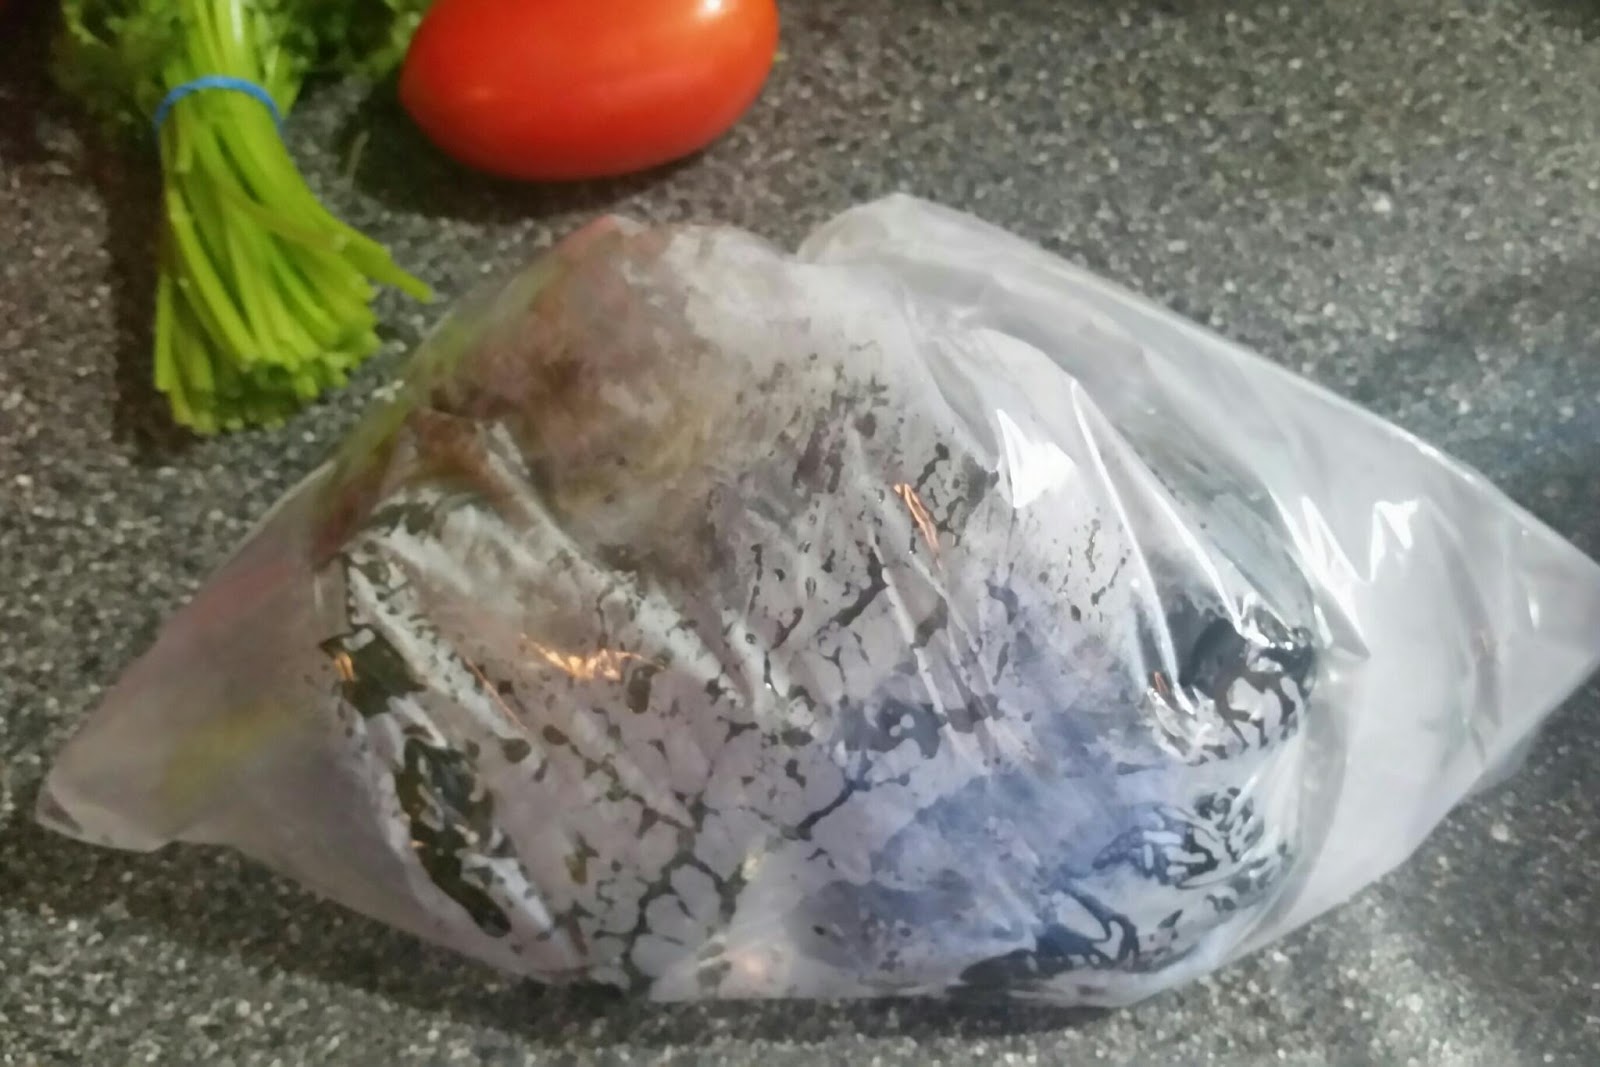
When you take the peppers out of the oven, place them in a paper or plastic bag for 10 or 15 minutes to steam.


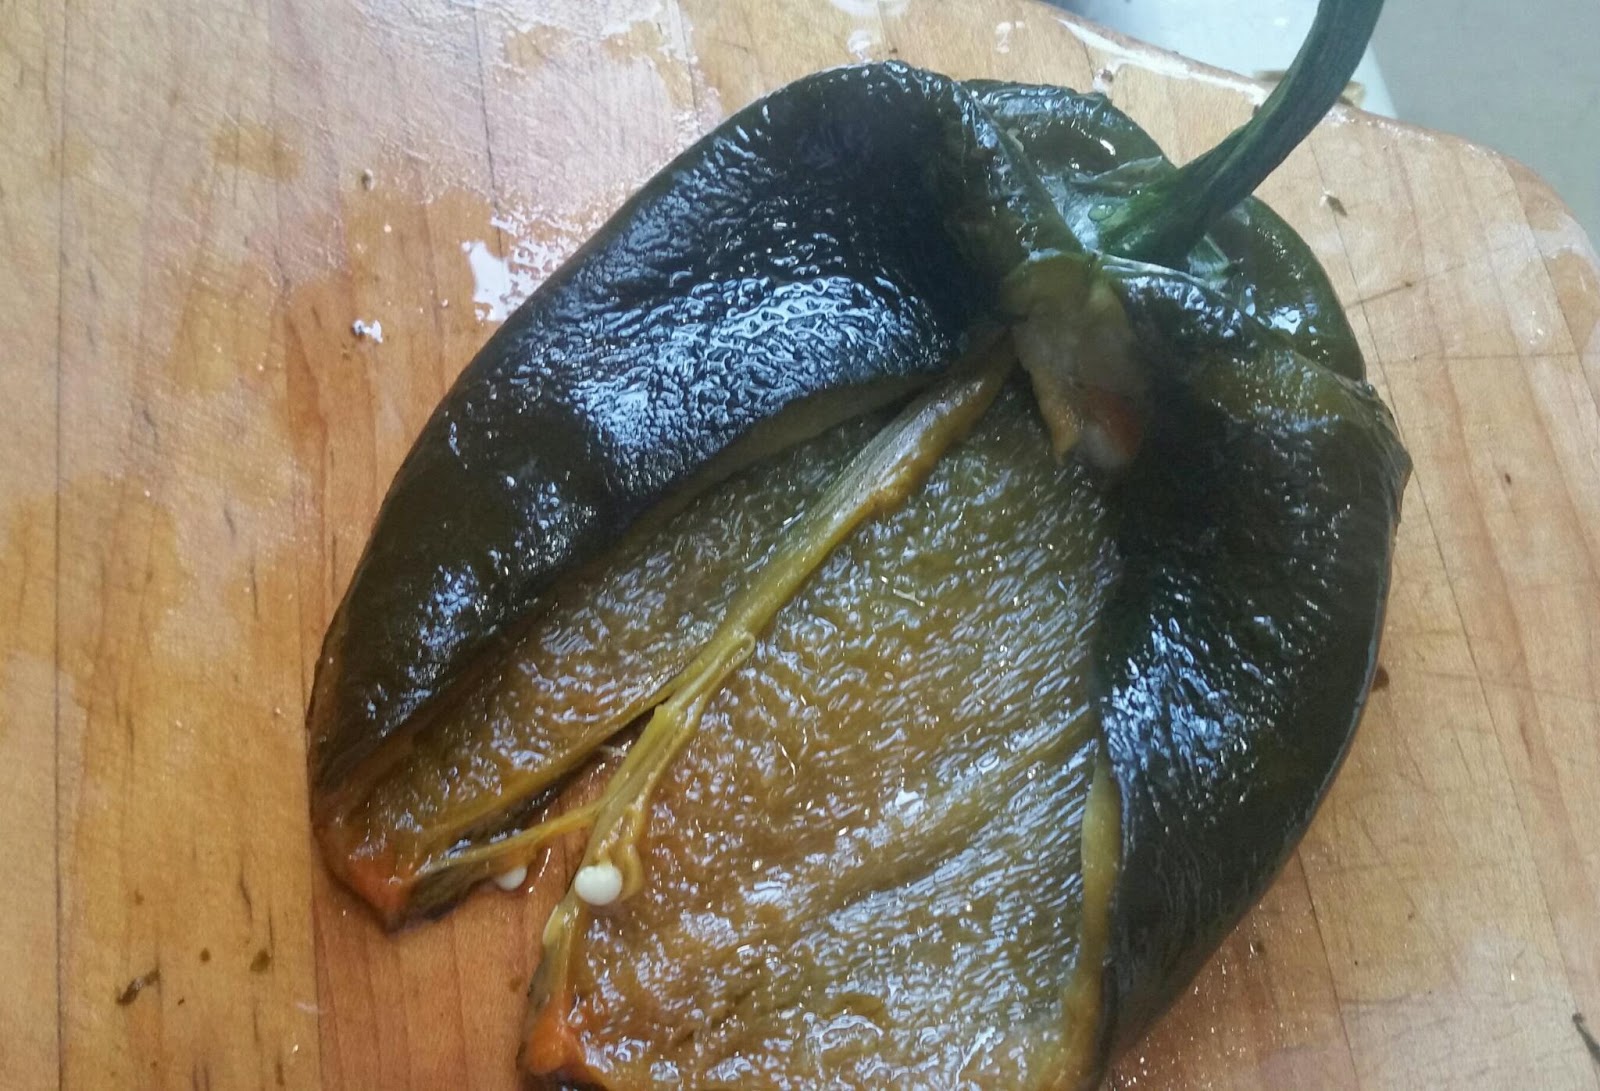
This will make the peppers easy to peel.  The skin should pull right off in big pieces.


Slit the pepper open and clean the seeds and inner membrane out.  Sometimes it's easy to just rinse them then blot dry.


Cut an oblong block of cheese for each pepper and put inside the pepper, wrapping the slit opening around to enclose it.

While preparing the coating, place about 1/4 - 1/2 inch cooking oil in a non stick frying pan to heat on medium heat.  The oil must be hot when you begin cooking.  Separate your eggs, placing the whites in a medium to large bowl and the yolks in a small bowl.  Beat the whites until stiff peaks form.  Then beat the yolks and add 1 tablespoon of flour for each egg and 2 teaspoons of water for each egg.  Since I was making 4 relleños, I used 5 eggs, 5 tablespoons of flour and 10 teaspoons of water.  Beat the yolk mixture until blended, adding a pinch of salt.  Basically, you want it to be the consistency of pancake batter.


Gently fold the yolk mixture into the beaten egg whites.


You will prepare 2 relleños at a time.  Place two big blobs of egg mixture on the oil, a little bigger than the peppers and let it cook for a few minutes.

Gently lay a cheese stuffed pepper on each blob of egg batter.


Carefully spoon a thin layer of batter over the top of the pepper, completely covering it (except the stem).


Here's the tricky part.  You need to turn the relleños by gently rolling them over.  Put your spatula under and roll toward the side of the pan.  You will basically be folding it in half.


You will need to roll them over at least once more, cooking until golden brown.


Repeat with the remaining chilis.  Drain them on paper towels.

I served these topped with fresh Pico de Gallo. 

Easy Pico de Gallo

Ingredients:

Roma tomatoes
Red or yellow onion
Cilantro
jalapeño pepper
lime juice

This is easy!  Dice equal amounts of Roma tomato (seeded), onion and cilantro.


If you decide to add jalapeño, seed the pepper and dice finely.  Be sure to wear gloves or wash your hands well after handling hot peppers.  I used one large jalapeño to 1 cup each tomato, onion and cilantro.


Mix well, add a splash of lime juice, salt and pepper to taste.  You may end up tweaking the ingredients to your liking by adding more or less of any one of them.

The meal consisted of the chilis, topped with the pico de gallo and a dollop of sour cream.  It was accompanied by our favorite Mexican slaw which can be found here.  I substituted green cabbage for the red cabbage called for in the recipe.


Yum!  My favorite Mexican dish!

Sunday, July 17, 2016

We interrupt our sewing to bring you . . . fresh tortillas!

I love almost any food that comes in a tortilla.  Always have, always will.  I've always purchased ready made tortillas and chips.  When Gloria joined the family, I had to rethink a few things.  For those readers who may not know--Gloria is a 30 year old Blue Front Amazon parrot who was being rehomed.

One way to bond with parrots is to share one's food with them.  It's how they bond with their young.  Gloria, it turns out, loves tortillas and nachos in particular.  The problem is that she should not have oil or salt.  So I decided to try making tortillas.  

I was surprised to find that the only ingredients in corn tortillas are corn masa, water and sometimes salt.  No special equipment is really necessary though a tortilla press certainly speeds up the process and gives you more uniform tortillas.  I ordered an 8 inch press from Amazon.

I bought some corn masa at the local grocery store.  The recipe on the bag calls for 2 cups of masa and 1 1/4 cups of water.  That's it.  Having made the recipe several times I found that it doesn't make as many as I want so I use 3 cups of masa and approximately 2 cups of water.

Place the masa in a bowl.


Add your water and mix with a wooden spoon until a dough begins to form.  Turn mixture out to the counter or a board and knead until a dry dough forms.  You may need to add more water.  You want a stiff dough.  Wrap the dough in a towel to keep from drying out.


Cut open a gallon zip loc bag and place it on the open tortilla press.  Break off some dough about the size of a golf ball and place it in the middle of the press.


Cover with the rest of the plastic, close the press and push.


Open the press and carefully peel the tortilla off of the plastic.


Place the tortilla on a hot cast iron griddle, preheated to about 450 degrees.  I put mine on a burner set on medium for about 5 minutes before starting.  The tortilla will puff up a little.  Cook for about a minute then flip over.


Flip over again and cook a few more seconds on each side.


Place the tortilla on a tea towel lightly spritzed with water and cover it so it doesn't dry out.  
Continue this process until you have used all of the dough.


This batch made a dozen 7 - 8 inch tortillas with dough for 2 more left over.  I decided to use that dough to make some tortilla chips for Gloria.  I placed it on the counter and poured some amaranth, hulled millet and flax seeds.


I kneaded the seeds into the dough and made two more tortillas.


After cooking the tortillas, I brushed them lightly with coconut oil then cut them in small pieces for Gloria.  You can also cut them in wedges for humans!


Place your chips on a non stick baking sheet and bake at 350 degrees for 10 minutes.  Turn over and bake another 5 minutes.  Allow them to cool on the sheet then package in an airtight bag or container.


Here is Miss Gloria enjoying her chips.


I used our tortillas for vegetarian enchiladas.

Enchiladas
  • 8 - 12 fresh corn tortillas 
  • 1 bag shredded Mexican cheese
  • 1 medium sweet onion diced
  • 1 can large pitted black olives, sliced
  • 12-ounce bottle enchilada sauce (I like Trader Joe's)
  • canola oil
Pour about 1/2 inch of canola oil into one large skillet and the entire contents of the enchilada sauce into another large skillet.  Heat both on low.  Assemble the other ingredients near by.  Heat one tortilla in the oil for about 5 seconds then in the enchilada sauce, turning to coat.  

Place the tortilla on a plate and place some of the onion, olives and cheese in the middle.  wrap both sides over to make a roll.  Place in a baking pan.  Repeat until you have enough.  I was able to place 8 enchiladas in a 9 X 13 baking dish.  If you make smaller tortillas then you will be able to use more of them.  Pour the remaining sauce over the enchiladas and bake at 350 degrees for 10 - 15 minutes.

Allow the enchiladas to set for about 5 minutes after removing from the oven.  Serve them with grated hard Mexican cheese (or you can use Asiago or Parmesan in a pinch) and a dollop of sour cream.

These enchiladas can easily be made vegan by using vegan cheese.  You can also bypass the canola oil but they are more tender when it is used.

Yum!