Saturday, July 25, 2020

Sewing during a Pandemic: "Women's purple and claret coloured lamb mitts"

I love making mitts and I've already made 2 pairs of lamb leather mitts.  This post is a tutorial of making mitts from leather.  I will be building on that tutorial below so you may wish to refer to both.

Milliners' ads in period newspapers show that mitts were available in many colors and materials.  There were several different types of leather listed as well:  kid, lamb and shammy for example.

Boston, MA 1762

New York,NY1768

New York, NY 1771

Portsmouth, NH  1768

Philadelphia, PA 1767

I had already made some straightforward traditional lamb mitts.  This pair was used in the leather tutorial post linked above.


I decided to make black lined with gray to wear with my wool mourning gown which I wear a lot in the winter.  Leather lined with silk is incredibly warm.  I kept these a bit plainer by not adding embroidery to the hemmed edges.


I was intrigued with the ad that mentions purple and claret lamb mitts.  I'm finding purple leather mitts to be fairly common in ads so why not reproduce those?  I wanted to make these a little fancier so I decided to base the embroidery on the extants below:

Linen Mitts

Black Leather Mitts

Color choices made:  Purple lamb with white silk and embroidery.  I normally use silk thread but this was during the pandemic lockdown so I had to work with the thread I had on hand.  I was lucky to find just what I needed.  Embroidery will be done with 1 strand of the Soie d''Alger silk floss.

For the claret mitts:  claret lamb plus pastel muted pink silk and silk floss.

Some helpful items:
The rubber thimbles on the thumb and forefinger make pulling a needle through leather sooooo much easier.  Size 12 glovers needles pierce the leather easier and make smaller holes.  They also bend easily so be prepared to go through a few of them.

One thing I did not go into detail with in the previous tutorial post was cutting the mitts out.  Mitts are cut on the bias when cutting from fabric so the lining will need to be cut that way.  For the lamb/leather however, you must go in the direction of the stretch which is perpendicular to the spine of the skin.  Inspect your leather for weak spots too because sometimes there are areas where the leather is much thinner.  The purple skin is 1 oz. lamb leather and the claret is  1 1/2 oz. lamb leather, both about 8 square feet which is enough for 2 pairs of mitts.  I will note that there is a significant difference when working on the two different weights.  If this is your first pair of leather mitts, you will find 1 oz. to be easier to work with.

I laid the pattern on the skin and traced it using a sharpie.  You cannot pin the leather.  You can scotch tape it in place if you are worried about the pattern slipping.  I just poked pins straight into the edge of the pattern piece by the edge to keep it from slipping. Cut a single layer at a time and remember to flip the pattern for the 2nd mitt!  Try to conserve the leather, fitting the pattern as tightly as possible on the skin.  Save your scraps!  They come in handy!


First I completed the embroidery on the hand using 1 strand of Soie d'Alger silk floss which matches the lining on both pairs of mitts (pink for the garnet mitts and white for the purple mitts).  I marked the lines using one of those blue water removable marking pens.  Note--and this is really important--this silk floss has a nap.  You need to thread the end you pulled from the skein into the needle.  If you thread the other end through--you will have knotting as you stitch.  Since you are only using one strand at a time, be sure to mark the starting end of your unused strands/


Once the embroidery was done, I made the thumbs as outlined in the tutorial and glued the seam allowances on the thumb seam, the hems on both edges of the thumb and the hem around the thumb opening on the mitts.  The previous tutorial contains information about what type of glue to use.

Using matching thread, whip stitch the thumbs in place on both the leather and silk mitts.  It's always helpful to have an assistant!


Cover the whip stitches with herringbone stitches using 1 strand of silk floss.  You will only be stitching through the top layers of the leather.

 Sew the side seams in both the silk and the leather mitts. This is literally the only place I use my sewing machine in 18th century sewing.  This leather is thin enough that you can use a universal needle though leather needles are preferable.  You will need to glue the seam allowances flat in the leather mitts.  I use a toothpick to apply my glue to about 2 inches of seam allowance at a time and immediately finger press the seam allowances in place.  This is contact cement so it grabs immediately on contact.


Roll the seam flat with the seam roller.

Next you need to glue the hems at the top and bottom of the leather mitts.  I do this the same way I do the seam allowance.  I just turn up a 1/4 inch hem and glue an inch or so at a time.  The tricky part is the point at the top of the mitts since it's a tight curve.  I do that by applying 3 dots of glue.

Then I just turn under the hem at those points and complete the rest of the hem.  I flatten out those "bumps" after the rest of the hem is done.

Take your toothpick with glue, stick some glue in those little bumps and flatten them out.

Turn the mitts to the right side and check the hems.

Use the seam roller to flatten the hems from both the right and wrong side.

Press under the hems on the silk mitts (lining).  With the wrong side of the silk lining out, drop the lining in the leather mitts and clip in place, making sure that the lining is not twisted.  I like using Wonder Clips but binder clips, paper clips, scotch tape--just about anything will work.

The lining gets whip stitched in place using tiny stitches that blend in.  You can use thread either the color of the leather or the lining.   I used size 100 silk kimono thread in white to stitch the lining in on both pairs.  While it didn't match the pale pink, the thread is so fine it blended it nicely.


Once the linings were all stitched in, I decided that the red mitts looked best without additional embroidery so they were compete.


I stitched a narrow embroidered edge on the edges of the purple mitts using one strand of white silk floss.


Final thoughts--I think I'm done with leather mitts for awhile.  This makes 4 pairs.  I do love them though.  I did learn that 1 oz. leather really is easier to work with.  1 1/2 oz. is significantly heavier.  The red mitts, being made out of the heavier weight should prove to be quite warm.   Now I get to rest my fingers before the net project!


Saturday, June 27, 2020

A hat of garnet silk--1770

Quick post about my most recent millinery project:

I was inspired by this example in the V&A which dates to ca. 1770:

As it turns out, Silk Baron had one of their remnant sales where you can buy pieces in 1/2 yard and 3/4 yard pieces.  I ordered a 3/4 yard piece of this lovely garnet silk to cover the hat, make breast knots and other small items.

I used the method outlined in the tutorial in this post to cover a straw hat blank with silk--using garnet silk on the outside and white on the underside. This style of silk covering is copied from several extant examples as shown in the post.  This post also shows how to attach the ties underneath.


I could not find French Val galloon lace--galloon lace is lace with 2 scalloped edges--so I bought 1 1/4 inch wide insertion and stitched 5/8 inch edging to both long edges to get what I wanted 

I used the method outlined in this post to attach the lace to the brim.

As far as the loops go--I just played with it to figure out the size loops I wanted and stitched then down as "open" loops--you can sort of see that in the photo.   I did two rounds of these loops, staggering them and then added more layers to the one side  I used 2 inch wide double face satin silk ribbon.   1 1/2 inch double face silk ribbon was attached to the underside for ties.
That's pretty much it. 


I'm very pleased with the way this one turned out.  You don't see many hats with lace during that time period.  I've always loved this one though and thought it would be a great addition to my upper class impressions and to hang in the shop for my milliner impression.  Plus--making hats is one of my favorite things to do.  Switching up one's accessories can change the entire look of a gown!

Also--as far as period images go--I see more silk covered hats than straw.  Even lower sorts have some simple silk covered hats--often showing signs of wear.

Covering the typical hat blank can be done with 1/2 yard of silk taffeta and it's a great way to use up those odd remnants.


Monday, April 20, 2020

Sewing During a Pandemic: 1760s Print Gown

Being a lady of a certain age, I frequently wear gowns that are a few years behind in style.  Lately many of the events I've been doing date around 1770 so I've been choosing 1760s styles. The 60s aren't too different from the 50s but they are quite different from the 70s.  I'm finding there's a lot to like in mid 18th century fashion.  Let's take a look.

Extant Indienne gown ca. 1760.  Note that there is no matching stomacher.  The robings are folded and look double.  Fairly large cuff.

Wool Damask Gown ca. 1760.  Same features as above gown.  You can see the larger pleats on this gown which is another feature of mid century English gowns. Note the ribbon ties across the center.  I don't know if these are original to the gown but I have noticed period images from the 1750s do not have stomachers.   They tend to have vertical bands, ties or lacing across the center front to secure a handkerchief in place.

1760s portrait by JS Copley.  Note the larger cuff which is typical of an earlier 60s cuff which is more winged.  Also 60s sleeves are shorter and wider.  You see the shift cuff has a ruffle which is visible in the 50s/60s.

Girl with a tray.  1750.  Note the double folded robing, winged  cuff and shift sleeve ruffle as well as the ties across the center front. The sleeves on 50s garments are more full than those on 60s garments.

No date but appears to be 50s/60s.  Same features as above:  double robing, wide shorter sleeve with cuff and shift ruffles.

Girl with a fan ca. 1750.  Same features as above.  The shorter, fuller sleeve is really quite apparent in this one.

The features I've noted above disappear in the 1770s.  The sleeves get slimmer, longer and cuffs disappear.  Eventually the stomacher becomes a center front closing bodice.

Another detail worth noting is that the silhouette in the 50s and 60s showed wider hips which were achieved with panniers or hip pads.  Those seem to disappear in the 70s for English gowns, being replaced by bum rolls or no padding.   In the mid to late 70s we start to see more bum pads.

One detail I should also mention--mid century gowns were longer waisted as were mid century stays.  Also--if you study mid century images, you will see that the front opening isn't as wide and typically forms a "V."  Often the robings almost come together at the waist.  I need to play with my pattern to achieve this silhouette but I will wait until I've made mid century stays.

My research also indicates it was typical for petticoats to match gowns with the exception of quilted petticoats.

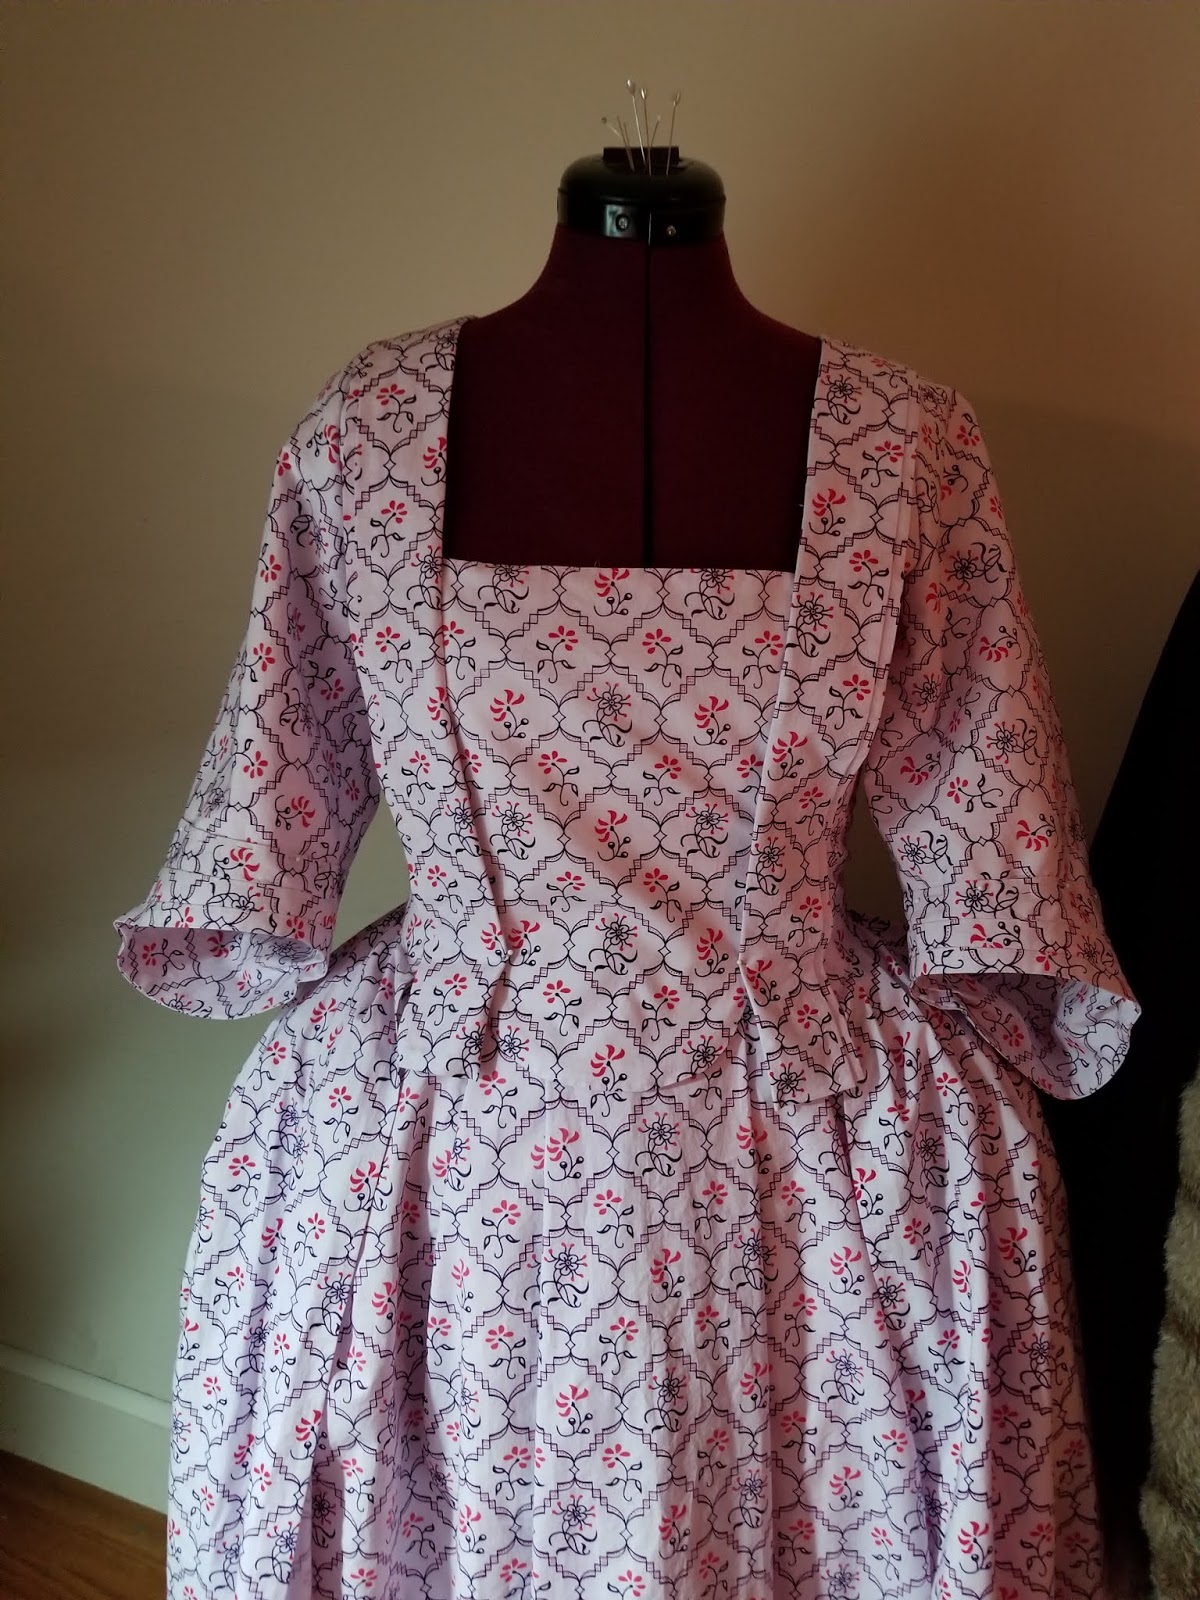
One thing to consider if you are using a print --research the date of the original or inspiration textile.  You certainly don't want to make a mid century gown out of print that didn't appear until 1780!  If your fabric is from Colonial Williamsburg, you can find the original swatch or garment in their emuseum which will give you the dates and use of the original textile. The online vendor doesn't typically give the dates.  This will alleviate the possibility of using an inappropriate textile. The print I used for this gown is a replica by Burnley & Trowbridge of a token from the Foundling Museum, dated to 1758.  This makes it perfect for a late 50s/60s gown.

If you are a seamstress that uses patterns, you will find that there aren't patterns for mid 18th century English gowns unless you scale up patterns from books.  My observation has been that many people simply use the available patterns that are geared for the 1770s.  In order to do this, changes should be made to make the gown appropriate for those earlier decades.

As noted in the extants/images above, you will need to shorten the sleeve and make it fuller.  I typically use the Larkin & Smith English gown pattern.  This post discusses how I changed that to have folded robings.


On this gown I added 1 1/2 inches along the front pattern piece to enable me to make the pleat on the robings to create the double robing appearance.

This print worked well for the en forreau back. I didn't particularly make an effort other than making sure the back fold was centered.

You can see how the robing/bodice piece goes to the back.  The robing covered the strap portion of the bodice.  I drafted a back facing (which is easy) as the straps don't seem to end up in the same place every time. 

I had made a mid century sleeve pattern which was about 1 1/2 inches fuller than my later sleeve and about 2 inches shorter.  I also used the same cuff as my brown silk gown.   It's larger than my late 60s cuff.  I'm still debating as to whether or not the cuff needs to be weighted.  Costume in Detail shows a number of cuffs with small self fabric pockets containing lead weights.  I have done this in other gowns using a drapery weight.  This gown will be worn over a mid century shift which also has a shorter, wider sleeve with a ruffle at the cuff. 

Almost done, pinned together.

This gown was made for an event taking place in 1770 where I was to portray a milliner so I do hope to make another cap.  In the meantime, I took a wired cap I made 4 years ago and put new ribbon on it.  1760s featured small hair and small caps.  This cap is quite petite.  I also made a nice 4 loop bow out of some silk taffeta I have to cover a hat.  I'll wear this with tambour work accessories.

I also made a 5 strand pearl choker and a bracelet from 4mm glass pearls.


And here's a pic from the event this gown was created for--worn with a different cap.


Overall, I'm pleased with this gown. It will be a nice summer addition  to my 1760s wardrobe.  My goal is to eventually make earlier stays and reshape the bodice on this pattern to a 1750s silhouette.