
I've been fascinated with the little framed reticules that I've been seeing in some Regency fashion plates lately so I decided I'd explore a little more. Here are some examples of extants I've found:
1820-21 silk and gold thread bearing the cypher of Queen Caroline

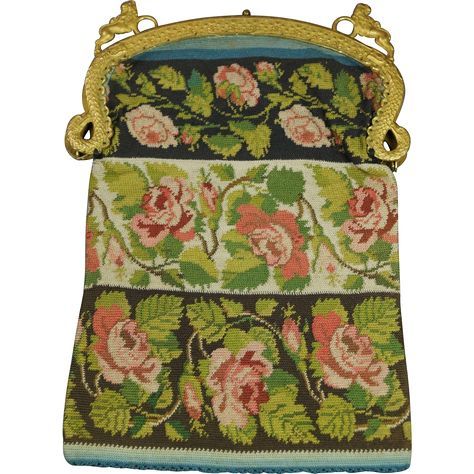
ca. 1820 woven silk

Early 19th century crochet

1810-20 silk and glass beads

French, knit 1820
Beaded silk 1800 - 1820


1814

1820


To make a framed reticule, you will need:
- a frame
- silk or other outer fabric--scrap
- linen or other lining fabric
- silk twist thread
- paper
First--using a pencil, trace around the frame--the inside and the outside. Then extend the outside line to make the shape you want for your reticule. Note that the extants above do not have gussets so this one will also just be flat.

Add 1/4 inch seam allowance all the way around the piece. Note where the hinges on the frame will also fall.

Cut out your pattern, fold it in half lining up the top where you traced the frame. You need to make the pattern symmetrical. Place it on a folded piece of paper, draw the pattern and mark the point where the hinge of the frame is.

Cut out the new pattern and lay the frame on it to check the fit. The pattern should extend past the frame by 1/4 inch. Mark where the frame ends.

Place outer fabric right sides together and stitch below the hinge mark in a 1/4 inch seam. Pin the lining the same way and stitch in a 1/4 inch seam, leaving the bottom open for turning.


Turn the outer fabric right side out and slip it inside the lining so the pieces are right sides together. Stitch the top of the bag together using back stitch.

Turn the lining to the inside of the bag by pulling the fashion fabric piece through the opening in the bottom of the lining. Whip stitch the opening in the lining closed. Press the bag. Insert the top of one side of the bag in the slot of one side of the frame and use silk twist to stitch the bag in place through the holes using a back stitch. I actually took two stitches between each hole for strength. Repeat on the other side.

You may decorate your reticule with tassels or beads. I chose to keep this one simple.
When you are finished with your sewing, add a chain to the frame.


I was pleased with the way this turned out. I've found some other frames and hope to experiment a little more with making these. Overall they're nice little one day projects.
No comments:
Post a Comment