I can't remember how it happened, but last spring in a discussion on Facebook, a decision was made to host a Suffragette Tea. I know I was beginning to research the Hello Girls for the Centennial of the WWI armistice and somehow, this being an election year, it just seemed the thing to do! 1918 was a big year in the Women's Suffrage movement. In 1918, President Wilson switched his stand on women’s voting rights from objection to support . Wilson partially tied the proposed suffrage amendment to America’s involvement in World War I and the increased role women had played in the war efforts.
When the amendment came up for vote, Wilson addressed the Senate in favor of suffrage. As reported in The New York Times on October 1, 1918, Wilson said, “I regard the extension of suffrage to women as vitally essential to the successful prosecution of the great war of humanity in which we are engaged.” It would still be 2 years before women gained the right to vote in the United States.
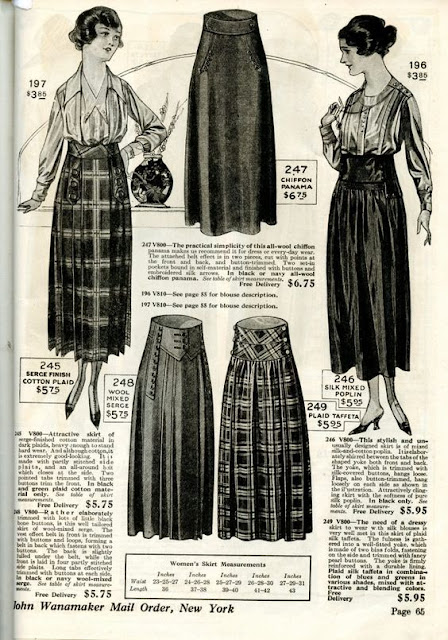
Of course this meant that I needed to make an appropriate outfit. I love Edwardian clothing. The late 19 teens saw a lot of changes. The corsets were different than the pigeon breast styles of the first decade of the 20th century. Skirts were shorter and more flared, By the late teens, corset covers gave way to early brassieres. Hat brims were smaller. You can see the styles moving toward that of the 1020s. I decided, as a matronly feminist rabble rouser, that I'd wear a suit. As always, I looked to period images for inspiration:
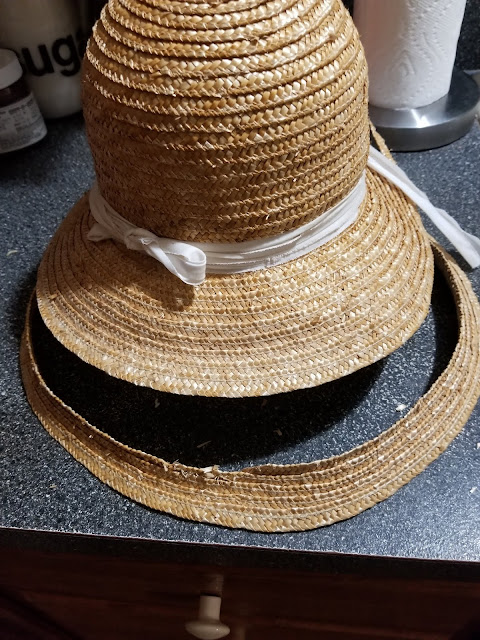
I raided my supply of thrift store straw hats and found one I could work with.
First I hit it with a blast of steam to soften the glue, allowing me to pull the flowers off.
I needed to reblock the hat to give it a deeper crown. Enter my improvised hat block! I have a collection of containers in the right size that work well.
I wet the crown thoroughly and stretched it over the bowl, wrapping cotton bias tape around the bottom to secure it until it dried.
Once dry, I ripped out the stitching to remove the outer rows of straw braid. Because the braid is spiral, I made sure it was even with one row more in the front of the hat.
I cut the braid and will deal with that later.
I pinned hems on both long edges of the velvet and started wrapping it around the crown of the hat. I also stitched the end of the straw braid in place using a zig zag stitch on my machine.
I overlaped it at the side back and just played with it until I liked the shape.
I used standard black thread and a size 4 millinery needle to tack the velvet on the hat. That was it! One of the fastest millinery projects ever!
My original plan was also to make an Armistice blouse using the vintage organdy below but I simply didn't have time. I'll save that project for another event. The fabric is probably from the early 20th century and I have about 3 yards in several pieces.
I had made the Wearing History Elsie shirtwaist for my Hello Girl uniform so I decided to use that with my suit for the tea.
Since I had made this for a uniform, it was made from pima cotton sateen according to the pattern with one change. The buttons are vintage early 20th century mother of pearl. I took the advice on the Wearing History video about this pattern to use a drawstring at the inside waist instead of a waist stay. This certainly allows for weight fluctuation.
I love the shaped cuff of this blouse!
I also used the Wearing History 19 teens suit pattern. I had used it as the basis of my Hello Girl uniform (with major style modifications) so I knew it fit and didn't need to make a fitting shell. I decided on the first version with the shaw collar and the shaped cuffs.
I followed the pattern pretty much with a couple of changes to the construction order. I made my waist stay out of 4 inch wide drapery tape. I trimmed the bottom to get the correct width, made the darts then bound the raw edge with bias tape.
The pattern has you turn under the center front edges and stitch them first. I pinned them in place and pressed under the 1/2 inch at the waist edge and sewed the hem facing on so that I could clean finish the corners at the top and bottom of the center front edges.
Before stitching the center front edges down, I pinned the waist stay in, adjusting the back gathers, and I put the ends of the waist stay under the front edge to secure it. Once pinned in place, I stitched the front allowance downl
Waist stay pinned in place:
Waist stay sewn in place
The fronts were overlapped and stitched in place leaving about 8 inches at the top for a placket. I hate sewing hooks and eyes and opted for hook and eye tape with large hooks and eyes at the part of the skirt over the waist stay since that gets more strain.
I ordered faceted black glass buttons in 2 sizes and stitched the larger ones down the front and the smaller ones on the decorative outer belt.
I made the jacket up exactly as the pattern instructed. I did use rayon seam binding on my facing and hem edges and I enclosed my armscye seams with bias tape so the interior of my unlined jacket would look tidy.
One last small garment that needed completing was my early brassiere. This is based on a period image using antique fabric and buttons from the era and lined with batiste.
There was an option to add boning to the front seams of this garment but I omitted that and just used flat bias binding. A separate post about the underpinnings will be posted soon.
The outfit was worn with black silk stockings and Edwardian styled American Duchess shoes I had purchased on clearance about 3 years ago.
First layer of underpinnings: Chemise and corset. I removed the garters from the corset because they weren't needed.
Second layer of underpinnings: Brassiere and petticoat (which I made with batiste and antique lace almost 30 years ago!)
Shirtwaist and skirt. Note the high waist! It's a totally different look as the inner waist stay contours to the waist and the skirt hangs from the top of the internal waist stya.
With the banner made by Betsey Keithly.
And here is a period image of real Suffragettes outside of the White House!


Wonderful tutorial, fabulous outfit!
ReplyDeleteThank you so much for posting this! Fantastic outfit! I appreciate all the under-things as well. People don't show those garments as often.
ReplyDeleteLove it. Thank you for the tips.
ReplyDeleteNice Post
ReplyDelete