Showing posts with label cloak. Show all posts

Thursday, April 24, 2025

Caught in the Storm of War . . . Dressing for 1775 New England

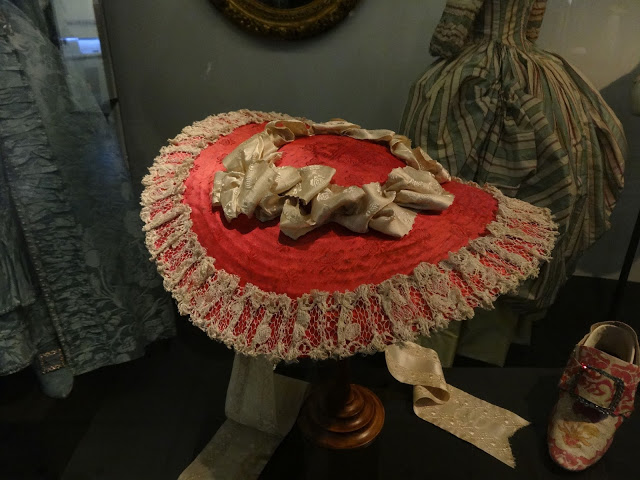
This is a fairly short post as I was on such a tight deadline that I didn't take many construction photos. Since this was the 250th Anniversary of the start of the American War for Independence, I thought I'd make something new.  The women participating in the evacuation of the various residences in Minuteman National Historic Park are portraying middle sort women in 1775.  Dress was on the conservative side.  I planned on wearing my satin bonnet which I made as a demo piece in a workshop I taught in January.  The clothing standards indicate that wool stomacher gowns were to be worn.  Fortunately, I've been sitting on about 8 - 10 yards of imported super 360 wool/cashmere tropical weight suiting that I had bought in one of the selling groups on Facebook.  It's amazing as it feels like pima cotton and is very lightweight so I figured it would work for any weather situation.  New England in April can be all over the map weatherwise! 

I made a gown using the the bodice I had drafted in this post.  I really prefer folded robings to robing strips.  The gown was made with a fitted plain sleeve.  This is really a solid mid 1770s plain gown.  I've used this bodice pattern with some variations in a number of gowns, mostly 1760s,  and it's basically my tried and true pattern at this point. 

I wanted this gown and petticoat to be a bit shorter.  I've made this enough times that I don't really try it on until I'm attaching the shoulder strap in the back to be sure the armscye fits. I figured I should at least double check it before I pack it up and head north.

Here's a better photo on the dress form.  Both of these photos are without a shift and underpetticoat so the skirts look a bit flat.


It was great to get this done with fabric from my stash.  I still have 4 yards left so I will probably make something 1940s with the leftovers.

I also wanted to do a nicer middlin' style short cloak.  My original red one is okay but it's more of a lower sort and my others are all upper sort.  I had some black wool in my stash that seems to be between a broadcloth and a plush.  It has a hard edge.  I used Sue Felshin's, which I've used before.  A good friend of mind had made a paper pattern and copied it for me which was a great time saver.  Mohair trimmed cloaks have fascinated me for some time so I decided to trim this one with mohair and to only have a small cape and collar.

The mohair is from a supplier on Etsy.  The fabric backing is woven.  I bought one half a yard and it's about 54 inches wide.  I ended up only using a little over half of what I bought so there would've been enough for a hood had I decided to make one.  Whenever there is fur, one has to be careful to only cut the backing and avoid cutting the fur nap itself.  I decided to try to solve that problem by tearing my strips.  Determining the width of the strips was the first task.  3 inches looked right on the bottom of the cloak itself with 2 inches being better for the cape.  The front edges ended up being 1.5 inches wide.  I snipped through the selvedge and gave it a good tug and was amazed at how easily it tore!  The nap definitely lays in one direction so I had to make sure I applied the pieces going in the same direction.  The mohair is torn on grain and is applied to a curved surface so the top edge of the mohair has to be slightly eased.  


The long edges of the mohair were left raw and the short ends were turned under when pinned in place.


I whip stitched the bottom edge in place but found that process to be a bit frustrating as the whip stitched kept catching the fur.  This took longer as I had to stop and pull the fur out.  I ended up using a running stitch for the remainder of the mohair as I found I could insert my needle under the fur when stitching and go faster.  The last thing was sewing on the black wool tape ties.

I simply love how this turned out--even with the white cat hair on it!


I wore my gown with a medium weight white linen apron and a white linen handkerchief with a blue border.  Sadly I didn't get too many photos of these garments in action but I was very comfortable in them.  I know I'll get a lot of use out of them.

Checking things in the Lexington Historic Masonic Lodge:


Lexington Green--saying goodbye to our militia men as they prepare for the Regulars:


In the kitchen at Hartwell Tavern, Minuteman National Historic Park:


I know I'll get a lot of use out of both of these pieces--especially the gown which can probably be worn year round.  Now to think about linen for the hot Mid Atlantic summer!

Friday, October 29, 2021

1760s-70s Mantelet based on Garsault

As fall weather approaches and events line up, it became apparent that I needed an appropriate outer garment for warmth to be worn with my upper sort 18th century wardrobe.  I had made a black silk velvet short cloak trimmed with fur for my mid century-1760s garments so I decided to go with a mantelet.  Let's have a look at some:

1747

1750s

no date but looks to be 1760s to me

1772

1775-76

1778

1780s

I liked the fact that this shape seems to be popular through several decades. I noted that the hood size changes to accommodate the changes in hairstyles.   Since time was of the essence, I decided to go stash diving and I was not disappointed.  I found some stuff that I had put aside for a different style of winter garment.  I had about 5 yards of light weight yellow woolen that my friend Barbara had given me at least 15 years ago along with 5 yards of yellow shot taffeta with matching ribbon and white fur trim!  The colors aren't so true in the photo as the wool and the taffeta are almost exactly the same shade.


My original plan, when I bought the silk and fur trim, was to make a plisse like that in this image based on the instructions in Garsault. I had originally planned to make it wool lined in silk.  I decided to look at that once again as I remembered that there was also a pattern for a mantelet.  I also looked at the scale mantelet patterns in Fitting and Proper and Costume Close up.  I liked the pattern shape in Garsault best for this project.  I also wanted this garment to had added warmth so I decided to use the wool for interlining between two layers of silk since I had enough silk.  I would've liked to line it in white but didn't have enough on hand so self fabric lining is fine.

This website had the translation of the original text, clarification of measurements, pattern diagrams and annotation which was very helpful.  I printed it out and noted the measurements on the drawings.

My next quandary was whether or not to attempt to manually draw the pattern full size based on the measurements.  I've done this before with gridded patterns and it takes forever.  This one wasn't gridded and it seemed like a pain so I decided to let technology work for me.

First--the measurements were given in centimeters from point b at the top to point c at the bottom of the diagram so I cropped the picture so that point b was at the top edge and point c at the bottom edge--basically eliminating any border.

Using photoshop elements (I would expect most photo editing software has these functions), I used the Resize image function and chose to resize the height of the image to 90 cm which is the measurement given for the full size pattern.


I saved the image as a pdf file and opened it in Acrobat Reader.

I selected print, chose poster and tile size 100% which automatically tiled the layout in my print dialog box as shown. 


I followed the same procedures above for the hood piece.

Added step--I took a screen shot of the tiled layout so I would know how to arrange the individual pages.

I taped all my pages together--Acrobat did allow for a little overlap which you can see on the pages.

I traced the pattern with pattern tracing cloth on the fold so I could fit the full size pattern.  Note the different dotted lines on the pattern.  The upper one is the short version on the original pattern.  It was too short and the longer view was too long.  I played around with the pattern by pinning it at various lengths to get the hip length that I wanted.  I also played around with the neck pleats using the original pattern as a guide.  I ended up with  five 1/2 inch deep pleats spaced about an inch apart on each side of the center back.   I marked these pleats on my pattern.

I cut my pieces out --2 of each for the silk (outer and lining) and 1 of each for the wool for interlining.  First I basted the wool to the wrong side of the silk then I marked pleats at the neck edge of the mantelet using the pattern as my guide  


Pleats were pinned then stitched in place.

Checking the length/fit so far:


I stitched the lower back seam of the hood and did the cartridge pleats in the opening at the top and checked the neckline pleats.  I had marked the same pleats as those on the body neck.  The original instructions do not indicate that the neck is pleated.  Not pleating it brought the hood way to far to the front.  I decided to go ahead and pleat the hood lower edge.  The hood was stitched to the body and the seam was pressed open.

The hem around the edge of the mantelet was pressed under (about 1/2 inch)

Fur trim was pinned to the wrong side.  This particular fur trim is like a little tube with cotton tape.  The tape will be concealed in the seam between the outer fabric and the lining.


Trim pinned in place:

The outer edge of the mantelet was whip stitched in place over the fur trim.

The hood lining was constructed as the outer hood was and stitched to the inside of the mantelet--whipstitched to the fur trim around the edge and the neck seam allowance stitched to the seam allowance of the mantelet.

Body lining was pleated at the neck, hem was turned in, pinned in place and whip stitched around the perimeter. Note:  when stitching anything to fur, always pull the fur "nap" out of the way so the thread doesn't catch it.  Frequently check and pull any fur out of any stitches it gets caught in.


Ribbon was stitched to the fronts at the neck seam.

Note: The original instructions said to stitch ribbon inside at the neck seam to create a channel for your ribbon tie.  I was delighted to note that construction in the period image of the blue mantelet in the beginning section of this post.

Final test fit:


I'm very happy with this project.  It was pretty quick and I know that I will get a lot of use out of it since both my silk day gowns are typically accessorized with yellow.  I have leftover fabric and trim and will make a matching muff cover to go with it.  I was also delighted to figure out how to resize and print using technology.  Here is the mantelet being worn--you can see which one I am!  

If you would like a quick little project, a mantelet makes a fun and practical one!

Tuesday, December 8, 2020

2020 Costuming Year in Review

It's that time of year --where I take stock of what I accomplished and what I failed to accomplish. Normally I'd wait until the end of the month but since I'm doing Christmas sewing from now until then, I don't anticipate getting anything new made.  Here are my costuming accomplishments for 2020:

1, 2.  Two silk hoods:  One taffeta and one silk velvet.  To be honest, these were started in 2019 and the finishing details were done on New Years Day.  The silk taffeta one is copied from a New England example in the Museum of Fine Arts in Boston.  I created a downloadable pattern for these which is available on the blog post.   Blog post here.


3.  Fur trimmed velvet cloak:  Detailed blog post here.


4,5,6.  Mrs. Russell's outfit:  1760s brown silk gown, antique linen with lace handkerchief, lace trimmed lappet cap.  Detailed blog post here.


7,8.   Yellow Silk Damask gown with petticoat and lace pinner cap.  Blog post here.


Inspiration images


9.  1760s Indienne gown:  Detailed blog post here.


10.  Garnet silk hat.  Blog post here.


Based on this hat in the V&A

11.  Black silk tulle mourning handkerchief trimmed with lace.


12.  Moretti masks.  I almost hesitate to list these but they were quite labor intensive so I figured I would.  They are based on period images and a research piece by Phillipe Halbert.


13, 14.  Lambskin mitts of purple and claret.  Detailed blog post here


15.  Sultana with petticoat and sash.  Detailed blog post here.


16. Sheer linen cap trimmed with lace.


17 .  Long term project carried into next year:  Quilted petticoat.  Series of blog posts here.  I hesitate to list this but the time involved so far exceeds that of making of a number of gowns.  Here are a couple of progress shots.


Reflecting on what I accomplished, it occurred to me that everything was 18th century.  I really focused on studying different decades and what distinguishes them from others which made me feel that I had a good amount of variety.  The past couple of years have also had some Regency and Edwardian projects but not this year!  I'm planning though!   Next year will have more variety!