Showing posts with label work bag. Show all posts

Friday, December 31, 2021

2021 Costuming Year in Review


Another year done, another group of additions to my costuming wardrobe.  For some reason, I feel like I didn't accomplish as much this year.  I think that is because I seemed to make more accessories than large garments this year.  Needless to say, some accessories are every bit as time consuming as an 18th century gown and some are even more so.  I also spend a good portion of the year researching a new era--the 1920s.  So without further ado, here are my costuming accomplishments:

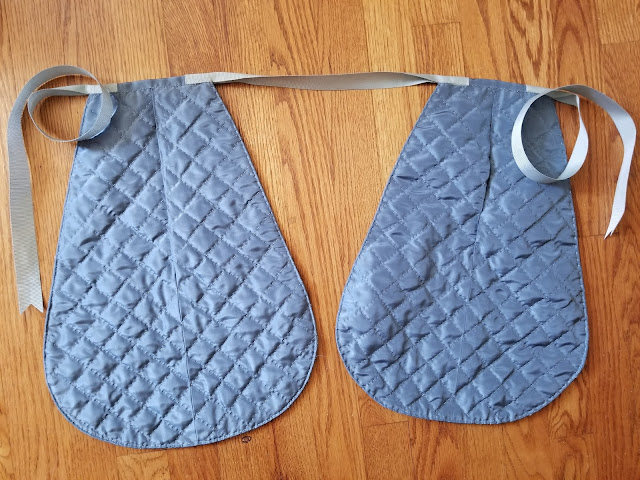
The first projects were samples for our February workshop which had to be moved online.  We had a quilted pockets class.  After studying a number of extants, I decided on 2 techniques for the pocket construction.  Both were quilted.

1.  Quilted linen pockets, bound with linen tape.  The hippogryphs were taken from from a 1740s quilted petticoat.

2.  Quilted silk pockets based on an extant pair.  These pockets are not bound but have the edges turned in and stitched with running stitch.

3. Another sample for our Feb. workshop which was on making muff covers.  The beading /embroidery design was copied from an extant muff in the Boston Museum of Fine Arts.  The image is printed on      silk.   Detailed post of the muff and pockets here.


4.  1920s underpinnings were a big part of this year. As is typical for me, I worked from the skin out--starting with an envelope chemise from a reprinted antique pattern from Silk and Thimbles on Etsy.

5.  1920's Corselette.  I used a pattern as a foundation for this but ended up totally redesigning it.  I don't like how this one works on me.

6.  1920s silk crepe de chine slip.  I used an image from an antique pattern.  The pieces looked like a 1 hour dress so I just drafted my own pattern for this.

7.  1920s Brassiere.  I started with the Wearing History pattern and changed it to match a brassiere in a 1922 store catalog.   Detailed post of these 4 undergarments here.

8.  One hour dress--self drafted.  This was made as a toile.  I will probably not wear it but I'm glad I made it.  It was enough to show me that this particular 20s shape doesn't work on me.  Detailed post here.

9. 18th century lined silk satin mitts.  These were a copy of a pair in the Bostom Museum of Fine Arts.    Detailed post here.

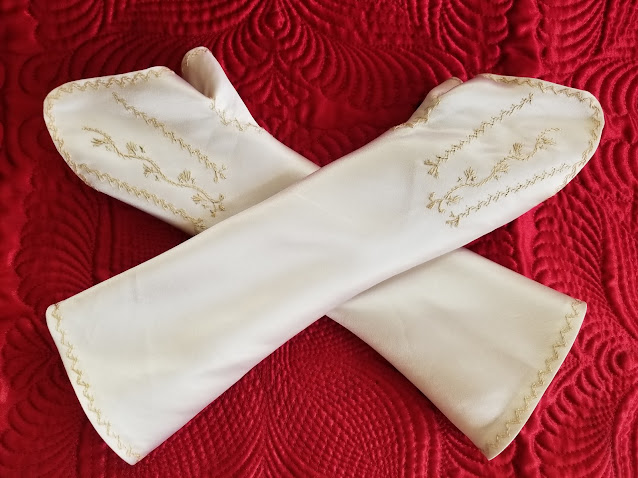
10.  18th century unlined silk taffeta mitts.  The embroidery was copied from a pair in the Amsterdam Museum.  These were one of 2 pairs I made as class samples for the summer mitts class I taught.

11.  Unlined silk satin fancy mitts.  This was my 2nd sample for the summer mitts class.  

12. 1778 silk taffeta English gown with pleated and ruched trim. Detailed post here.

Here's the gown as worn at the French Occupation at Newport, RI.

13.  2 Masquerades masks for our 18th century masquerade gift swap--paper mache covered with silk velvet, lined with linen and silk taffeta ruffle.

14. Silk mantelette based on Garsault pattern.  Silk taffeta, self lined, interlined with wool, trimmed with rabbit fur.  Detailed post here.

Here's the matelette as worn.

15.   1920s French corset based on several extants.  Detailed post here.

16.  1803 silk workbag with silk embroidery and spangles, copy of extant in the National Trust.  Detailed post here.

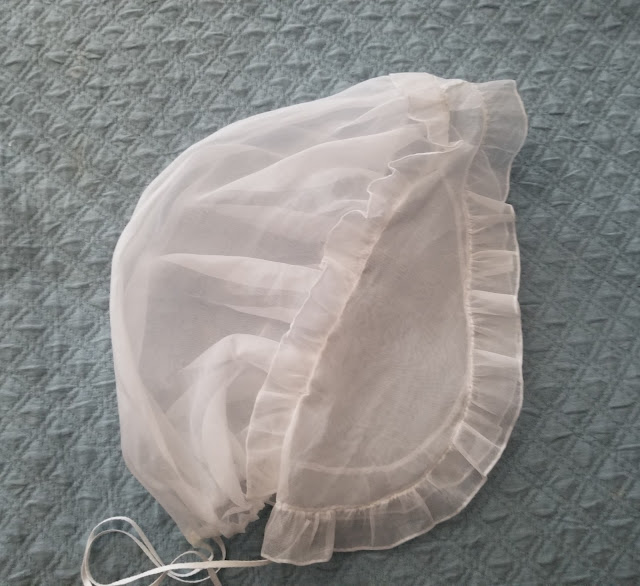
17. Annabelle cap: Pattern test for Virgil's Fine Goods new cap pattern!  Be sure to check it out!

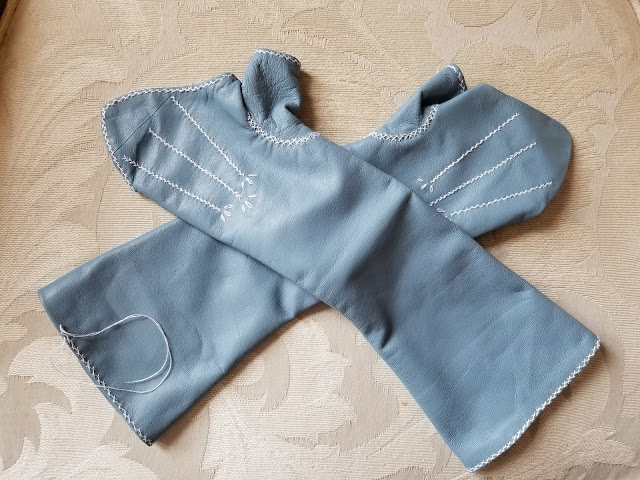
19.  French blue lambskin mitts--class sample for leather mitts class.  

I was hoping to have one more outfit to show but it won't be finished today so it will have to be my first completed project for 2022!

It's easy for me to discount my accomplishment because so many of them are small.  Some of the small projects require the same time commitment as a full sized garment though.

Anyway--here's to a productive 2022!  Happy New Year!


Friday, December 17, 2021

18th Century Trifles

My friend Ruth and I like to refer to small projects as trifles.  I guess only one of these really fits that term as three of the four were fairly involved.  They're small accessories so I thought I'd include them.

First--Sleeve links!  I had lost one of my fancy ones at an event so I decided to just make my own.  I picked up several sets of fancy silver buttons at Joanns along with some heavy craft wire.  I bent the wire, two pieces at a time, into S shapes and joined pairs of buttons.  The ones on the right are very similar to the one I lost!


Next up is a workbag I've been eyeing--an extant from the National Trust dated 1803.  


The flower petals are made from marquis shaped spangles which are difficult to find so I decided to embroider them with silk then add tiny metal spangles to the centers.  The embroidery was done on white silk duchess satin which I prewashed and ironed.


Finished embroidery

I lined the bag with burgundy taffeta.  I wanted white ribbon for the handles but didn't have any white satin ribbon in my stash so I used burgundy.  The original looks like it has bobbinette or lace netting as the ruffle trim--perhaps in a tarnished metallic. Since I had white French cotton bobbinette on hand, I decided to use that.  

Here is the finished workbag:


The next "trifle" is a lovely "big hair" cap that I made as a pattern tester for Virgil's Fine Goods.  It's different than any other I have in that the "ear" part is much larger.  I really like it!


The last of the trifles is another pair of leather mitts in French blue lined with white silk taffeta.  I made them according to this post with slightly different stitching on the hems.  They are my 5th pair of leather mitts.  I love them!

Finishing up the 2nd mitt but want to get a pic in before the end of the year!


I will have a separate post on my masquerade masks which could also be considered "trifles."

I love small projects because they bring such a sense of accomplishment.  They're also great for practicing one's skills without a major commitment.


Sunday, May 28, 2017

Odds and Ends

Sometimes I just get lost in making small projects.  Here is a compilation of what I've been up to lately.   The first project wasn't so small as it was a gown but it was completed in 3 days so it wasn't a particularly taxing project.  I purchased the hand block printed fabric from a friend who was destashing and I used the Larkin & Smith English gown pattern that I had adapted into a center front closing gown as explained in this post.  I wanted to wear this during the Printed Fabrics Symposium in Colonial Williamsburg as my goal was to wear a different print each day.  I got the gown almost completed before leaving and ended up doing some finishing in the hotel.

I love this fabric

I added the ties to draw up the skirt and finished the hem in the hotel.  Here it is with just the side seam ties drawn up.  There are also ties to draw it up at the side back seams.


Whole outfit as worn in Colonial Williamsburg


Visiting Philly for the members' preview at the Museum of the American Revolution and wearing different accessories:

And at Mount Vernon for Call to Arms with different accessories.


I love this gown.  It's lightweight and very comfortable.  Because the fabric is so lightweight, I made sure to use a medium weight linen to line it with in order to provide the necessary structure.

The next project which I had been procrastinating doing was a new shift which I'm wearing in the picture immediately above.  My old shift didn't have cuffs which I prefer so I finally made one that did.  I purchased some lovely cuff links from K. Walters At the Sign of the Gray Horse last year and finally can use them. I really dislike making shifts and shirts.  I think it's the gussets and felled seams that bug me so I'm glad that I got that one done.

Next project was a nifty silk work bag using the instructions in the first Lady's Guide to Sewing.  I used some silk taffeta I had bought to line a yellow cloak and lined it with a scrap of yellow linen.  Silk ribbon trim was added to the outside in a lighter yellow.  I need to order more of this ribbon for the ties as I didn't have enough.  I used white China silk ribbon in the meantime.  I love these bags when I don't wish to carry a basket and I carried this one around Philly when we were there (you can see it in the pic above.)  


Next small project:  A green market bonnet!  This green ribbed silk is one of the new ribbed silks that Renaissance Fabrics is carrying.  They are gorgeous!  This one has yellow threads in the weft which makes it somewhat iridescent.  This silk has a lot of body and is very crisp.  I used the Fashions Revisited Market Bonnet pattern which was very easy to follow and the project took one afternoon.  The ribs on the silk ran horizontally on the fabric so I cut the bonnet on the cross grain which ended up only using 1/2 yard!  I have enough left for another project.  I also had some double layer milliner's buckram in my stash so I only needed one layer of that for the brim.  Finished it off with some wide white double face satin ribbon from my stash which was ruched.


Next project was decorating a new pair of American Duchess Dunmores.  The shoes were on sale and since I wanted blue shoes to wear with a number of projects, I figured why not!  I bought the shoe dyes from American Duchess and mixed two colors using the provided swatch to get the color I wanted then I followed the instructions for dying the shoes.  The color was nice but the dyes did not dry evenly for some reason, leaving white areas along some of the seams and looking a bit splotchy.  AD sent me more dyes and I did another coat which helped somewhat.  After searching online, I found that a lot of people used Rit dyes successfully to dye shoes.  One difference with Rit dye though is that it typically needs to be rinsed out which doesn't happen with shoes so you have to Scotchguard the shoes.  The Rit dye worked great to even out the color and I sprayed the shoes with a water proofing spray created for sports gear.  Since I was using fancy buckles on these shoes, I felt they needed a little more trim so I found a narrow braid at Joann's that worked well.  

I haven't worn them yet but I hope to wear them with a gown made from the fabric in the background of the pics.


My last project was a utilitarian one.  I needed a hussif!  I have a lovely 18th century sewing box but it's too big to take with me to events and, quite frankly, I'm tired of hiding zip loc bags in my frail.  I figured out how many pockets I needed and made a hussif that would be able to house all of my basics.  I also made a little leather sleeve for my embroidery scissors so they wouldn't poke through the fabric and I used Pigma pens to create a linen measuring tape.  I have everything I need right at hand!


All in all, it's been a productive few weeks!


Thursday, March 9, 2017

Large Reticule or Work bag--tutorial and pattern

I love the little reticules that are so typical of Federal era fashion.  Sadly they are highly impractical and don't allow me to carry what I need.  A few months ago, I decided I needed a bigger one when going on an all day outing dressed in period attire.  I had to carry a wallet, car keys, tissues, etc. etc. and a regular reticule just wasn't going to cut it.  I decided to design something based on a shape that was popular for smaller bags.  I also discovered that ladies sometimes carried work bags which were similar to what I was looking for.


My bag is similar to the shape of that in the top picture.  And I've found it to be so practical that I decided to make another.

Large Reticule/Work Bag Tutorial

Materials:

  • 1/2 yard each fashion fabric, lining, interlining (interlining can be linen, cotton flannel or some other fabric which gives the bag body.  It shouldn't be stiff. )
  • 2 pairs of 4 inch tassels 
  • 2 chair ties (chair ties are long cords with a tassel on each end)
  • matching thread
  • Pattern--downloadable below
The red bag in the above photo is made from silk dupioni with a cotton flannel underlining and it is lined with red silk persian.  It was sewn entirely by machine.

The bag in the tutorial is made from silk taffeta with cotton flannel underlining and it is lined with black linen.  It was sewn entirely by hand.

I found my tassels and chair ties at Hobby Lobby but any store that carries home decorating supplies should carry them.   DO NOT REMOVE THE PLASTIC PROTECTIVE TUBES FROM THE TASSELS/ CHAIR TIES.

Download the pattern you would like to use.  You can download either the scale pattern and enlarge it yourself or you can download page 1 and page 2 of the full size pattern on standard printing patper and tape them together.  The full size pattern takes 11 X 17 sheet of paper when enlarged. 


Page 1 full size

Page 2 full size

1/2 inch scale pattern

Seam allowances are 3/8 inch.

Cut the full size pattern out of your fashion fabric and underlining and cut out the lining, noting the cutting line for the lining on the pattern.  Place the underlining pieces on the wrong side of the fashion fabric the place the right sides of the fashion fabric together creating 4 layers and pin together.  Make two marks on each side 4 3/4 and 5 3/4 inches down from the top.  This is the part of the seam that will be left open for your ties.   Pin the lining pieces right sides together.

Stitch the lining pieces together using a spaced back stitch and a 3/8 inch seam, leaving the top edge open.  Begin stitching the bag pieces together leaving an opening between the two marks you made.  Your opening must be at least an inch.  

When you get to the first corner, take one one of your tassels and insert it inside the bag, pulling the loop out at the corner.  Hold that loop in place with the tassel pulled firmly against the seam on the inside.  Take several stitches anchoring the loop in the seam and give it a little tug to make sure it's securely stitched in place.  Continue in this manner, stitching all 4 tassels in place, one at each corner.

Press the seams of the bag open and tack the seam allowances to the underlining where the opening for the ties is. This will make it easier to thread your ties through the casing.

Press the seam allowances of the lining open and turn under 1/4 inch on the top edge, pressing it in place.

Either whip stitch the top edges of the bag or do a running stitch 1/8 - 1/4 inch from the edge to secure the layers together.  Fold the top in on the fold line which is 3 inches from the edge and pin in place.


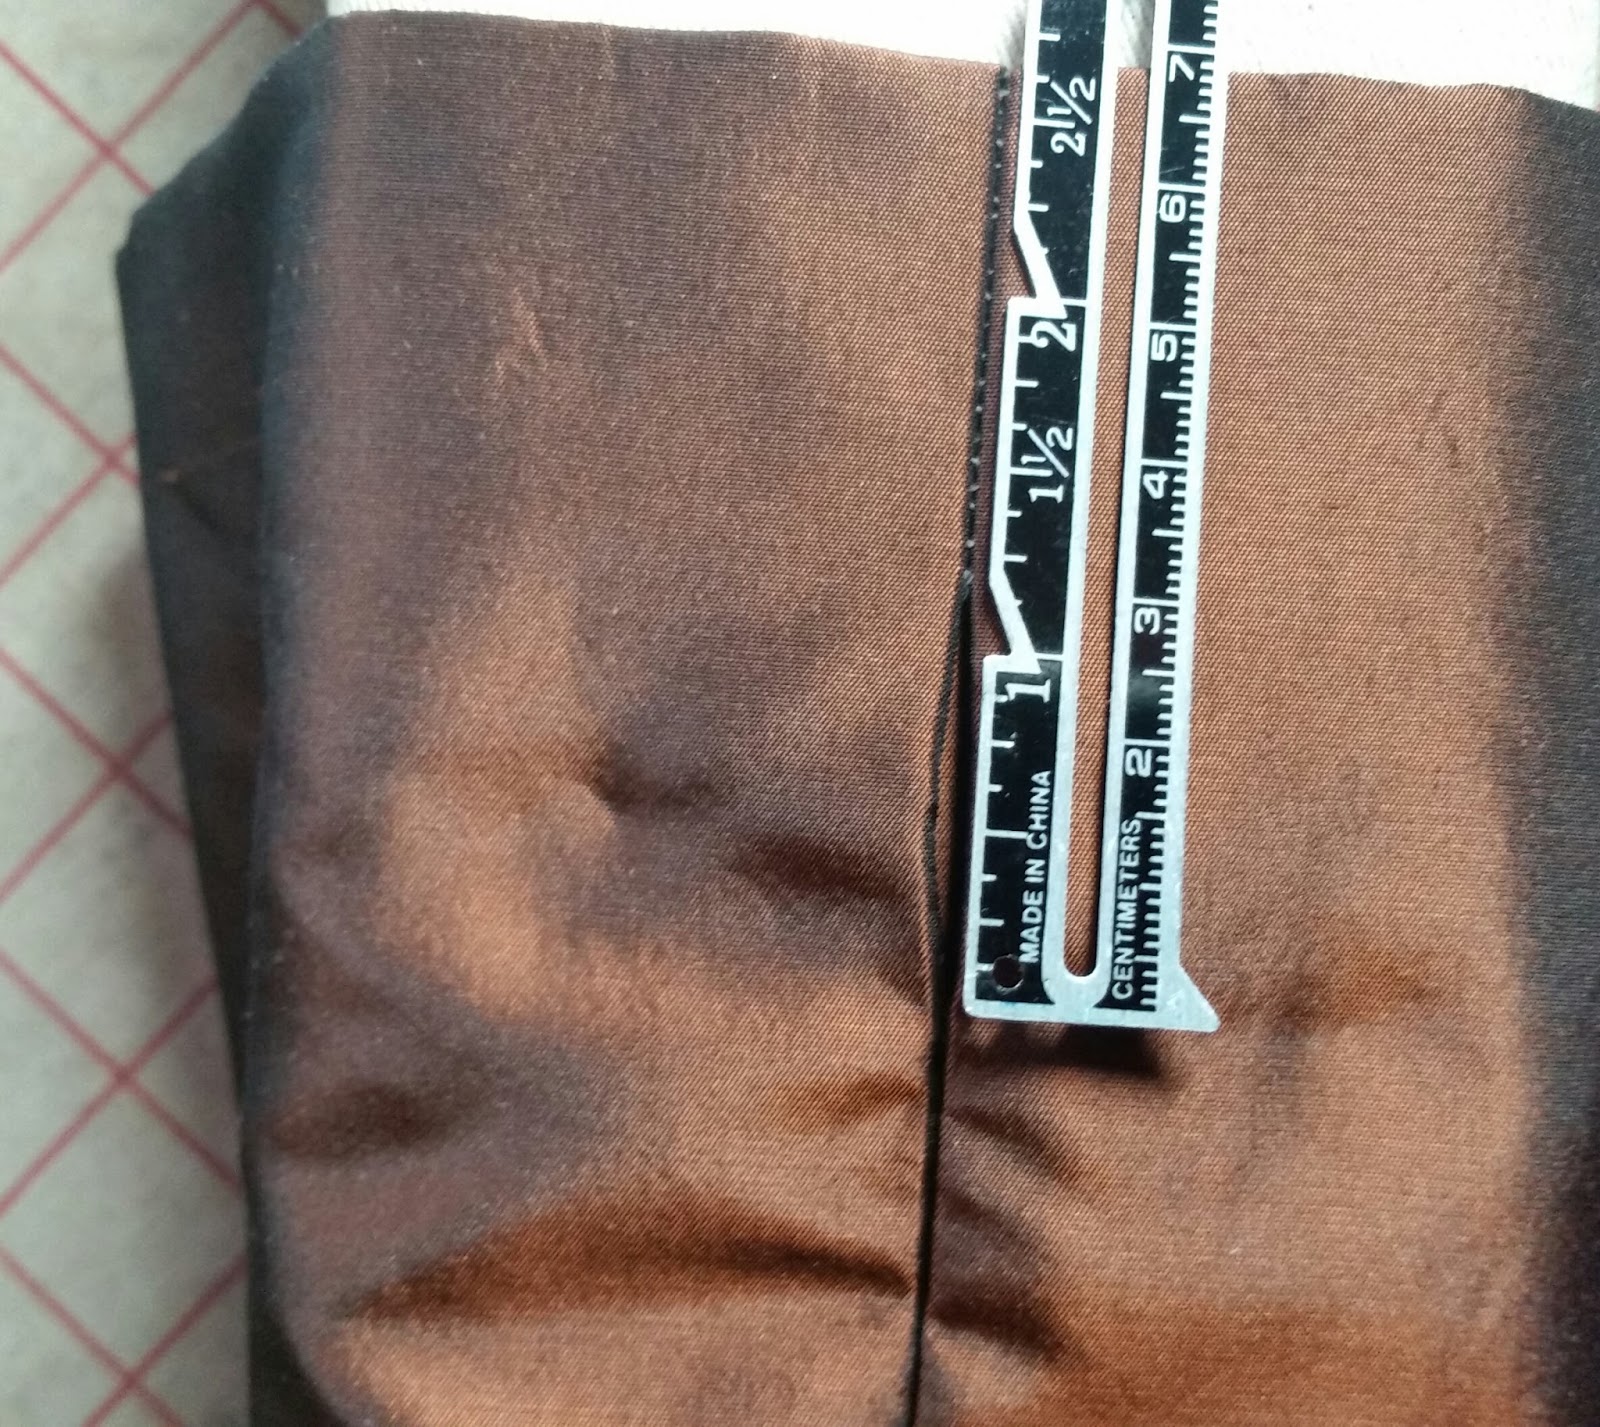
Turn the bag right side out and measure from the top edge of the bag to the top of the tie opening and again from the top edge of the bag to the bottom of the tie opening.  It should be close to 1 1/2 and 2 1/2 inches.


You will need to mark a line around the bag at those measurements using chalk or other removable marking method--for me those lines were 1 1/2 inches and 2 5/8 inches from the top.  

Stitch around the bag on each line using a spaced back stitch, taking a couple of extra stitches over the seams. Then remove the marks.


Turn the bag inside out and the lining right side out.  Insert the bag into the lining, aligning the top of the lining with the bottom row of casing backstitching. Pin the lining then whip stitch it in place.


Turn the bag right side out and insert one of the chair tie tassels (still in the plast tube) into the casing, threading the tie through the casing all the way around.  The tassel must come out of the same side it went in.


Thread the other chair tie starting on the other side of the bag. Tie the tassel ends together on each side using a square knot.

Pull the plastic tube off of your tassels and enjoy your new bag!


*Options*
If you like the bag in the top picture without a ruffle above the casing, alter the instructions as follows:  Cut the fashion fabric and underlining off on the first fold line, making it three inches shorter.  Sew side seams beginning and ending 1 1/2 inches below the top edge.  Stitch the layers at the top edge together and fold the top in 1 1/2 inch.  Sew your casing 1 inch below the folded edge using spaced back stitch.  Attach the lining the same as above.

You may wish to add embroidery or ribbon treatment to your bag before sewing the seams.

You may with to eliminate the tassels altogether or add beaded loops.  The sky is the limit when it comes to decorating your bag.

You may also choose to stitch a pocket on the lining before stitching the seams.