Showing posts with label Larkin & Smith. Show all posts

Tuesday, December 8, 2020

2020 Costuming Year in Review

It's that time of year --where I take stock of what I accomplished and what I failed to accomplish. Normally I'd wait until the end of the month but since I'm doing Christmas sewing from now until then, I don't anticipate getting anything new made.  Here are my costuming accomplishments for 2020:

1, 2.  Two silk hoods:  One taffeta and one silk velvet.  To be honest, these were started in 2019 and the finishing details were done on New Years Day.  The silk taffeta one is copied from a New England example in the Museum of Fine Arts in Boston.  I created a downloadable pattern for these which is available on the blog post.   Blog post here.


3.  Fur trimmed velvet cloak:  Detailed blog post here.


4,5,6.  Mrs. Russell's outfit:  1760s brown silk gown, antique linen with lace handkerchief, lace trimmed lappet cap.  Detailed blog post here.


7,8.   Yellow Silk Damask gown with petticoat and lace pinner cap.  Blog post here.


Inspiration images


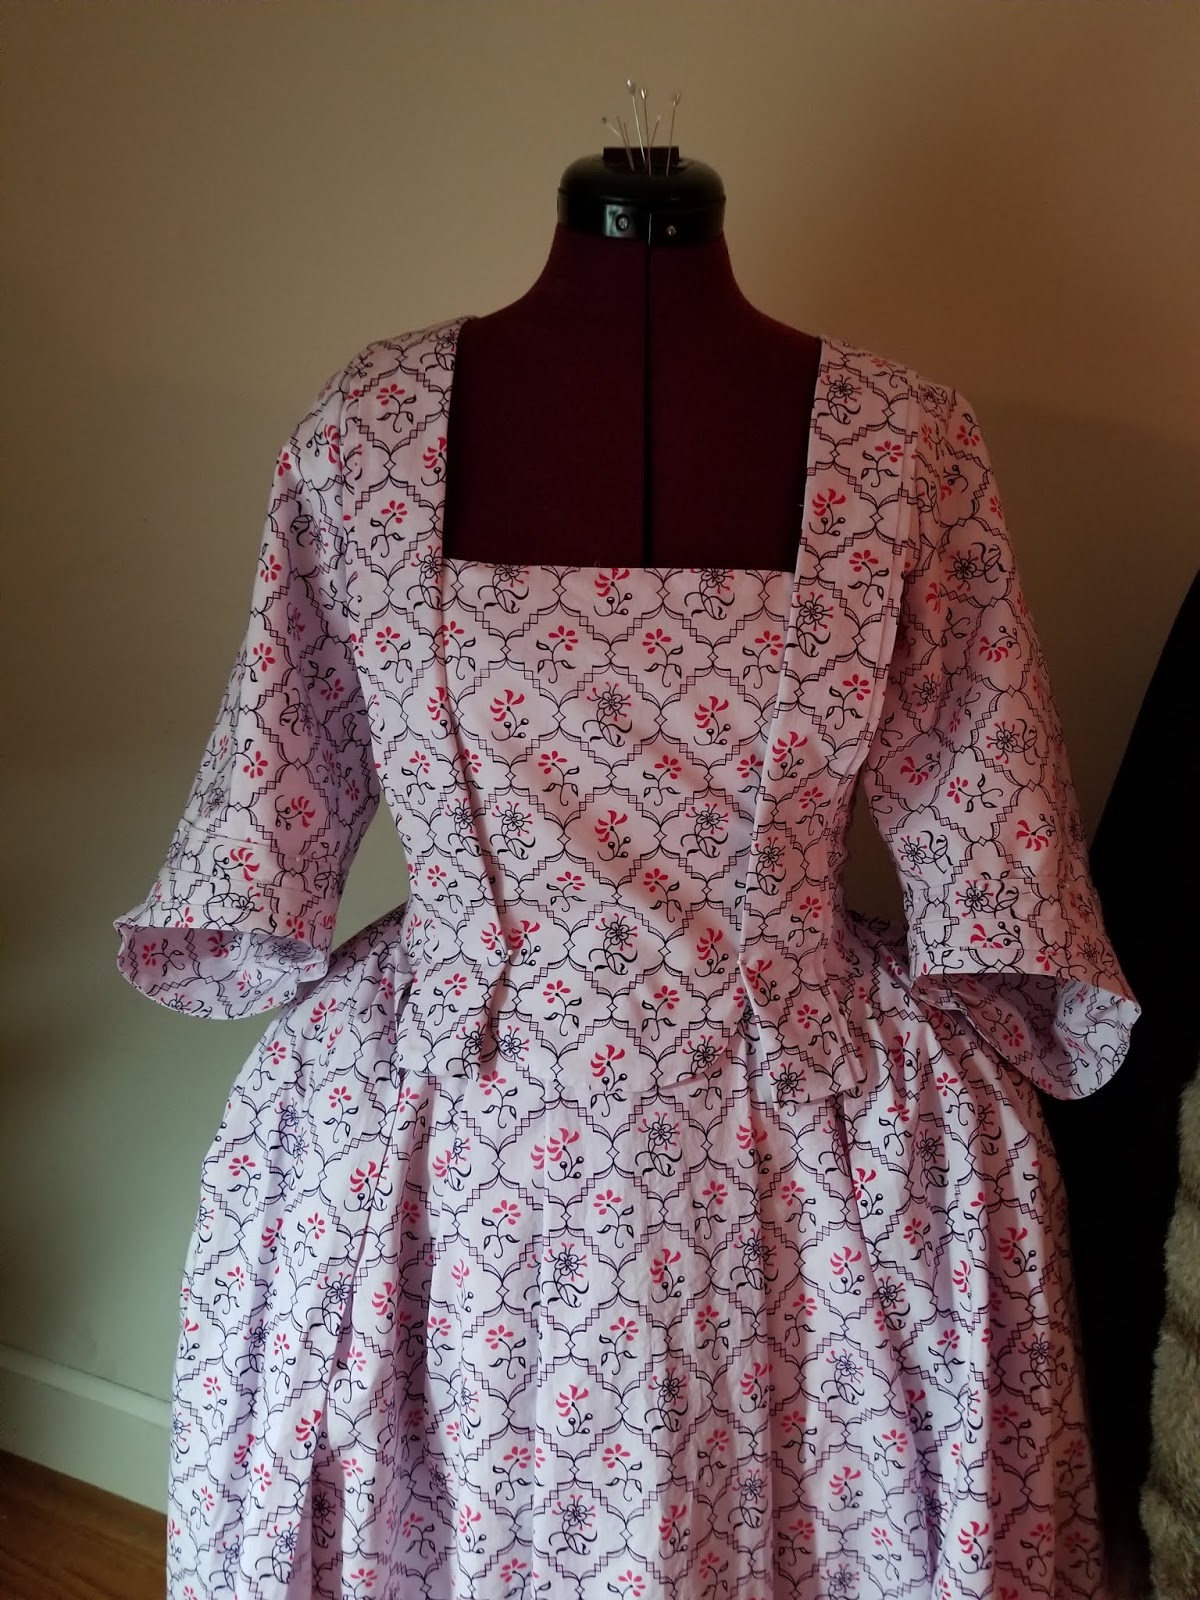
9.  1760s Indienne gown:  Detailed blog post here.


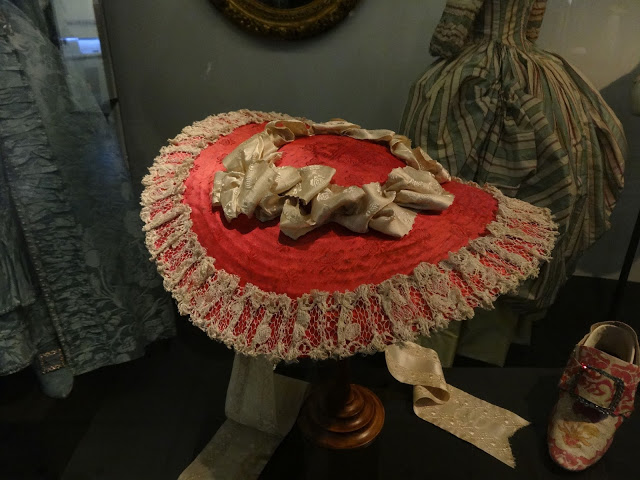
10.  Garnet silk hat.  Blog post here.


Based on this hat in the V&A

11.  Black silk tulle mourning handkerchief trimmed with lace.


12.  Moretti masks.  I almost hesitate to list these but they were quite labor intensive so I figured I would.  They are based on period images and a research piece by Phillipe Halbert.


13, 14.  Lambskin mitts of purple and claret.  Detailed blog post here


15.  Sultana with petticoat and sash.  Detailed blog post here.


16. Sheer linen cap trimmed with lace.


17 .  Long term project carried into next year:  Quilted petticoat.  Series of blog posts here.  I hesitate to list this but the time involved so far exceeds that of making of a number of gowns.  Here are a couple of progress shots.


Reflecting on what I accomplished, it occurred to me that everything was 18th century.  I really focused on studying different decades and what distinguishes them from others which made me feel that I had a good amount of variety.  The past couple of years have also had some Regency and Edwardian projects but not this year!  I'm planning though!   Next year will have more variety!

Monday, April 20, 2020

Sewing During a Pandemic: 1760s Print Gown

Being a lady of a certain age, I frequently wear gowns that are a few years behind in style.  Lately many of the events I've been doing date around 1770 so I've been choosing 1760s styles. The 60s aren't too different from the 50s but they are quite different from the 70s.  I'm finding there's a lot to like in mid 18th century fashion.  Let's take a look.

Extant Indienne gown ca. 1760.  Note that there is no matching stomacher.  The robings are folded and look double.  Fairly large cuff.

Wool Damask Gown ca. 1760.  Same features as above gown.  You can see the larger pleats on this gown which is another feature of mid century English gowns. Note the ribbon ties across the center.  I don't know if these are original to the gown but I have noticed period images from the 1750s do not have stomachers.   They tend to have vertical bands, ties or lacing across the center front to secure a handkerchief in place.

1760s portrait by JS Copley.  Note the larger cuff which is typical of an earlier 60s cuff which is more winged.  Also 60s sleeves are shorter and wider.  You see the shift cuff has a ruffle which is visible in the 50s/60s.

Girl with a tray.  1750.  Note the double folded robing, winged  cuff and shift sleeve ruffle as well as the ties across the center front. The sleeves on 50s garments are more full than those on 60s garments.

No date but appears to be 50s/60s.  Same features as above:  double robing, wide shorter sleeve with cuff and shift ruffles.

Girl with a fan ca. 1750.  Same features as above.  The shorter, fuller sleeve is really quite apparent in this one.

The features I've noted above disappear in the 1770s.  The sleeves get slimmer, longer and cuffs disappear.  Eventually the stomacher becomes a center front closing bodice.

Another detail worth noting is that the silhouette in the 50s and 60s showed wider hips which were achieved with panniers or hip pads.  Those seem to disappear in the 70s for English gowns, being replaced by bum rolls or no padding.   In the mid to late 70s we start to see more bum pads.

One detail I should also mention--mid century gowns were longer waisted as were mid century stays.  Also--if you study mid century images, you will see that the front opening isn't as wide and typically forms a "V."  Often the robings almost come together at the waist.  I need to play with my pattern to achieve this silhouette but I will wait until I've made mid century stays.

My research also indicates it was typical for petticoats to match gowns with the exception of quilted petticoats.

One thing to consider if you are using a print --research the date of the original or inspiration textile.  You certainly don't want to make a mid century gown out of print that didn't appear until 1780!  If your fabric is from Colonial Williamsburg, you can find the original swatch or garment in their emuseum which will give you the dates and use of the original textile. The online vendor doesn't typically give the dates.  This will alleviate the possibility of using an inappropriate textile. The print I used for this gown is a replica by Burnley & Trowbridge of a token from the Foundling Museum, dated to 1758.  This makes it perfect for a late 50s/60s gown.

If you are a seamstress that uses patterns, you will find that there aren't patterns for mid 18th century English gowns unless you scale up patterns from books.  My observation has been that many people simply use the available patterns that are geared for the 1770s.  In order to do this, changes should be made to make the gown appropriate for those earlier decades.

As noted in the extants/images above, you will need to shorten the sleeve and make it fuller.  I typically use the Larkin & Smith English gown pattern.  This post discusses how I changed that to have folded robings.


On this gown I added 1 1/2 inches along the front pattern piece to enable me to make the pleat on the robings to create the double robing appearance.

This print worked well for the en forreau back. I didn't particularly make an effort other than making sure the back fold was centered.

You can see how the robing/bodice piece goes to the back.  The robing covered the strap portion of the bodice.  I drafted a back facing (which is easy) as the straps don't seem to end up in the same place every time. 

I had made a mid century sleeve pattern which was about 1 1/2 inches fuller than my later sleeve and about 2 inches shorter.  I also used the same cuff as my brown silk gown.   It's larger than my late 60s cuff.  I'm still debating as to whether or not the cuff needs to be weighted.  Costume in Detail shows a number of cuffs with small self fabric pockets containing lead weights.  I have done this in other gowns using a drapery weight.  This gown will be worn over a mid century shift which also has a shorter, wider sleeve with a ruffle at the cuff. 

Almost done, pinned together.

This gown was made for an event taking place in 1770 where I was to portray a milliner so I do hope to make another cap.  In the meantime, I took a wired cap I made 4 years ago and put new ribbon on it.  1760s featured small hair and small caps.  This cap is quite petite.  I also made a nice 4 loop bow out of some silk taffeta I have to cover a hat.  I'll wear this with tambour work accessories.

I also made a 5 strand pearl choker and a bracelet from 4mm glass pearls.


And here's a pic from the event this gown was created for--worn with a different cap.


Overall, I'm pleased with this gown. It will be a nice summer addition  to my 1760s wardrobe.  My goal is to eventually make earlier stays and reshape the bodice on this pattern to a 1750s silhouette.

Sunday, March 8, 2020

1760s Brown Silk Gown

As a woman of *ahem* a certain age, it was simply time for me to make the iconic brown silk 1760s gown.  After studying a number of portraits--almost all of them by John Singleton Copley--I narrowed down the inspiration images to the following four:

 Mrs. Ezekiel (Elizabeth) Goldthwaite 1771

Mrs. Nathaniel (Ann) Ellery 1765

Mrs. Thomas (Sarah) Boylston 1766

Mrs. James (Katherine) Russell 1770

The first portrait--that of Mrs. Goldthwaite--shows her wearing a sacque.  I didn't wish to make a sacque but I love the accessories in that image.  The 2nd and 3rd portraits show traditional English gowns with wide cuffs and the last image appears to be the same.  My goal is to make something that pretty much resembles that in the last portrait, including the accessories: handkerchief, mitts and lace edged lappet cap.  I will also need a shift with proper sleeves for this period.  I have an old shift with 1790s sleeves which I don't wear so I will retrofit it with new sleeves with cuffs and ruffles.

I also like the idea of folded robings in lieu of robing strips for this gown as well as lacing strips to eliminate some of the pinning which can make holes in the silk.  This change required me to make a "Franken pattern."  I use he L&S gown for just about everything as it fits so well.  I have the Mill Farm English gown pattern which has folded robings but I do not like the back pleating on that gown.  So I decided to convert the L&S gown to one with folded robings, fuller 1760s sleeves and a winged cuff.

How to begin:  First I laid my L&S bodice pattern pieces on the Mill Farm pattern to compare.  You can see how much smaller it is.  The robings make the bodice piece significantly larger and there is a dart at the shoulder to make that lay flat.


Here are the bodice lining pieces of both patterns.

I traced the bottom edge and side seams of the L&S pattern and worked the robbing part in making new pattern pieces.

Next I had to make a muslin.  I cut the new front bodice and my L&S back lining piece for that.

The darts were stitched in the front, the side seams were stitched and the robings were folded.

The shoulder straps are shorter than needed so I added length then cut the pieces out of the fashion fabric.

Darts stitched and robings folded in place--wrong side.

dart stitched, robing folded--right side.

The bodice fronts were stitched to the back as indicated in the L&S pattern.

Skirt panels were stitched on and the skirt was pleated to the bodice.  Note that there are fewer, but larger pleats in the gowns of this decade.  Also the pleats that go over the hip pads were made deeper to accommodate the pads.

Skirt stitched on.

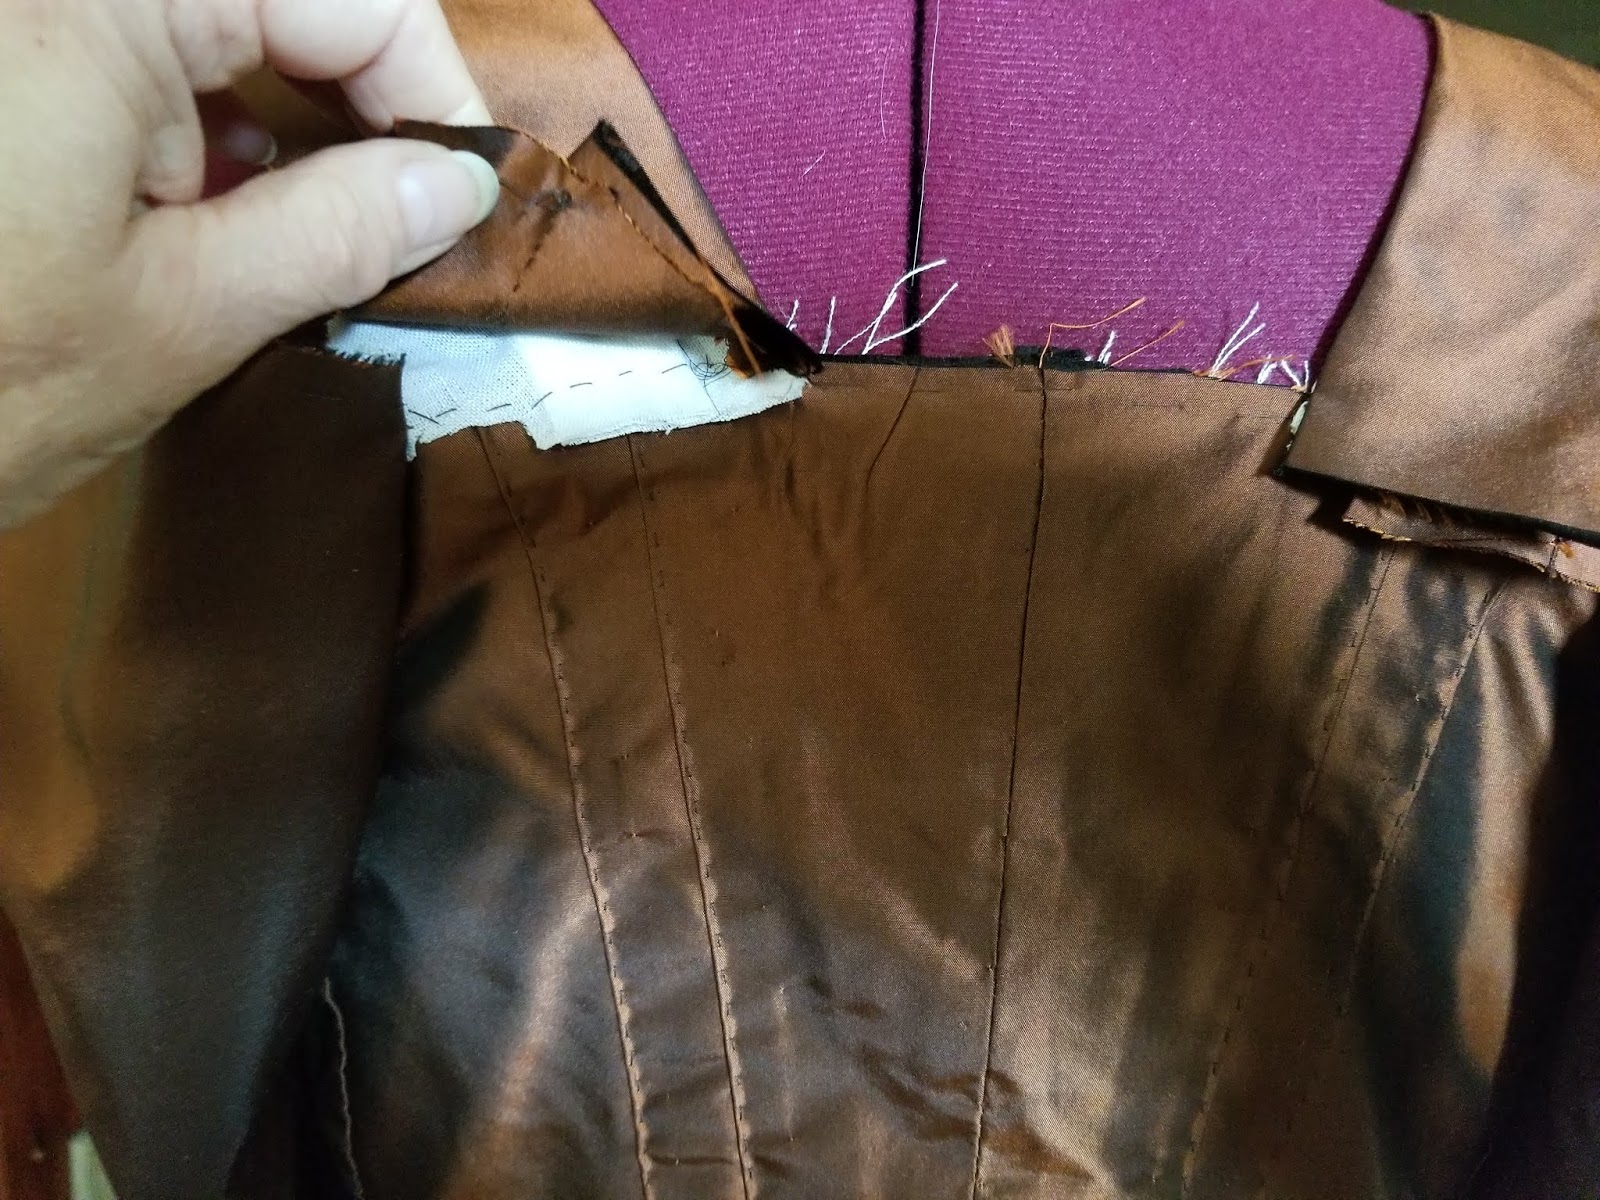
The bodice lining was stitched in place: whip stitched at the side and waist seams and with the Point a Rabattre Sous la Main along the front edge.  The skirt seam allowance at the waist was left to hang free.

The shoulder straps were pinned in place in back and only the lining layer was stitched.

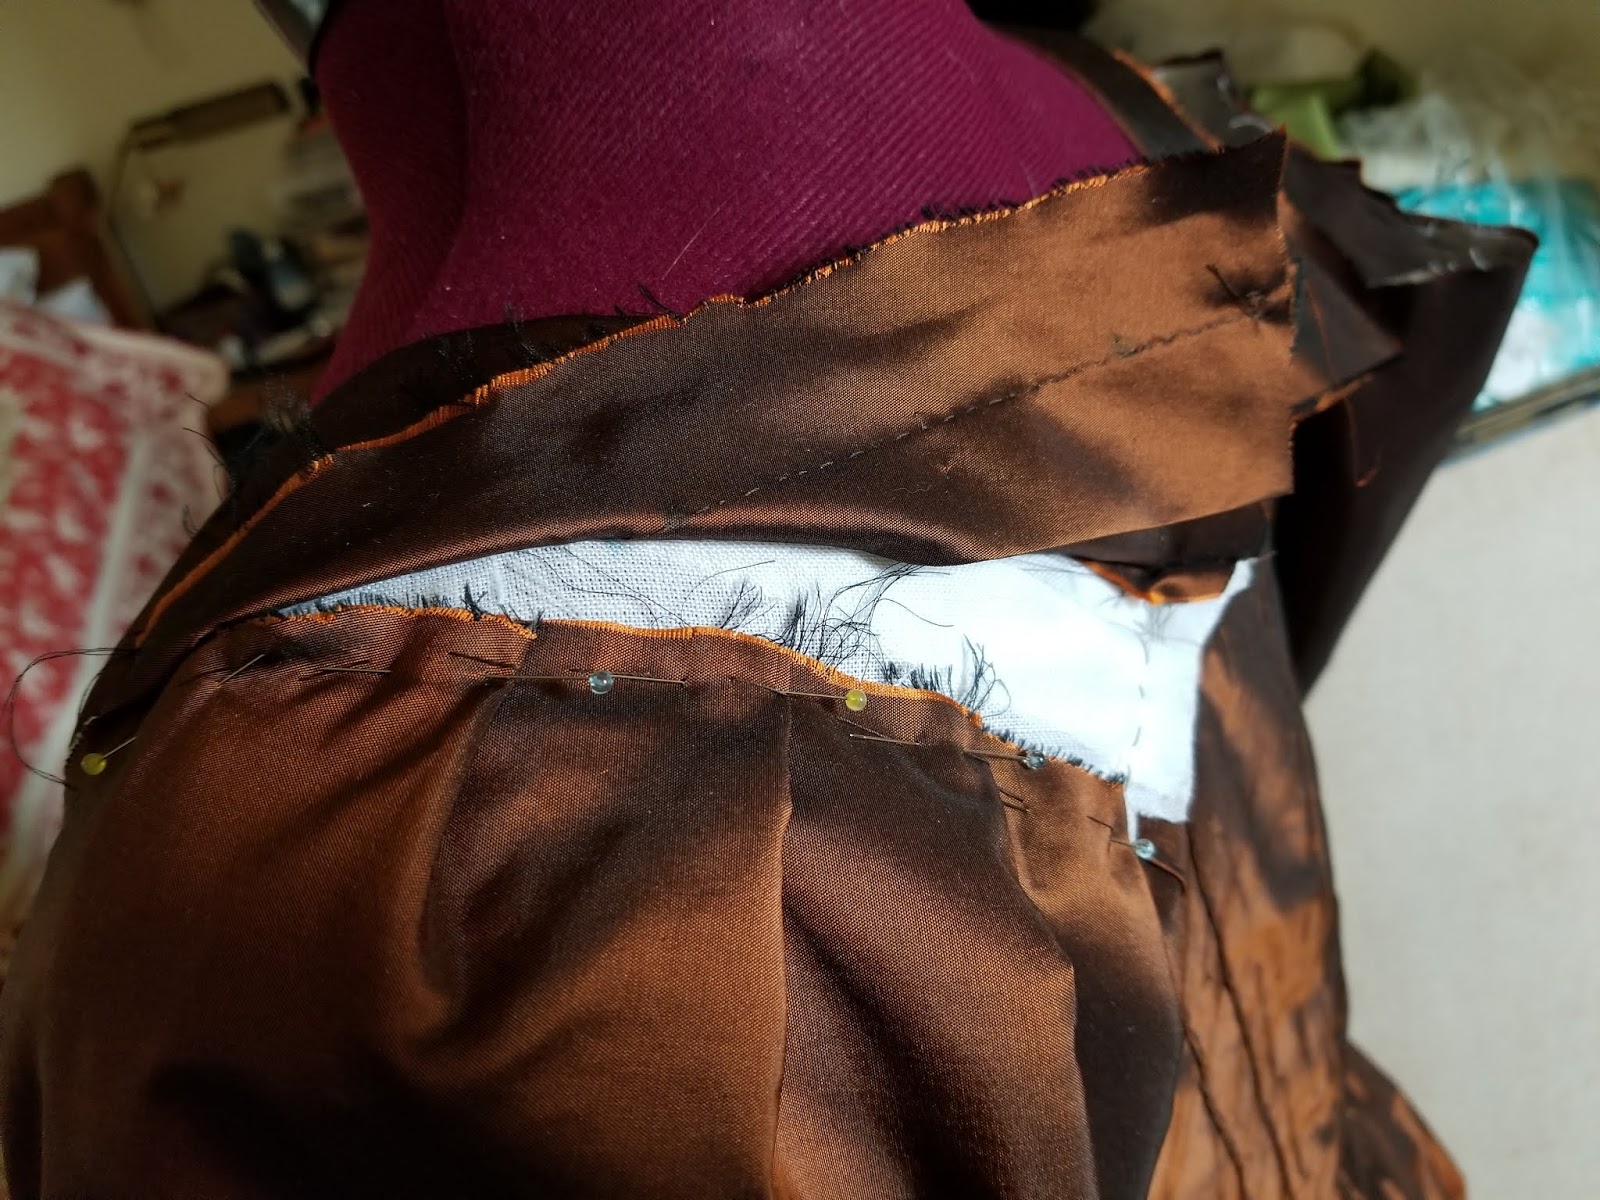
The sleeve, which was cut about 1 1/2 inches fuller than my usual pattern,  was stitched on as if there were a separate shoulder strap.

Sleeve pinned to the lining layer only here then backstitched in place.

Edge of robing turned in and invisibly stitched in place.  Back facing was drafted to fit the upper back.

 Front of gown at this point.  I tried the gown on over stays to determine where the top and bottom of the lacing strips should be.  I had them end at the top of my stays and at my waist.

 Next I made lacing strips (for 2 gowns).  I cut the strips 9 inches long by 4 inches.  I folded under 1/4 inch on the top and bottom of each strip then folded it in half, stitching the top and bottom together and making eyelets.

The strips were pinned into the gown and back stitched 1/2 inch away from the raw edge --about 1 1/2 inches from the front edge of the gown.  The stitching is covered by the robings.

Here is the gown laced over my stays.

I drafted a large cuff which is lined with self fabric.

Next a petticoat was made out of matching fabric.
Last was the stomacher.  I had to measure the space that the stomacher would fit as it had to fit over the lacing in a specific amount of space.

I also needed a proper mid century shift before I could do my final gown fitting.  I had the first shift I had ever made that was more of a 1790s style with a straight sleeve.  I tore the sleeves off and made full sleeves from fine cambric linen with a ruffle from some antique glazed handkerchief linen that my mom brought back from Europe in WWII.


My final fitting with all of the proper underpinnings which included a shift, hip pads and matelasse petticoat.

To complete the portrait of Mrs. Russell, I needed handkerchiefs--she is wearing a white one under that I assume to be silk or fine linen and a sheer half handkerchief with lace trim--a lace trimmed lappet cap and a white apron (which I already had).

I made a Swiss organdy lappet cap in a smaller size for my smaller hair and trimmed it with 1 1/2 inch wide French Val lace with a 4 loop ribbon bow on top:


I purchased a white silk satin handkerchief with hand rolled hems from Dharma and then made a half handkerchief from my mom's antique linen.  The antique linen was only 16 inches wide.  I cut two 32-inch lengths and stitched the selvedges together using a butted seam then cut that 32 inch square into 2 triangles.  I made a dip at the neckline, narrow hemmed all of the edges then whipped the lace on, carefully mitering the back corner and angling the lace on the front edges to follow the line of the neck edge. Last I made a white satin bow.


I finished off my outfit with my sheer voile apron and some new 1760s shoes with fancy buckles.

Here are some pics of the completed outfit as worn at the 250th anniversary of the Boston Massacre:


I really like this gown.  I think I prefer the folded robings to the separate ones particularly for the 1760s and earlier.  I plan to make an Indienne gown this same way in a few weeks.