
As the saying goes--no time like the present.
Now I realize that a plain wrapper would be more practical but I'm in the mood for glamour and silliness. I found some ads for silk wrappers in 1765 and 1778:


Somehow, I imagine these wrappers to be more utilitarian in their style--an upper sort robe for around the house.
Let's look at some images.
First from John Singleton Copley:
Mrs. Benjamin Hallowell

Mrs. Jerathmael Bowers

Now we have a bunch of MidAtlantic ladies as painted by Charles Wilson Peale--many of whom are Marylanders.


My friend Ruth and I had talked about making one of these for years and she finally did it to wear in the audience of the Theater Quarantino--a group of like minded friends giving a performance of Cato over Zoom.

Ruth decked her little corner out and dressed up for the occasion! Doesn't she look beautiful?


Her robe is made as a t-shaped garment with 56 inch wide taffeta. The sleeves are pleated at the cuff.
This was more or less my plan until I realized that my silk was 45 inches wide. It also has a gold border that I would like on the sleeve edge and around the front opening.
Here's the basic shape I had to work with:

Here are my fabrics: the red for the wrapper, the figured gold taffeta for a petticoat, the organza for a turban and other ornaments and the plain gold for a sash.

I thought I would make this shape and not use the facing piece. I would place the gold trim on the cuff edge and around the center front. If I have enough gold trim to be able to place it at the hem, I'll do that as well.
I figured I'd need to take some measurements. First I measured the length from my shoulder to the floor which is 54 inches. That means the entire pattern will be 108 inches long since there are no shoulder seams. I used my measuring tape to measure from one wrist to the other which was also 54 inches. Sadly my silk is too narrow for that so the sleeves will need to be pieced. The object is to pleat them to make them shorter for my shift sleeve ruffles to show.
I also looked at my B&T bedgown pattern which is a similar shape to see what the bust measurement was in my size. The width across the bust was 24 inches on the front and the back. I figured that would work for me. I adapted those measurements to the drawing above and drew a pattern on gridded pattern tracing cloth which is also 45 inches wide. I determined that I will need to piece the outer skirt corners due to the width of my fabric. I also measured the width (diameter) of my neck to determine how wide to do the front opening. Here's the pattern I ended up with--folded at the center front/back and the shoulder:

I pinned the side seams and pinned pleats in one sleeve to check the length. The sleeves are shorter than I wanted, as I suspected they would be. The body fits the way I want which is good

The sleeve will be too short. Each sleeve needs about 5 inches added to the length.

So the plan is:
- Cut out, stitch the side seams, leaving open at the end of the sleeve in case I need to cut off the gold trim and add an extension
- Cut gold trim from excess fabric and use to face the front edge on the outside.
- If enough trim remains, face hem on the outside.
- Make petticoat
- Make sash
I cut out the robe and had to piece the skirt extensions due to the 45 inch fabric and the gold border. which made my fabric narrower. The gold border was not used as part of the skirt. The skirt extensions were stitched on using a flat felled seam then the side seams were stitched--also using a flat felled seam.


Checked the sleeve length. My original plan was to cut the gold trim off, add a sleeve extension, then stitch the gold back on. The sleeve needs to be longer to pleat it. I ended up deciding on a different plan.

I've decided to turn under the excess red on the sleeve edge and use a sheer textile as an extension as in this detail from one of the images above. In this image, the sleeve appears to be a sheer fabric with gold embroidery. I have a variety of sheer fabrics and will decide on this later.

To finish the front edge, I turned the edge to the outside 1/2 inch. I cut the gold trim off the rest of my fabric, turned under the cut edge and the wide selvedge edge and pressed. I left a tiny red edge which was placed along the opening where the edges were pinned together.

I had two long pieces of trim so I started each side at the center back. I took 3 darts in the trim to make it fit the curve of the neckline. After pinning one side, I matched the motif on the gold trim at the center back and pinned the other side of trim on.

Here is the front with the trim pinned in place.

Here is the back. The darts/pleats will be stitched flat.

I used a tiny running stitch to secure the front edge of the robe with the edge of the trim.

Then I secured the other edge of the trim with an appliqué stitch.

Here it is with the sleeve hems pressed up. It needs to be hemmed and have the pleated sheer sleeve extension added.

For the sleeve extension, I cut silk organza 7 inches wide and the dimension of the sleeve. I seamed the short ends and made a narrow hem. It ended up not working. The organza is simply too crisp and the piece needed to be fuller in order to drape properly. I'll cut these down and make elbow ruffles out of them for another garment.

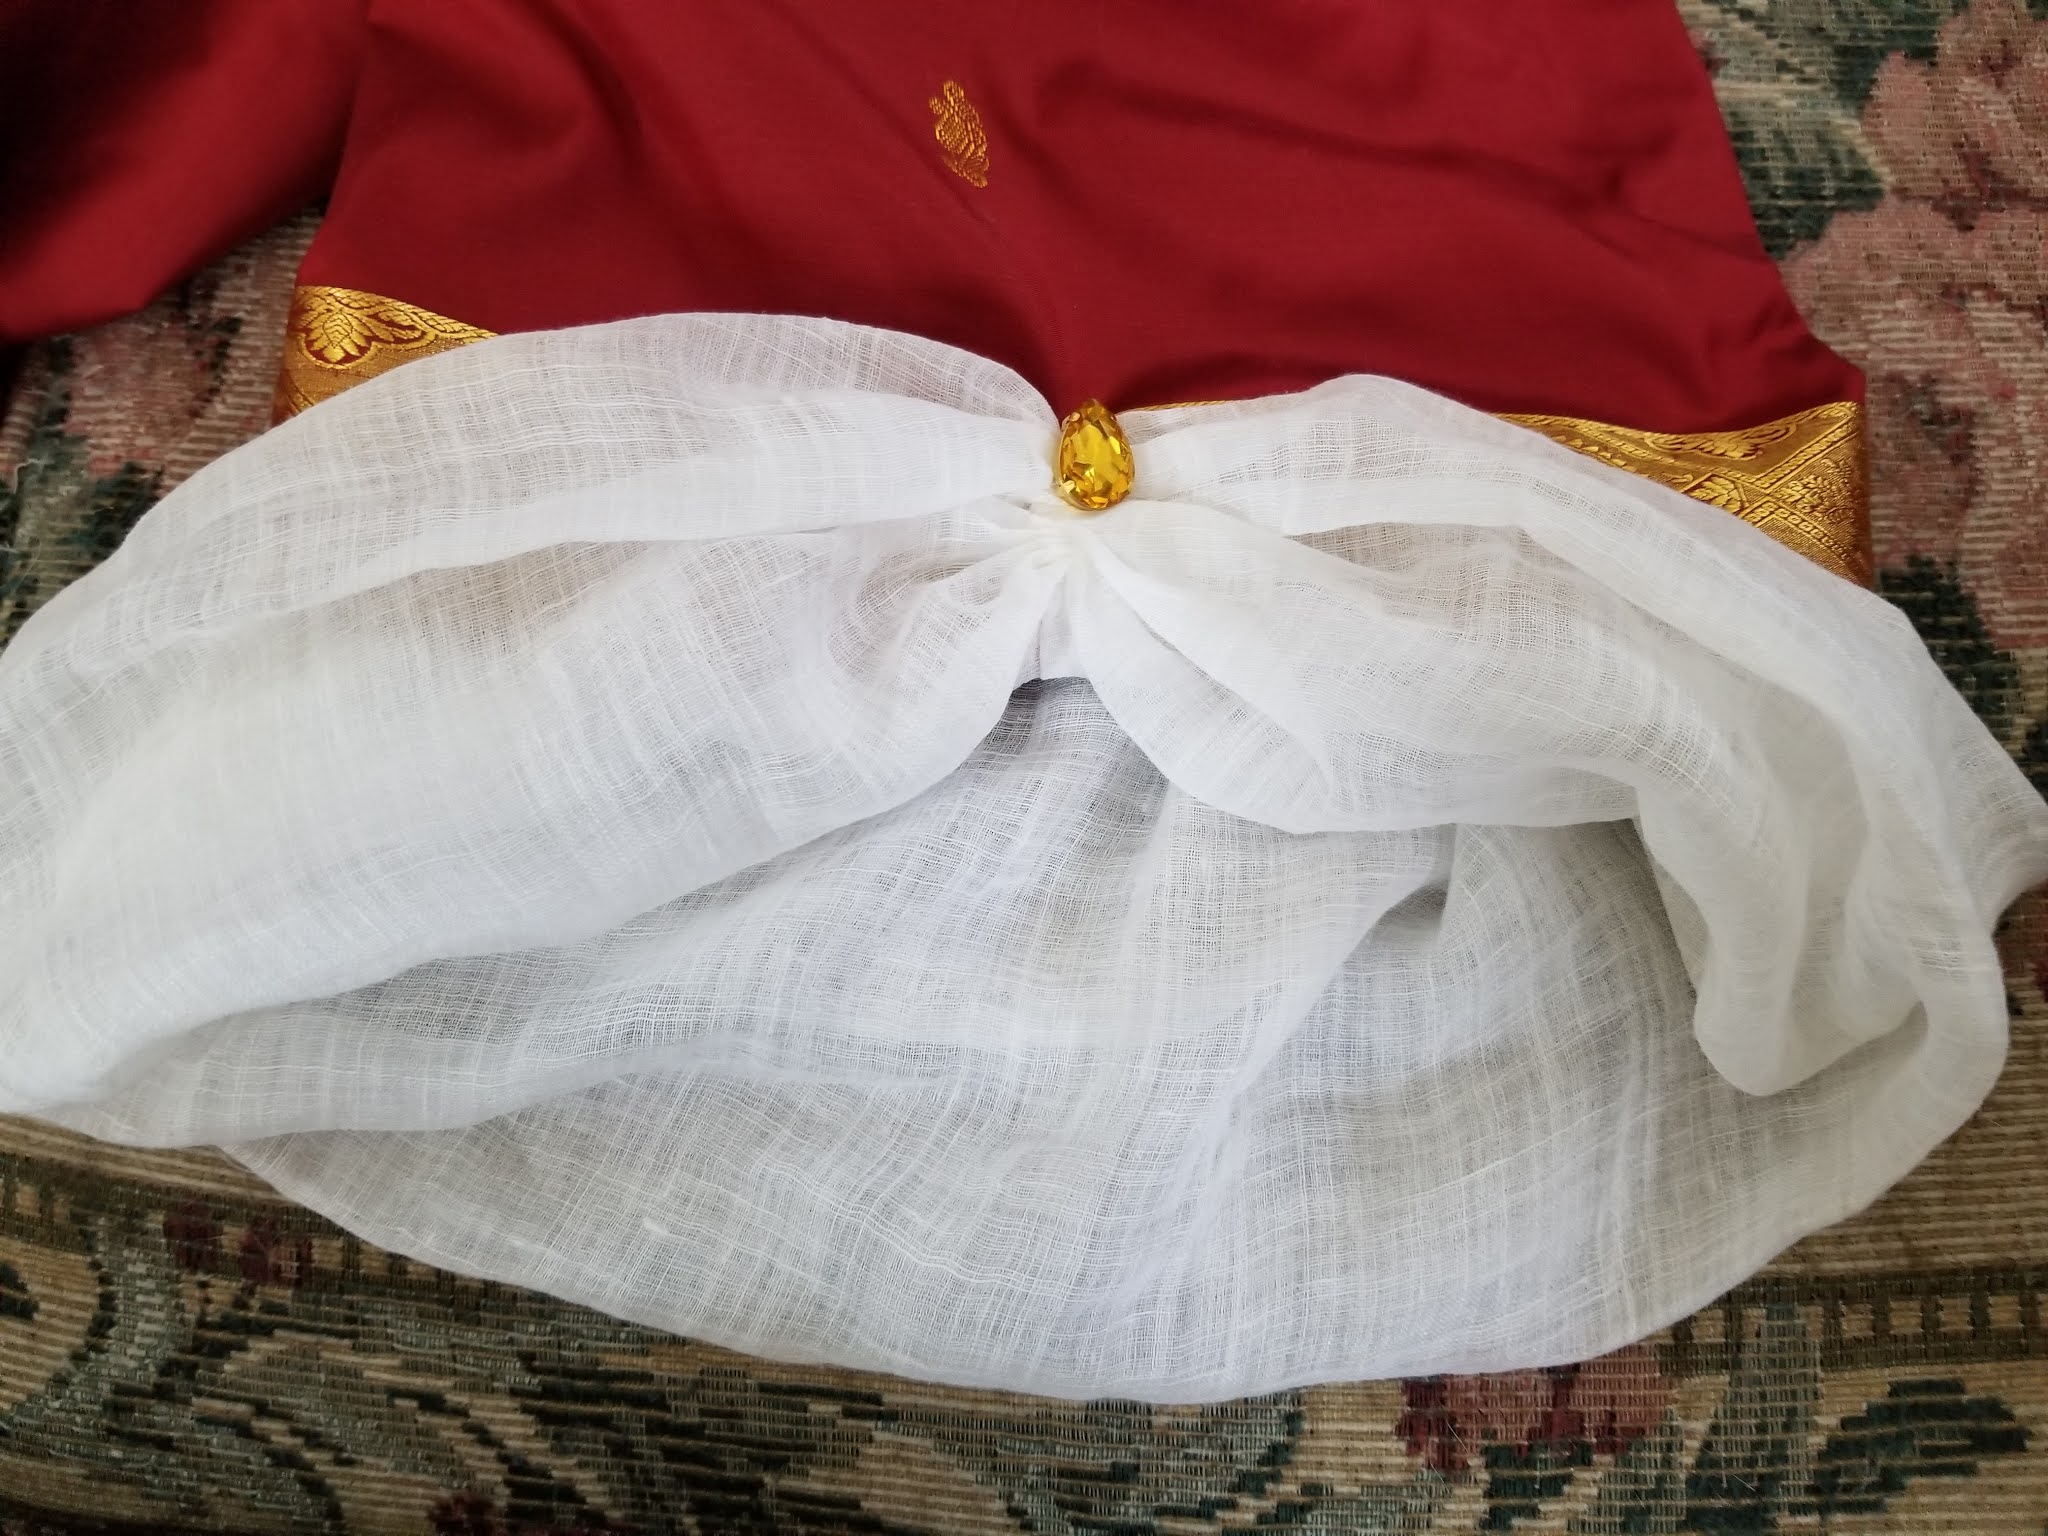
Sleeve extension take 2: I went stash diving and found this linen gauze I bought several years ago. It had the kind of drape I was looking for. The sleeve measures 20 inches around. I cut a crosswise strip that was 15 inches wide. The fabric was 56 inches wide so I cut that strip in half to have 2 pieces 15 X 28 inches. I seamed the short edges then folded it in half without pressing the fold. I wanted it to be more of a tube. I turned over the raw edge and whip gathered this piece to fit the sleeve, stitching it inside the sleeve to the sleeve hem.

The sultana is complete so I need to finish the other items that go with it!

I put the seam of the sleeve extension at the top of the sleeve since I knew it would be hidden there and I made gathering stitches through the seam around the entire tube. I pulled the gathers and tacked this above the sleeve edge on the outside. I then added a stitch on pear shaped crystal.

First I made a petticoat using the figured silk in the fabric pic above. Since this is a lounging outfit, the petticoat was made to be worn with no hip shaping.
Then I needed a sash. I had played around with ribbon to determine how long to make the sash and found that 120 - 130 inches was ideal. My silk was 52 inches wide so I cut two crosswise strips 4 1/2 inches wide plus another strip 4 1/2 inches wide by 24 inches long. The strips were stitched together placing the short strip between the two long ones so that the seams would be against my body.

Flat felled seams were used for the piecing. Then the entire piece was narrowly hemmed on all edges.

I found this metallic stranded embroidery thread at Joanns which had the look I wanted. Each skein is 8 meters long so I figured I'd use 2 skeins per end of the sash for fringe.

Working with 1 skein at a time, I cut the entire skein into 16 inch long pieces. I folded each piece in half and put the loop end through a doll needle --which has a large eye and sharp point. I poked the needle through the edge just above the hem and threaded the ends through the loop and pulled. I continued doing this all the way across the end using one skein for half the width.

Here is the finished fringe which I did trim to event it up. I still felt it needed something else.

I ended up just dividing the fringe in quarters and tying a single overhand knot.

Voila! She is all finished.
Now to style this outfit to wear!
This outfit was worn over my earlier shift with the ruffled sleeves and my stays.
I had to come up with some quick accessories to wear this for a virtual event. I needed something sheer for my neck--using the last portrait above as inspiration. I didn't have time to sew anything so I simply tore a crosswise strip of my linen gauze--about 20 inches wide (I didn't measure) and the full width of the 60 inch fabric.
I also needed something for a turban type wrap and I had purchased some gold striped silk organza so I did the same with that--tore off about a 13 inch wide strip the full width of the fabric though I think I will do a wider strip next time.

Since this outfit is loungewear, I kept my jewelry to a minimum and chose to only wear earrings and a ring, both by Dames a la Mode.

Silk stockings and leather mules completed the accessories. My goal is to cover these mules with the black and gold silk brocade at some point.

I fixed my usual "cap hair" but left some hair out in the back that I curled around some buckles. Then I lightly twisted the organza and wrapped it, using long pearl head pins to pin it to my hair. I made sure I had an end in front so I could wrap it in a little circle in front and pinned that in place.

I wasn't sure what to do with the linen gauze so I just loosely draped it around my neck, concealing the raw edges and pinned it to my stays so it didn't hang down at the waist.

After that, it was just petticoat, sultana (pinned at the waist at center front) and sash. The sash was wrapped around my waist twice and looped around in several places until was happy wth the way it looked.
Here is the final result:


I'm tickled with the way this project turned out. I'm glad I waited to make it as I had a different vision when I first bought the fabric 3 years ago. It's comfortable and will be great for online events --particularly since stays are not required. I think I may also make a more "ordinary" wrapper out of chintz sometime soon as well as I know I have some in my stash!


