Thursday, May 27, 2021

1920s One-Hour Dress: Wearable Fitting Toile

 One of the most popular styles seen in the 1920s was one known as the One Hour Dress.  There were many variations on this simple dress with numerous booklets published by Mary Brooks Picken.  This dress is basically cut like a kimono top with no sleeve seam and a side extension at the high hip for pleats/gathers at the sides.  Other variations have a full waist seam which allow pleats/gathers all the way around.  There are also versions with gores creating a slightly flared skirt.  Sleeves may be kept short or sleeve extensions in a variety of styles can be added.  There are a number of neckline variations:  simple round, collars in various shapes and sizes, V-shaped inserts of contrasting fabric.  The list goes on.

Here is a pic of one of the brochures from 1924-25.  This one has a full waist seam.


Reprint of a period pattern with a flared insert on the sides. Note the front slot closure and embroidered collar and cuffs.


Diagrams from a French fashion magazine showing the pattern diagram and how contrasting fabrics can be used to create a different style.  This one is from the mid 20s.

Reprint from a period sewing book with ideas for adding other details to the simple one hour dress.


Reprint of mid 20s period pattern.


This design doesn't really require a pattern.  I followed the diagram on Festive Attyre's Lawn Party dress post.  I enlarged the diagram then took my own measurements to compare.  Period sewing guides give detailed instructions on drafting these patterns.  Basically I took my bust measurement plus desired amount of ease and my high hip measurement with ease.  I also measured the front length from shoulder to where I wanted the skirt to be.   You can see my pattern here along with the one I made for my slip.


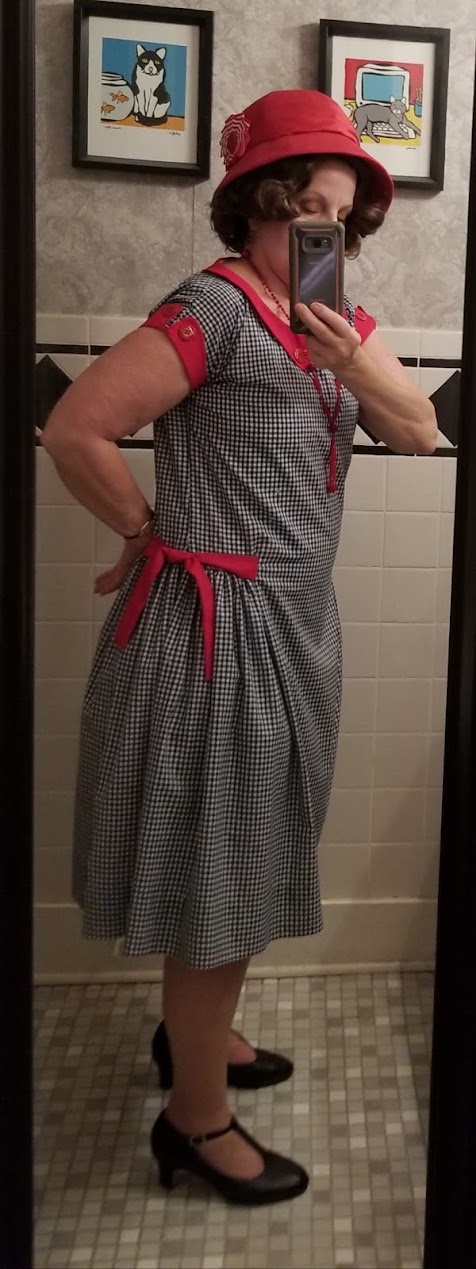
I needed to make a fitting muslin so I bought some cheap gingham check, figuring I could actually wear it.  It's a cotton blend which I'm not overly fond of but I'll make a better version later.  I cut the sleeveless dress and stitched it together.  Here is my first fitting over modern underpinnings.  It fits fine.  I'm glad I raised the "waistline" and added a larger side extension for the gathers.  No amount of corsetry can make a straight style of dress work on my body.

I had planned to wear this with red accessories so I decided to add a red collar, cuffs and some sort of belt.  I used pattern tracing cloth to draft a collar based on one I'd seen with button accents.


I did the same to create cuffs.


The collar and cuffs were interfaced and faced with self fabric.  They were attached using bias tape as facing.  I had found these buttons at Joanns that resembled some vegetable ivory ones I found in my 1922 catalog.


My original plan was to do some sort of belt with a button closure.  After perusing more period images, I decided to go with side ties which I saw on an extant dress.  I needed to pull the sides in a couple of inches so this worked well.


Accessories:  Red silk Regency bonnet, 1920s vintage glass bead necklace, 1920s gold watch (belonged to David's grandmother), Red paste repro earrings and ring, seamed stockings, 1920s vintage handbag, T-strap shoes (I've preordered 20s red pumps that haven't arrived yet!).  I found that my jockey style Regency bonnet had the shape and color that I needed.  I'd like to refashion a red straw hat eventually to wear with this.  


Here is the dress in action.  
I think I need to raise the "waistline" almost to my natural waist.  My hips are 6 - 8 inches larger than my bust so it's hard to get the straight silhouette if the straight part of the dress has to go over my hips.

I have mixed feelings about this style.  I'm going to play around with my basic pattern a bit more:  raise the waistline almost to my natural waist and do a full waist seam to add fullness over my hips.  I'll also do a 3/4 length sleeve.  Basically, I'll add style details that flatter my shape.   I think my next attempt at a 20s dress will be a Robe de Style as I think that will be more flattering.  Bottom line--this is probably the worst decade I could choose for my body type but I have no doubt that many women in the 20s struggled with these same issues.  I'll find something that works.


1920s Underpinnings, part 2: Back to the drawing board!

After engaging in a fair amount of research into 1920s underpinnings, I decided to get down to making mine.  Some people can just get away with a teddy or tap pants and a simple bandeau bra.  I'm NOT one of those people.  I have curves which are definitely not a 1920s silhouette.  My research revealed a wide variety of corset styles that evolved through the decade as you can see in this post.  I knew that I'd need a chemise and some sort of corset.  1920s corsets tended to be under bust corsets so I also needed something up top to flatten my chest.

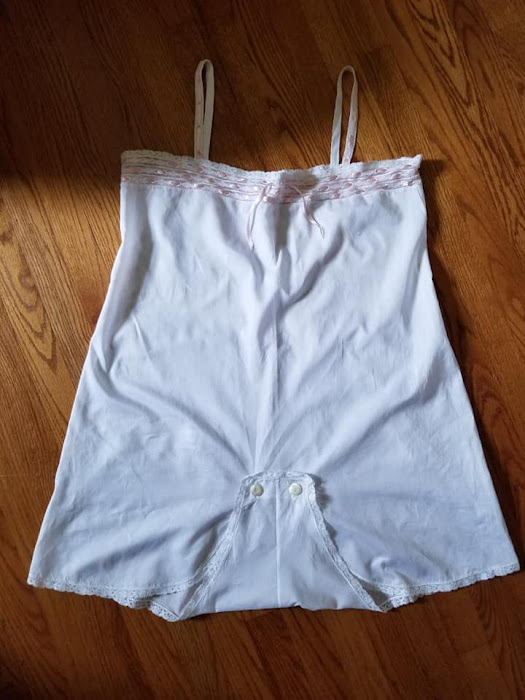
Since I work from the skin out, I started with my envelope chemise. I found this reprint of a 20s pattern that came in one size--bust 36--which happened to fit.  I traced the pattern using pattern tracing cloth on the fold for the front and 2 pieces for the back, pinning the seams together to fit it.  Perfect fit except the torso was too long.  I took a 1 inch tuck to shorten the body 2 inches for a perfect fit.  I chose to make the view with the straps.

I used Nelona Swiss batiste and French valenciennes lace.  The trim at the top is 3 rows of lace beading stitched together with a narrow lace edging.  The straps are made of the same lace beading stitched to cotton twill tape for durability.  The ribbon is pink double sided satin.   I added the same lace edging to the bottom edge and used 2 antique mother of pearl buttons for the closure.


I thought a corselette would be a good way to achieve the straight silhouette.  I found 2 downloadable patterns that were similar to period garments I had seen.  I have to admit that in the back of my mind, I had my doubts about this type of garment given my body shape.


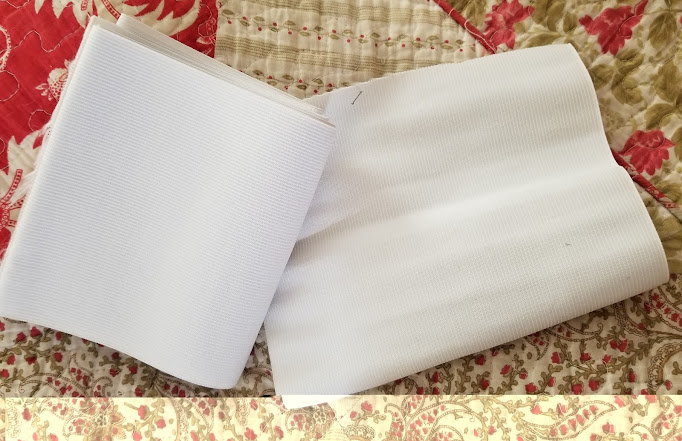
I decided on the Reconstructing History pattern because I liked that it had elastic inserts.  I was able to find 8 inch wide elastic which was still not wide enough.


I experimented with zigzag stitching two pieces together and that worked so I was in business.


I have read for years that Reconstructing History patterns have horrendous fitting issues.  I took my body measurements and followed the measurements listed in the pattern sizing and made adjustments to the pattern pieces before tracing them off.  For some reason, I didn't flat measure the pattern pieces.  This is something I typically do.  I made a fitting muslin out of heavy denim and was stunned to find the pattern to be about 6 inches too small around--something that flat measuring would've revealed.  That's a ridiculous amount given that I followed the body measurements listed in the pattern.  I ripped the muslin apart and cut new side pieces with a new pattern piece that had 3 inches added to the center of it.  That worked.


I constructed the corselette as indicated, using satin bias tape on the edges and adding an underlap to the closure.  I also covered the seams with tape for a cleaner finish.

Back

Closure--eye side with the underlap

Closure--hook side

Inside construction

Front

Back

The jury is still out on this one.  The very top of the  bust area is too large.  I plan on cutting a "V" in the center back and inserting an elastic wedge to pull it in.  I don't think I'll really be able to use this though.  I'm not liking this corselette. Coutil is very stiff and this isn't fitted to the body at the waist which is causing wrinkles in the coutil.  It's like wearing bent cardboard.  I have a couple of choices:  I can attempt to put darts in the waist area to attempt to fit it better or I can go with my original instinct (which I should've done in the first place) and make a corset and brassiere.   My waist to hip ratio really requires a fitted boned garment to hold things in.  My bust just needs some flattening.  If you note the waist area, you can see wrinkles in the coutil.  Because it's such a stiff fabric, these wrinkles show through my dresses.


The lack of boning allows the bottom of the corselette to ride up over my thighs.  The wrinkling is really a problem and requires me to pull the corselette down to straighten it out.
The bust is flattened sufficiently so it would seem that a brassiere made from a firm fabric would have the same effect.


Next I needed a slip.  I chose to use silk crepe de chine which seems to have been a common textile used for slips based on ads I've studied.  I found this pattern for sale on Etsy but didn't buy it.  The pics reveal that it is nothing more than a one hour dress shape in the body.


I had already drafted a one hour dress so I took my chemise pattern  and laid it over the dress pattern, tracing the shape of the neckline/straps.  

I made the slip up which was pretty basic.  Side seams then a facing on the slashed area that overlaps the side pleats.  The neckline was finished with a row of French beading with a narrow edging.  The edging was also applied to the armholes.


Plan B:
Make a brassiere and corset which was my original plan.  I found this brassiere in my 1922 catalog that I like.  It's simple and has a front closure.  There is an elastic insert in the back.  It is made from "lightweight but firm cotton tricot mesh" which seems to have no modern equivalent.  It also appears to have boning at the side seams.  I noted other brassieres that were made out of cambric--almost like Edwardian corset covers.  

I had bought this pattern by Wearing History that came in one size (38).  I took my measurements and adjusted the pattern accordingly to fit.  I cut it out with an opening at the center front with a 1/2 inch turn under.  I cut the back with a seam allowance added to the center back.  I figured I'd just fit it as I went since I was just using some polished cotton.  


I seamed the center back and sewed the darts and found that it fit perfectly.  I cut a 4 inch wide piece of my 8 inch wide elastic and cut away 3 inches from the center back, turning under 1/2 inch and stitching the cotton over the elastic.   I turned under the hems at the top and bottom  The bottom hem had to be increased as the brassiere was a little too long.  I used twill tape to face the hems then turned under and pressed the front edges.


I trimmed away the dart and decided to cover it with 3/4 inch boning channel.

Boning channel was stitched in and German artificial whale bone was added.  The hook and eye tape was added.   


I added lace beading and ribbon to the top and bottom and made straps like those on my chemise--lace beading stitched to twill tape.

Front:

Back:


I'm happy with this piece.  I would like to make one that's a bit heavier--perhaps out of coutil.

Next the corset--I don't have time to get to this one right now. I had found this extant one for sale with about a dozen pics so I feel I can reproduce it.  It's really the shape I would prefer. I'm torn between ripping apart the corselette and using that same coutil or using the fabric I have left.  I need to draft this from a well fitted corset pattern.  I bought the Scroop late Edwardian corset which will have the right shape so I will need to fit it, move seam lines etc. That is my long term goal.  This one has a hook and eye closure on the side front and lacing in the back.  I'm always more comfortable in a well fitted boned garment.


What to do in the meantime?  Well they did have garter belts.  I need something to hold up my stockings.  


I decided to go with a plain modern garter belt in the meantime.  Not exactly accurate but close enough to do what I need it to do.


Let's see how this works.
This is way more comfortable.  


Flattening is okay but would be improved with a firmer textile such as coutil.

Here's the slip which is very comfortable.

Chest flattening is fine as can be seen here.

Conclusion:  This will be a challenging era for me to achieve the "correct" silhouette.  I think my original plan of a boned corset will be better for my body type.  Worn with the flattening brassiere, it should give me as close of a 20s silhouette as I'm going to get.  Plus the open bottom girdle styling was also popular in the 1930s and I can use the same garment for that era.