Tuesday, April 30, 2019

Federal Era Fashions Revealed: A Skill Building Sewing Weekend -- Registration


Federal Era Fashions Revealed:  A Summer Skill Building Sewing Weekend--Registration instructions


This is where you will find registration information.  Please read carefully.  You will not be considered fully registered until you have filled out our Google Doc Registration Form and paid through Paypal.  These links are below.

Join us for a summer weekend of learning about and sewing some Federal Era fashion details in historic Savage Maryland's Carroll-Baldwin Hall. We will be studying the differences in dress and style among the different decades in the Federal Era.

Friday night will combine a social and learning time where participants will have dinner and wine while enjoying a display of extant bonnets from Dannielle Perry's personal collection.  We will also have shopping!  Timely Tresses, Fig Leaf Patterns and 96 District Fabrics will have some of their treasures available for your shopping needs!  They will also be available on Saturday as well.

On Saturday, following a keynote presentation on  Federal Era fashions from 1790 to 1820 given by Sarah Woodyard,  two consecutive workshops will be offered.  Participants will learn to fit and construct a chemisette.  They will complete the fitting and construction of the basic chemisette with options for completing a neck treatment at home.  The second workshop will be creating a plume for millinery or hair.  We will wind our day down with another presentation of millinery styles of the period given by Dannielle Perry.  Participants will learn how to stack and curl ostrich feathers to create the full period style plumes so often seen in fashion plates of this era.  We will have more time for shopping and for help on the projects begun during the day.

We hope to plan an optional visit to a local Federal era mansion on Sunday where we can tour the mansion and promenade in our period dress if we so choose.  This will be a no cost event.  We will be free to picnic on the premises or we may choose to go out for lunch as a group.  Details on this activity will follow but we will need a count for the tour when we get closer to the date,


Plan on dressing out during the weekend to fully get into the early 19th century spirit. If you aren't prepared to dress in Federal Era attire, we will welcome you all the same as it's not a requirement!  Above all else, we want our participants to be comfortable!

The fee of $185 includes the Friday night get together with dinner/wine, full day of workshops / presentations on Saturday as well as continental breakfast, lunch, snacks, beverages and dinner on Saturday. Also included are all of your workshop materials.  You will just need to bring your basic sewing tools and thread.

Regular updates will be shared on our Facebook event page.

Workshop fees:
Saturday only -- $170 
Friday/Saturday workshop -- $185  
We will once again, offer a 2 payment plan for those attending both days.  Your second payment is due by July 1 -- $95 X 2

Registration is limited to 40 participants.

In order to register, please fill out our workshop registration form HERE.  and follow the directions below for payment.  You will not be considered registered until your payment (or half payment if applicable) has been received.  We will take names for a waiting list once the workshops fill up.  Note:  you do not need to have a Paypal account to pay using the Paypal link.


Please choose


Other information:

Here is a list of the closest hotels--all within 5 minutes of Carroll Baldwin Hall.  If you would like to look for other hotels, search using Savage, Maryland as the location.


Hotel List

Tentative Workshop Schedule

Venue location

Friday/Saturday:  Carroll Baldwin Hall  9035 Baltimore Street   Savage, MD  20763

Sunday, April 14, 2019

1912 Day Gown

My friend Jan and I decided to attend a Titanic themed tea.  Jan is new to costuming and she got really involved in doing a lot of research, making all of the underpinnings as well as adapting a period pattern to match a fashion plate using period construction techniques.  I think hers was the most impressive newbie outfit I've seen due to the time spent in research.   I already had the most important pieces of Edwardian underwear and made the rest of what I needed.   I'd been eyeing this one pattern from the Vintage Pattern Lending Library--1912 Dress with Four Gores, size 36. This is a reprint of an actual period pattern.  These patterns do not have detailed instructions so it takes a while to figure out how to do certain things.

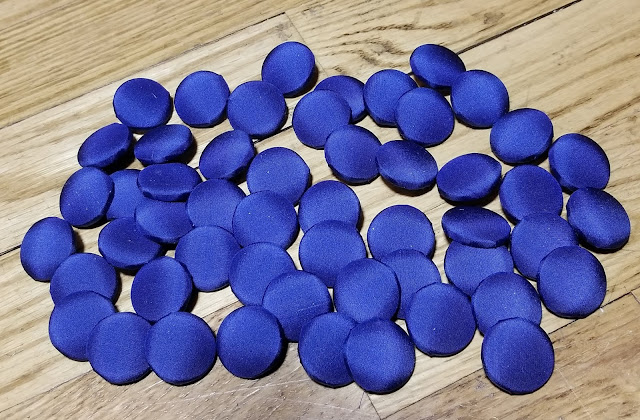
I had purchased 1 yard of pleated Swiss cotton from Farmhouse Fabrics when they had it on special.  It's incredible fabric.  The pleats are woven in which shows at the selvedge.  I planned on using that for the center inset but wasn't sure what to do for the rest of the gown.  The pattern suggested silk, linen or pique.  I originally wanted a yellow pique but just didn't find anything that turned me on.  Then I came across this micro striped pique which I liked.  Even better was the fact that I had 3 yards of royal blue silk taffeta on hand for an 18th century petticoat.  I only need 2 1/4 yards for that so I had enough to use for buttons and millinery trim.  Next I experimented with a couple of sizes of self cover buttons to see what I liked.  I decided on the 7/8 inch and ordered a bag of 100 of them on Amazon. 

I really didn't feel like making a fitting muslin of this gown.  It's a pretty straight forward shape so I flat measured quite thoroughly, adding to the hips (as usual) and adding to the side seam allowances to give me a 1 inch seam allowance for fitting purposes.  The original allowance is 3/8 inch.


My next challenge was to piece the pleated fabric as the lower part of the gown.  I used a narrow zig zag to stitch two pieces together under one of the pleats.


I turned it to the wrong side and trimmed really close to the stitching.

Voila! The pleats completely hide the piecing!

Early 20th century garments are constructed quite differently than the last quarter of the century.  They tend to use hems instead of facings and they have unusual closures.  First I had to hem the side pieces.  In a modern garment, this would've been done with a facing.


Then the inset gets stitched to the left side front on the bodice and also on the skirt.  I laid it out together to play with the button spacing when the pieces were pinned together.

Then the inset was stitched to the bodice on the left side and to the skirt on the left side and halfway up the right side.

I pinned the waist seam and the side seams and tried it on over the underpinnings and was pretty happy with the fit.

Then the fun began.  The pattern instructions said to stitch the shoulder seams and either use functional buttons or hooks and eyes on the right side.  The problem with this is that stitching the shoulder would not leave any way to put the gown on as the neck is very small.  I did some research and found out from an antiques dealer that a lot of garments of this period have asymmetrical closures that open at the shoulder and have hidden snaps as closures.  I had planned on using snap tape as I had found some that used old fashioned stitch on metal snaps.  So I hand machine stitched one side of the tape to the white inset and hand stitched it to the blue fabric overlap.   I put a hook and eye at the waist seam since I thought it would get more stress.


I tried the gown on again and decided that I needed to cut about 5/8 inch off of the neck.

Next I got the rest of the buttons covered--48 in all.

I needed a plain white fabric for the collar and I had several on hand.  The pleated fabric is actually quite sheer and I found that the Swiss batiste I had was the best match.  I measured the new neckline and altered the collar to fit.

Because the batiste is sheer, I trimmed the seam allowance to less than 1/8 inch instead of snipping the curves as I knew it would show through.

The tiny evenly cut seam allowance gave it a nice look on the outside.

There are no neck facings in these garments.  Typically the neck is finished with bias or some kind of binding.  I stitched the collar to the closed side of the gown and around the back stopping at the shoulder on the right side.  Then I bound the collar seam and the loose edge of the collar.  I stitched small snaps on the collar seam allowance and inside the front neck edge.


You can see the loose edges in the front, shoulder and neck.

Last was the belt.  I measured around the high waist seam and cut the belt, made 2 buttonholes and buttoned the belt on the gown.  Finished!


Next came the hat.  I love the big flowered garden hats of this era but this gown is fairly simple, having no lace and being cotton so I decided on a simpler style.  I used the bottom right model as my inspiration.  It has one flower cluster with plumes circling the crown.

I found this one that I liked in my thrift store hat stash.  I removed the ribbon.

Then I cut 2 five inch wide crosswise strips of my silk and machine roll hemmed the edges.  I pleated one onto the hat stitching the ends in place.

Then I used the other one to tie a 4 loop bow.

I stitched the bow to the hat at the left front.

I purchased some velvet hydrangeas and leaves so I bunched 2 of them together, added 2 leaves and stitched them over the center of the bow.  

Then I curled my plumes and stuck them behind the bow.


Accessories:

I bought this cheap Edwardian necklace at an auction.  It seems to be made of some kind of pot metal with glass.  I added an extender chain.  Then I found some glass earrings from Dames a la Mode that were a good match.

Here it is all put together.


Jan, me and our new friend Iris, who sat with us at tea.  We had a lovely day.

 I was pleased with the outcome of this project.  I learned a lot.  I did end up getting another period sewing book, dated 1912.  I'm fascinated with the way garment construction constantly changes and I like to learn the period techniques.  Using a period pattern forces one to learn as the instructions are vague and the pattern is clearly not made to use modern techniques. 

Edwardian Underpinnings: French drawers and Princess Slip

Time to add to my Edwardian underpinnings collection.  I've been needing drawers so that was the next thing on my list.  I decided on the Truly Victorian TV02 Edwardian Underwear pattern with the hope of making drawers and a corset cover.  I like that this pattern has several designs of corset covers including the ruffled one for the pigeon breast look of the early 1900s.  I opted for the plain ruffled drawers at the bottom right.  Instead of making a ruffle, I decided to purchase a swiss embroidery to use as the flounce.


Instead of a corset cover, I decided to make a full length darted princess slip--this one by Past Patterns which is  reprint of a vintage pattern.  It came in a size 36 so it needed very little in the way of alterations other than adding a little to the hips--which is standard for me.  


I bought some plain cotton lawn from my favorite Ebay vendor and wasn't sure what kind of flounce to put on the petticoat as it's difficult to find wide ready made flounces in the width called for,  I ended up getting an 8 inch wide flounce for the petticoat along with some Swiss insertion to make it longer using some of the fabric.  I also ordered some Swiss Broderie Anglaise for the drawers.  Both were listed as being white.  You can see in the photo below that they look very different!  I ended up having to bleach the one on the left to get it to match the fabric


I started with the drawers.  Truly Victorian patterns are pretty straight forward.  They do use modern construction techniques however.  I had seen a pair of Victorian drawers in an antique shop at Savage Mill and inspected them carefully to find they were pretty much made the same way as these.  Basically drawers are two pants legs with no outer leg seam.  They are not stitched together at the crotch seam--rather that area is open and those edges on each leg have a facing that is stitched down.  Then the legs are sewn to a waist band.  The fullness is in the back and the crotch seam is completely open.  Here's the front:

And the back:

You can see the crotch seam with the facing here.

I covered the flounce seam with beading and ribbon.

Next up is the petticoat or slip.  It was a vintage pattern with 3/8 inch seams--also quite straightforward.  I did lengthen the shoulder straps a little and I added French beading and edging to the neck and edging only on the armhole.  Had I known I would use Swiss embroidery on the flounce I would've used Swiss beading but this works well.


I stitched beading to the bottom of the slip body using heirloom sewing techniques

I then constructed the flounce using the wide Swiss edging, a strip of insertion and a strip of fabric.

I gathered the flounce to the beading.

Then I ran ribbon through the beading.  I finished the slip with buttonholes and antique mother of pearl buttons in the back.

So here's the underwear as worn:   First chemise then corset.

Then the drawers go on top.

Then the slip goes on top.


I was pleased with the way both of these pieces turned out.  I think I'd actually like to make another princess slip in silk.  Wearing a cotton slip under a cotton dress poses some challenges in that the dress didn't slide so easily.  It was comfortable though given that it was a worm day.  I recommend both patterns to anyone looking to make these garments.  I also ordered some Swiss batiste to make a drawers/corset cover combination garment with a lot of inset lace. No rush on that one though!